<?xml version="1.0" encoding="utf-8"?>
<feed xmlns="http://www.w3.org/2005/Atom" xmlns:media="http://search.yahoo.com/mrss/">
    <title>workshop.l300company.pl</title>
    <link href="http://workshop.l300company.pl/feed.xml" rel="self" />
    <link href="http://workshop.l300company.pl" />
    <updated>2026-06-29T00:17:58+02:00</updated>
    <author>
        <name>Piotr</name>
    </author>
    <id>http://workshop.l300company.pl</id>

    <entry>
        <title>One Year of Designing a Rear Bumper</title>
        <author>
            <name>Piotr</name>
        </author>
        <link href="http://workshop.l300company.pl/one-year-of-designing-a-rear-bumper.html"/>
        <id>http://workshop.l300company.pl/one-year-of-designing-a-rear-bumper.html</id>
        <media:content url="http://workshop.l300company.pl/media/posts/7/final_3.jpg" medium="image" />
            <category term="metal work"/>
            <category term="exterior"/>

        <updated>2026-06-29T00:03:34+02:00</updated>
            <summary>
                <![CDATA[
                        <img src="http://workshop.l300company.pl/media/posts/7/final_3.jpg" alt="" />
                    Some projects take a weekend. This one took almost a year. The first version of this project in Fusion 360&hellip;
                ]]>
            </summary>
        <content type="html">
            <![CDATA[
                    <p><img src="http://workshop.l300company.pl/media/posts/7/final_3.jpg" class="type:primaryImage" alt="" /></p>
                <p>Some projects take a weekend. This one took almost a year.</p>
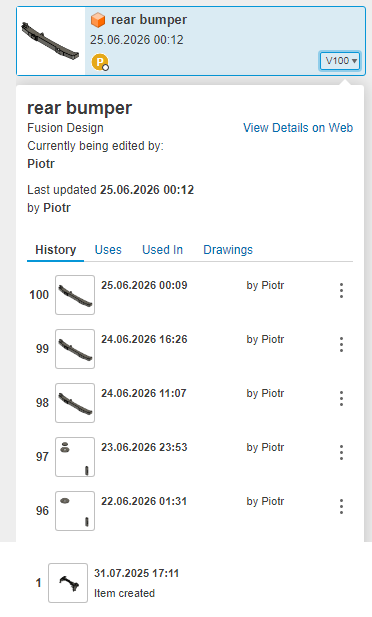
<p>The first version of this project in Fusion 360 was created on July 31, 2025. I installed the finished bumper on June 28, 2026. Between those two dates, the project went through almost one hundred saved versions.</p>
<p>Most of those versions were not small changes. Several times I completely changed the design, removed ideas that did not work well, and came up with better solutions. Only when I was happy with the whole design did I start making the real parts.</p>
<figure class="post__image align-center"><img loading="lazy"  src="http://workshop.l300company.pl/media/posts/7//f360_liczba_wersji.png" alt="" width="372" height="617" sizes="(min-width: 37.5em) 1600px, 80vw" srcset="http://workshop.l300company.pl/media/posts/7//responsive/f360_liczba_wersji-xs.png 384w ,http://workshop.l300company.pl/media/posts/7//responsive/f360_liczba_wersji-sm.png 600w ,http://workshop.l300company.pl/media/posts/7//responsive/f360_liczba_wersji-md.png 768w ,http://workshop.l300company.pl/media/posts/7//responsive/f360_liczba_wersji-lg.png 1200w ,http://workshop.l300company.pl/media/posts/7//responsive/f360_liczba_wersji-xl.png 1600w"></figure>
<h2>Where did the idea come from?</h2>
<p>The main reason was actually very simple.</p>
<p>I wanted to make the van more practical for trips and camping.</p>
<p>I didn't want a bumper that could only carry a spare wheel. I wanted a modular system that could also hold recovery boards, a fuel can, and maybe even a bike rack in the future.</p>
<p>And there is one more reason.</p>
<p>I simply wanted the L300 to look more like an expedition vehicle.</p>
<p>I built this van for myself, so I wanted it to be practical, but I also wanted it to look right. In my opinion, a well-designed rear bumper can completely change the look of the vehicle while still feeling like it belongs there.</p>
<p> </p>
<figure class="post__image"><img loading="lazy"  src="http://workshop.l300company.pl/media/posts/7//zderzak_skan.png" alt="" width="1575" height="990" sizes="(min-width: 37.5em) 1600px, 80vw" srcset="http://workshop.l300company.pl/media/posts/7//responsive/zderzak_skan-xs.png 384w ,http://workshop.l300company.pl/media/posts/7//responsive/zderzak_skan-sm.png 600w ,http://workshop.l300company.pl/media/posts/7//responsive/zderzak_skan-md.png 768w ,http://workshop.l300company.pl/media/posts/7//responsive/zderzak_skan-lg.png 1200w ,http://workshop.l300company.pl/media/posts/7//responsive/zderzak_skan-xl.png 1600w"></figure>
<h2>Everything started with a 3D scan</h2>
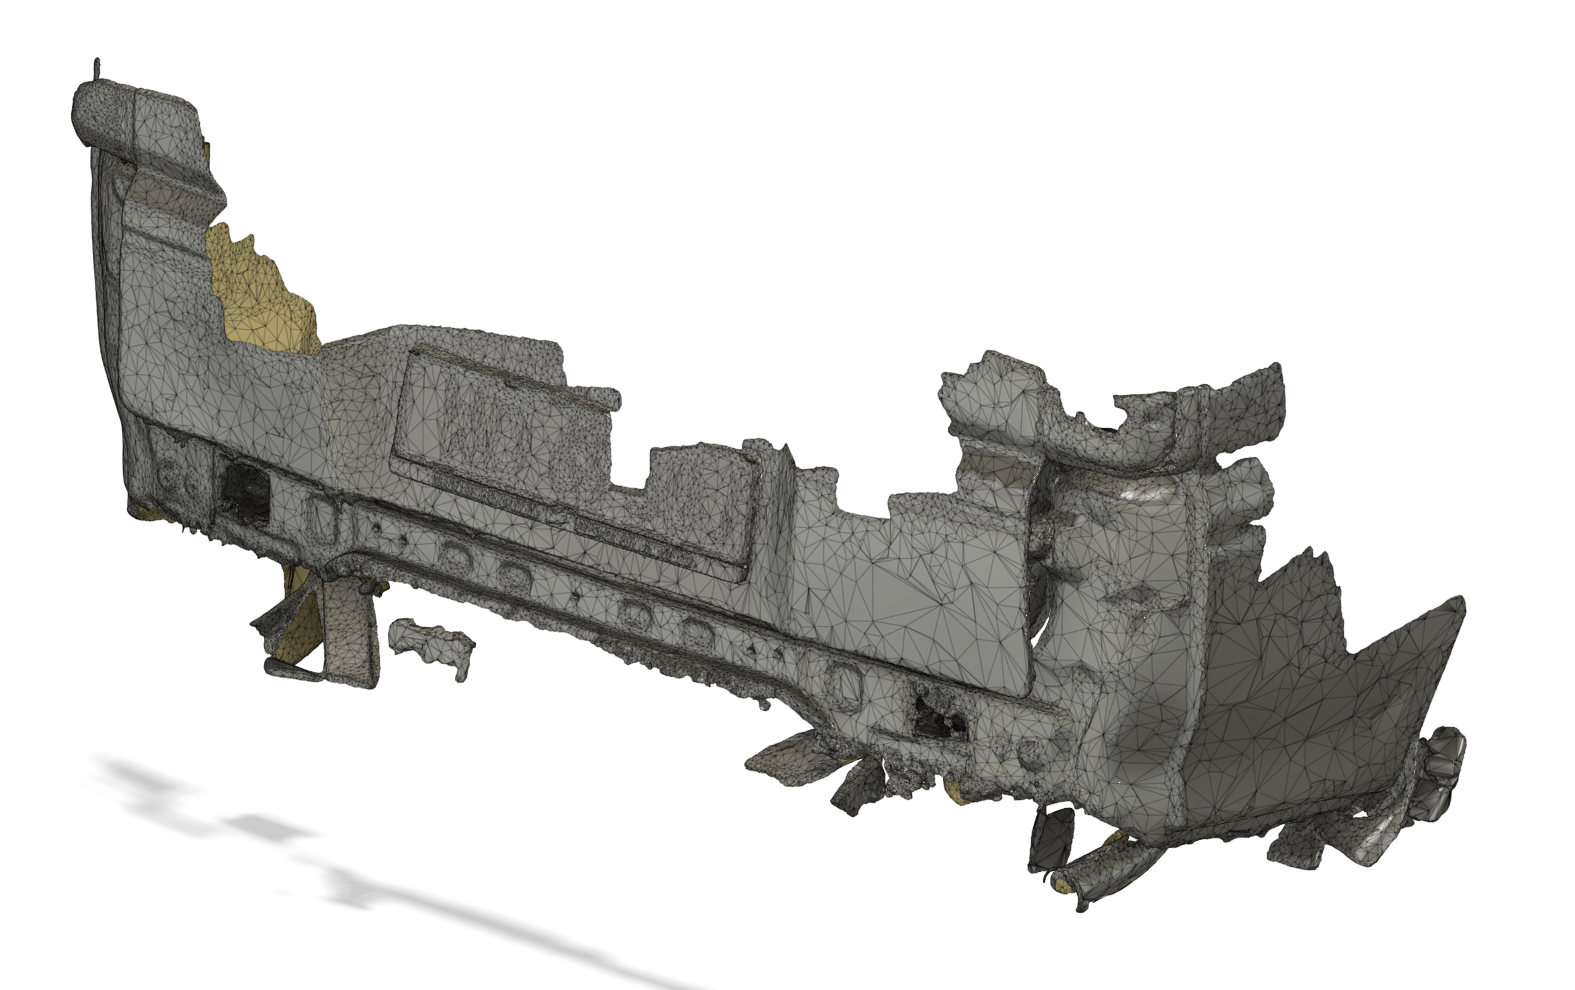
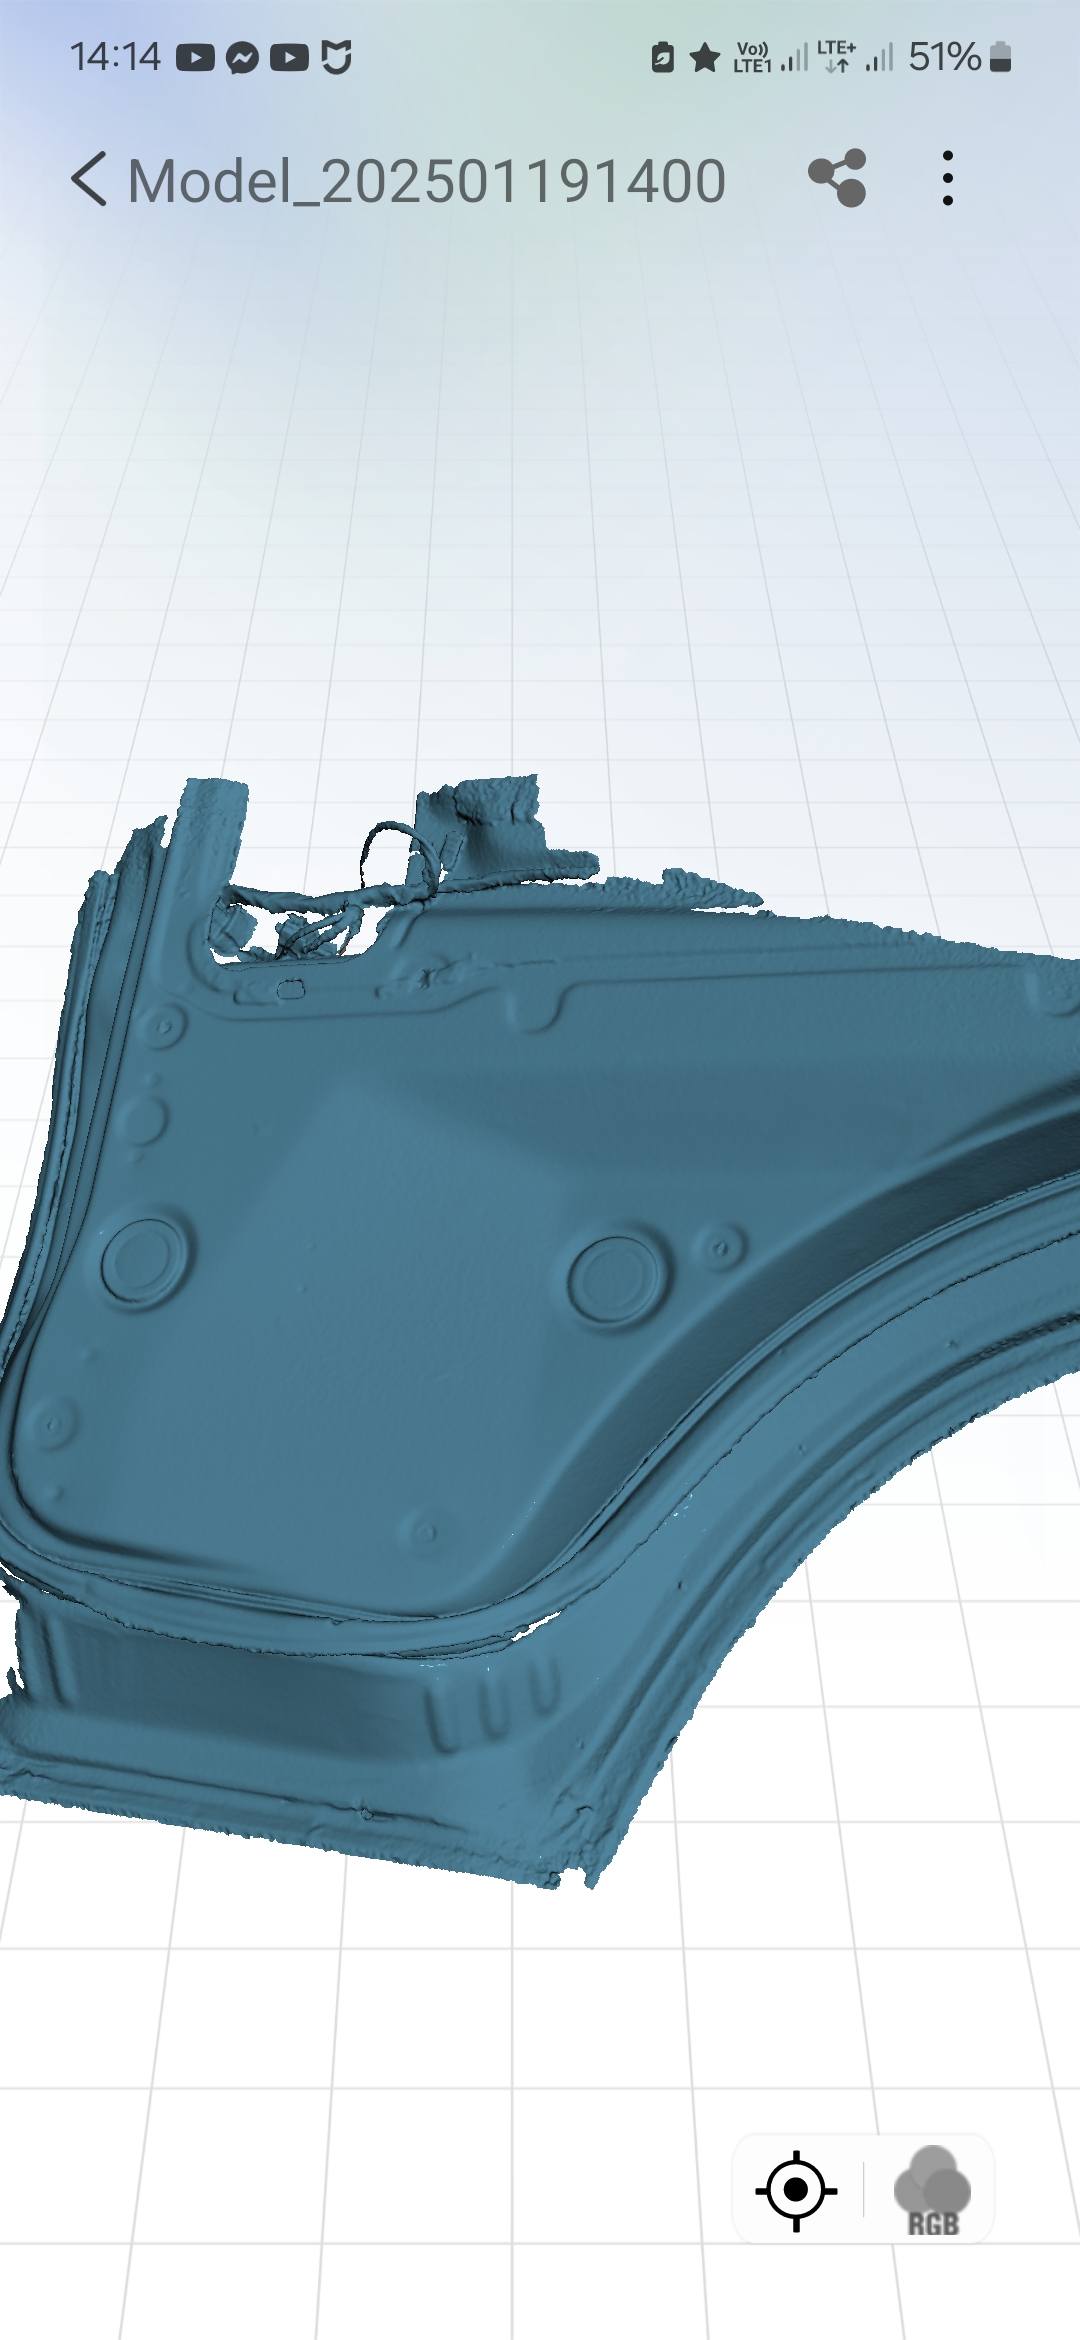
<p>Before drawing the first part, I scanned the rear of the van and all the mounting points underneath.</p>
<p>That allowed me to design every part around the actual vehicle instead of working from measurements alone.</p>
<p>From the beginning, I also wanted this to be a proper engineered design, not a one-off fabrication. Every part was designed so it could be made accurately and repeated without having to modify each bumper by hand.</p>
<p> </p>
<div class="gallery-wrapper gallery-wrapper--wide"><div class="gallery"  data-is-empty="false" data-translation="Add images" data-columns="3">
<figure class="gallery__item"><a href="http://workshop.l300company.pl/media/posts/7//gallery/xmember.png" data-size="1002x920"><img loading="lazy" src="http://workshop.l300company.pl/media/posts/7//gallery/xmember-thumbnail.png" alt="" width="768" height="705"></a></figure>
<figure class="gallery__item"><a href="http://workshop.l300company.pl/media/posts/7//gallery/xmember_1.jpg" data-size="2840x1599"><img loading="lazy" src="http://workshop.l300company.pl/media/posts/7//gallery/xmember_1-thumbnail.jpg" alt="" width="768" height="432"></a></figure>
<figure class="gallery__item"><a href="http://workshop.l300company.pl/media/posts/7//gallery/final_4.jpg" data-size="2840x1599"><img loading="lazy" src="http://workshop.l300company.pl/media/posts/7//gallery/final_4-thumbnail.jpg" alt="" width="768" height="432"></a></figure>
</div></div>
<h2>It became more than just a bumper</h2>
<p>Very early in the project I realised that designing only the bumper didn't make much sense.</p>
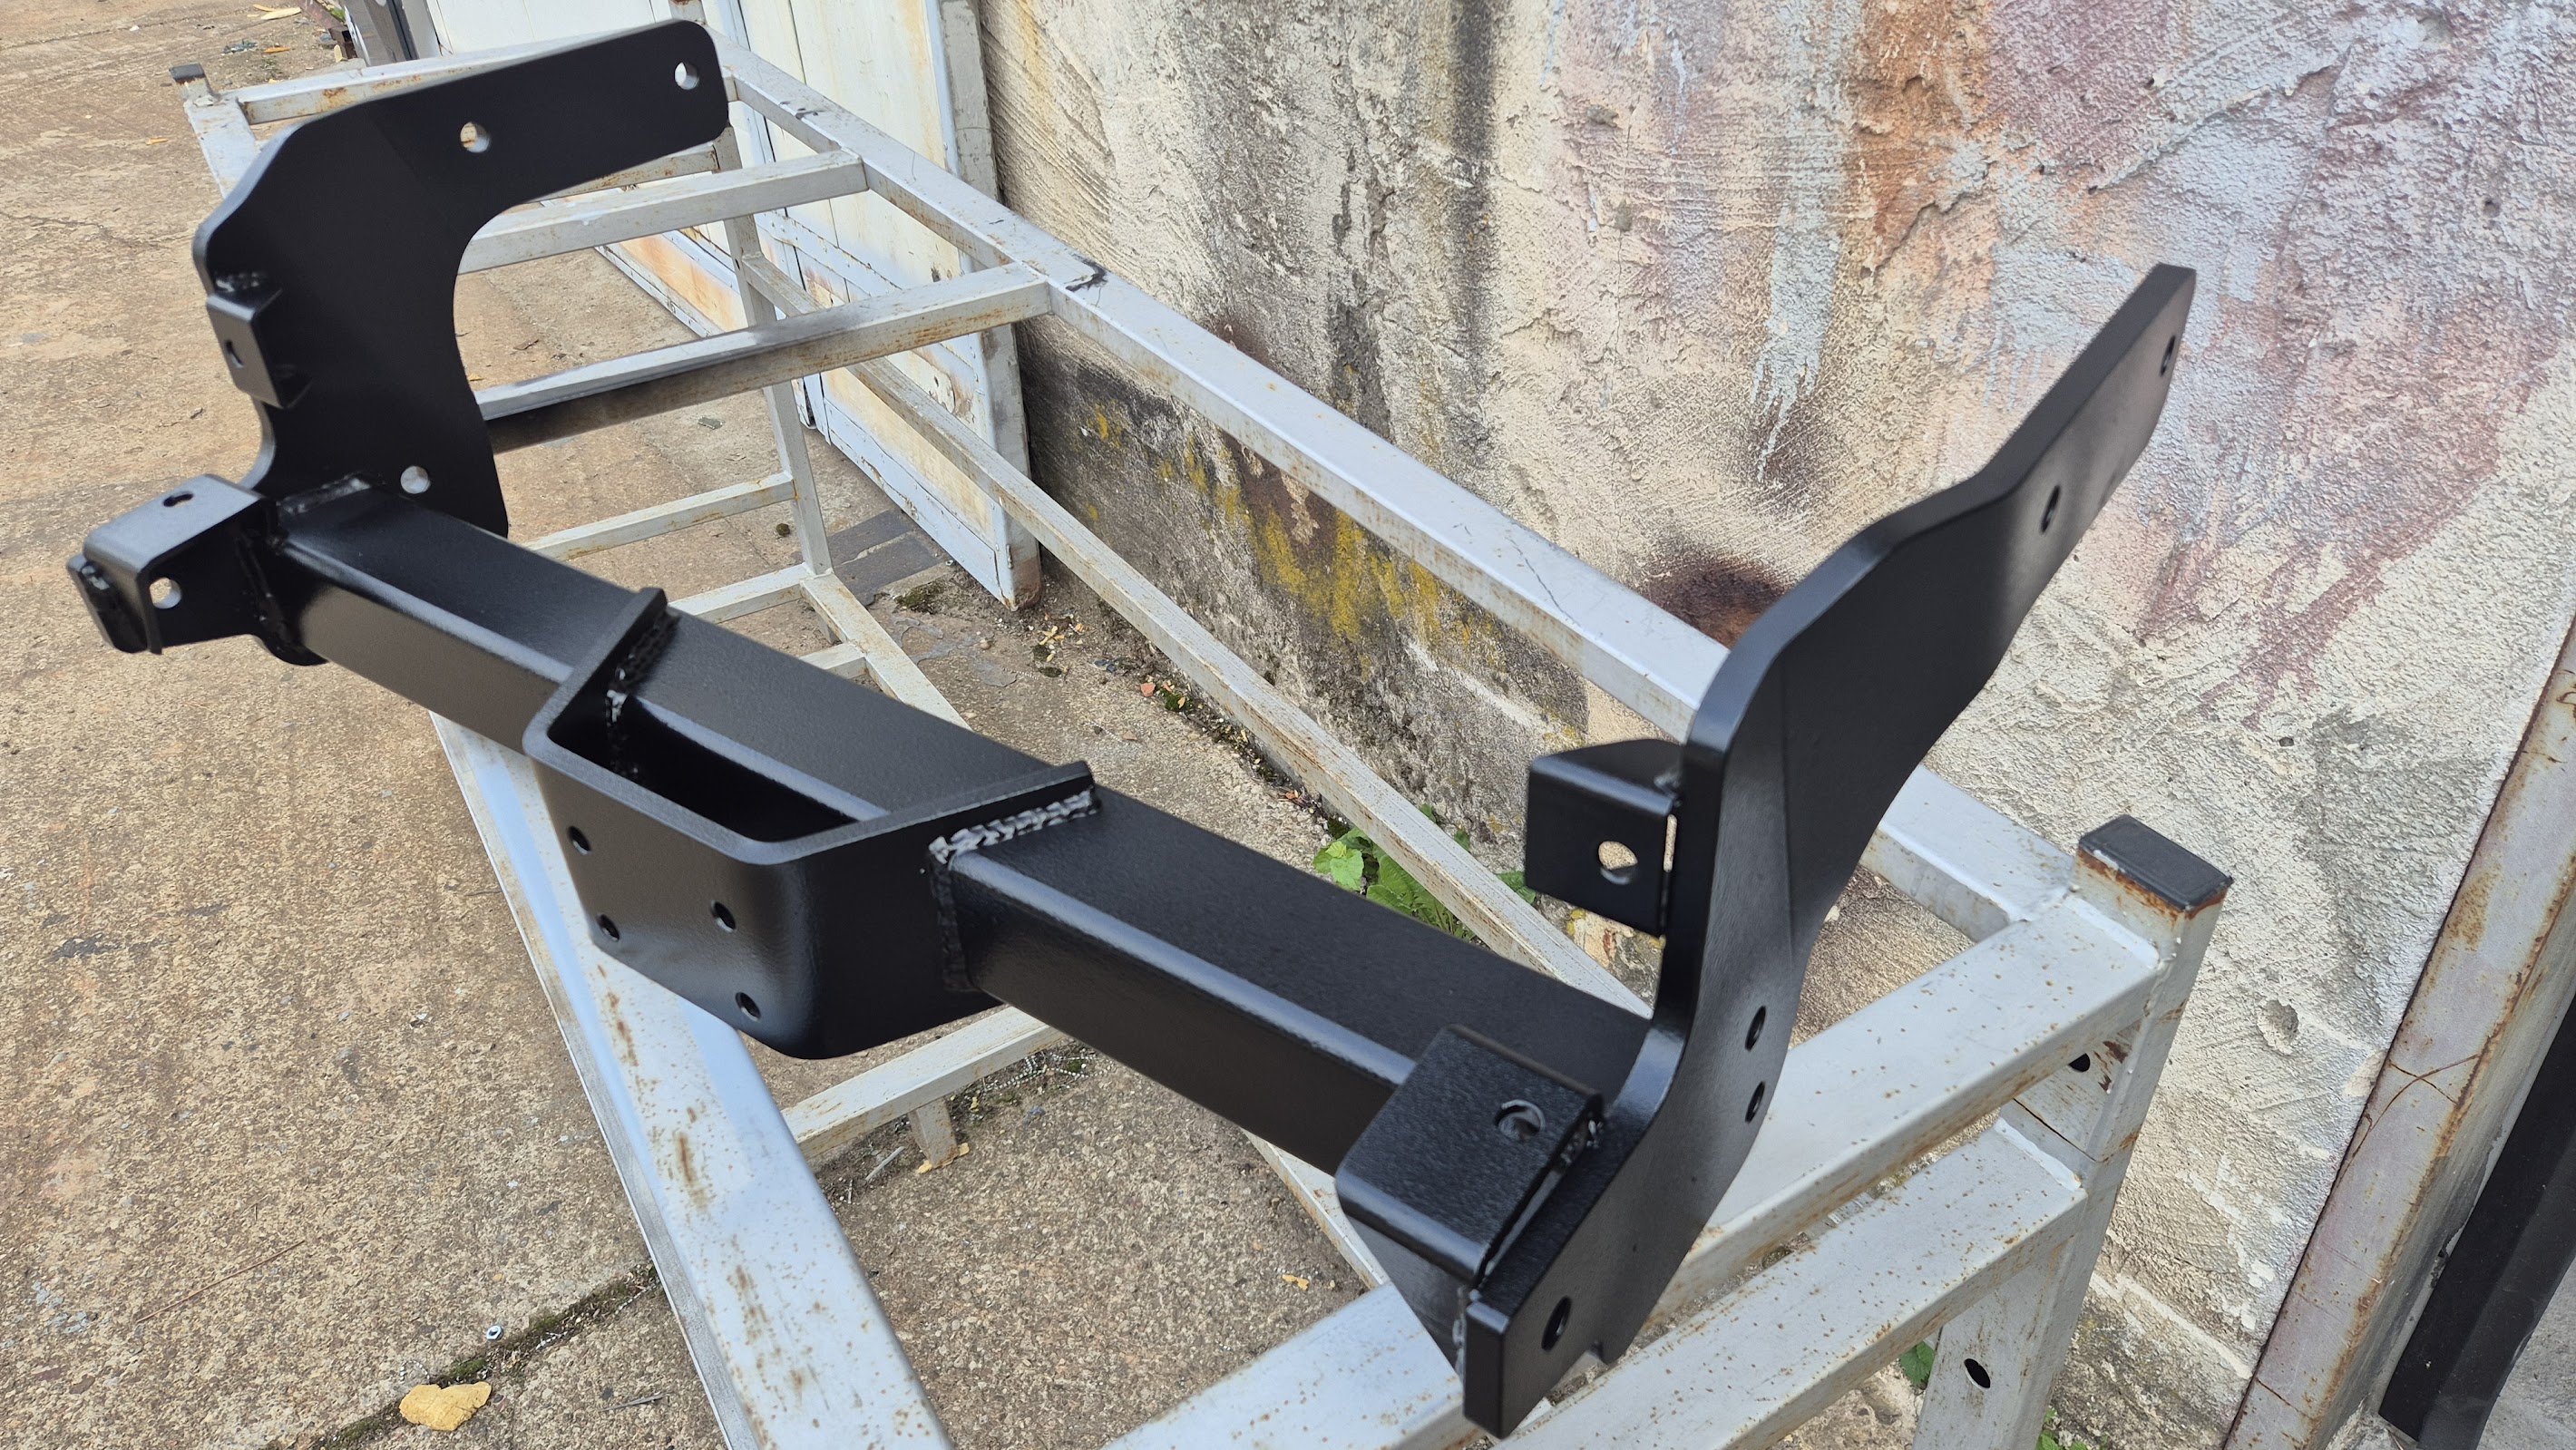
<p>The factory tow bar sat too low, reduced the departure angle and didn't fit the direction I wanted to take with the build.</p>
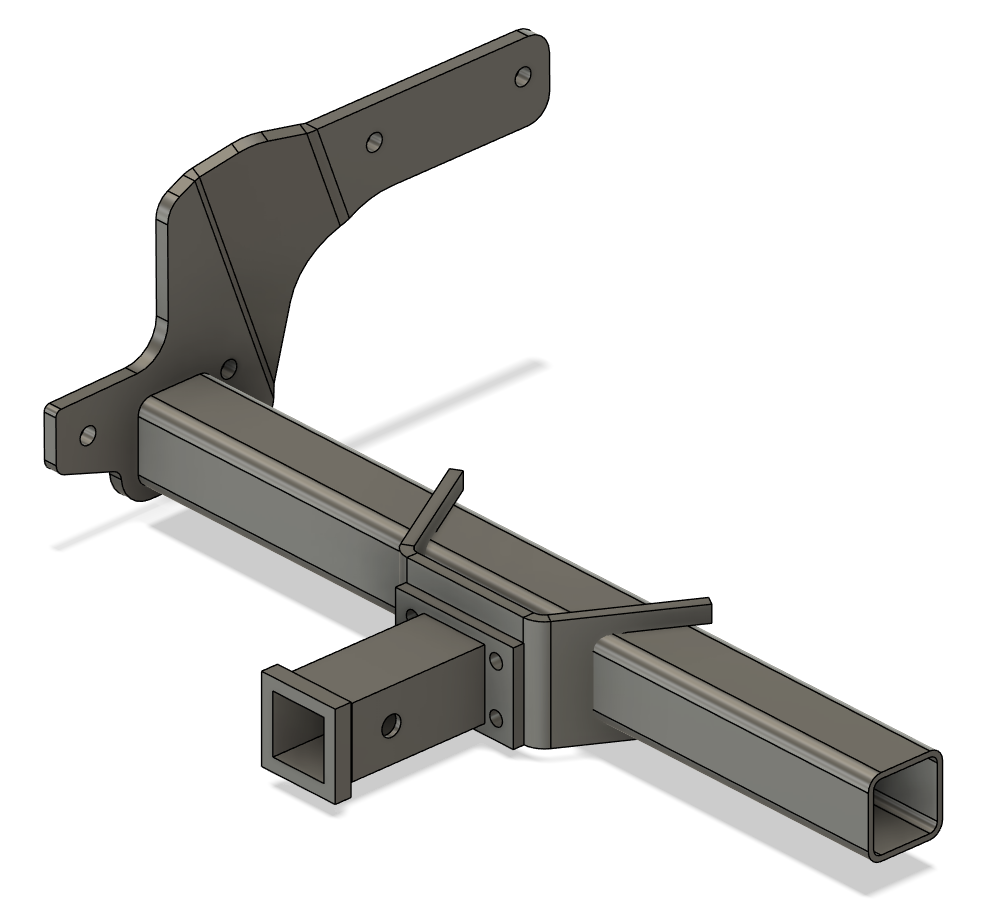
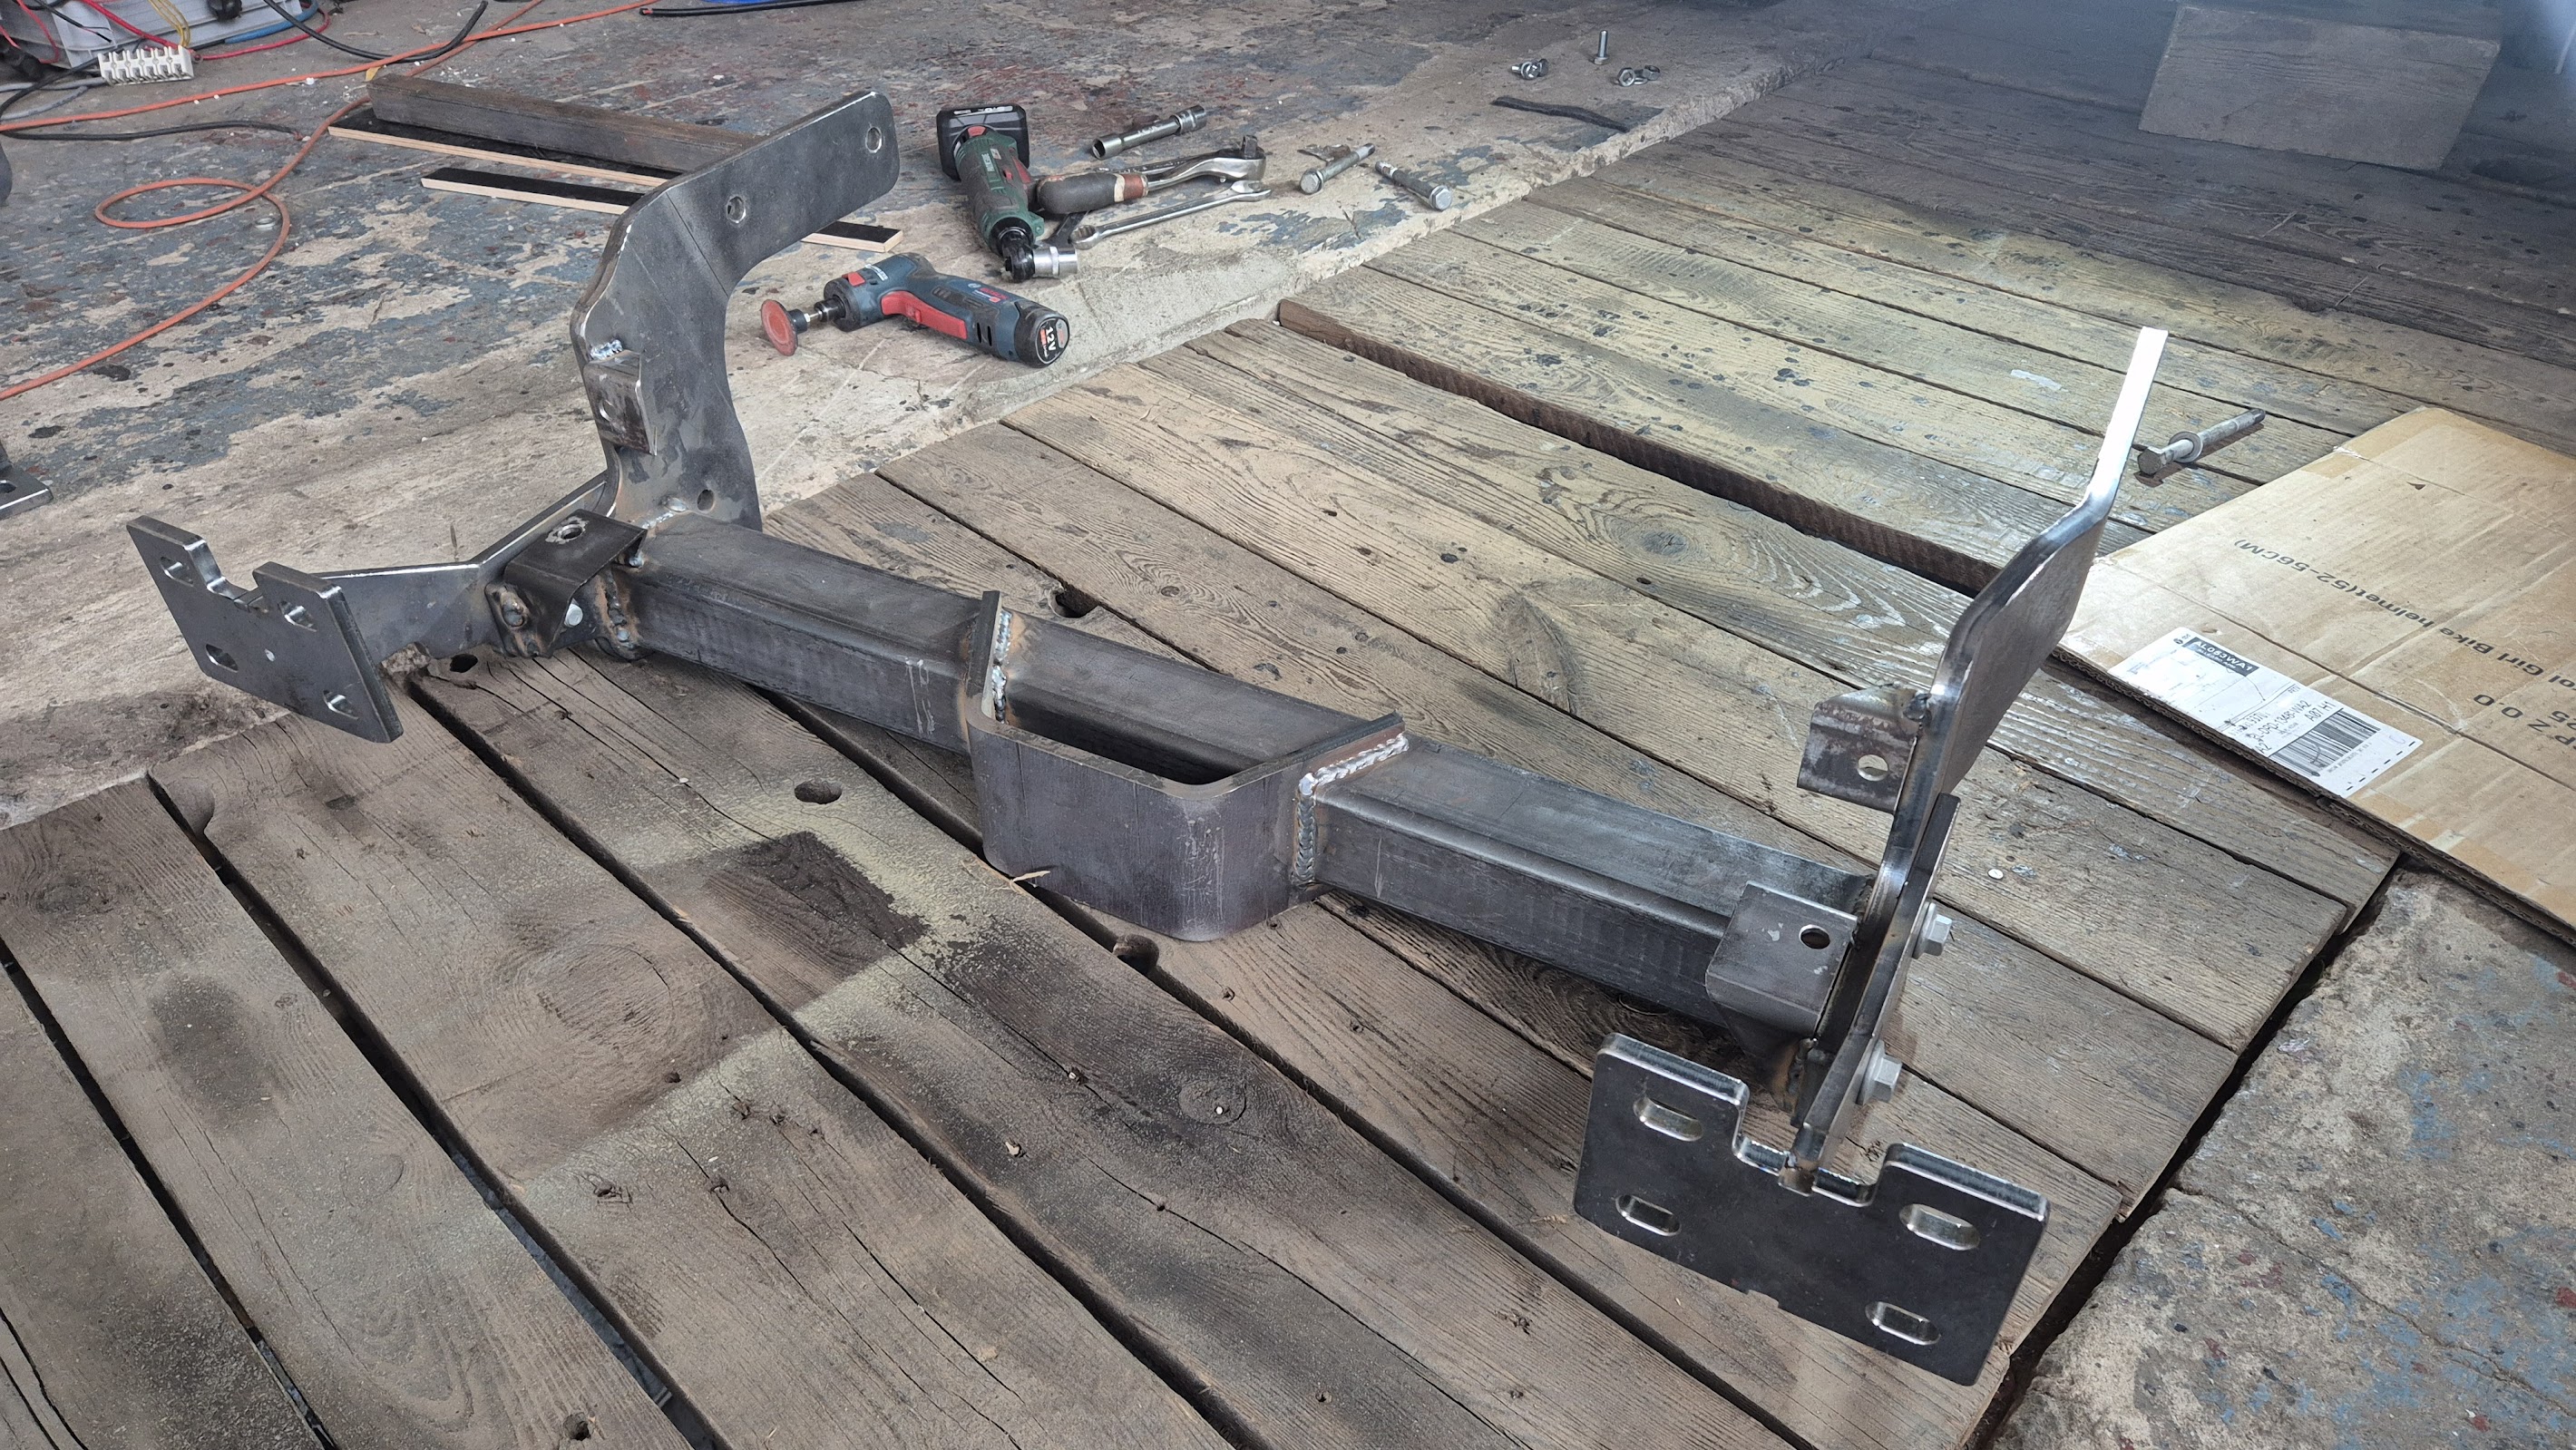
<p>So I started by designing a completely new tow bar crossmember.</p>
<p>The bumper is mounted directly to this new crossmember. Instead of a fixed tow ball, I used a 2-inch receiver system. That means I can install the tow hitch only when I actually need it. The rest of the time, nothing hangs below the bumper and the departure angle is much better.</p>
<div class="gallery-wrapper gallery-wrapper--wide"><div class="gallery"  data-is-empty="false" data-translation="Add images" data-columns="3">
<figure class="gallery__item"><a href="http://workshop.l300company.pl/media/posts/7//gallery/final.jpg" data-size="2840x1599"><img loading="lazy" src="http://workshop.l300company.pl/media/posts/7//gallery/final-thumbnail.jpg" alt="" width="768" height="432"></a></figure>
<figure class="gallery__item"><a href="http://workshop.l300company.pl/media/posts/7//gallery/final_1.png" data-size="685x821"><img loading="lazy" src="http://workshop.l300company.pl/media/posts/7//gallery/final_1-thumbnail.png" alt="" width="685" height="821"></a></figure>
<figure class="gallery__item"><a href="http://workshop.l300company.pl/media/posts/7//gallery/final_2.png" data-size="696x823"><img loading="lazy" src="http://workshop.l300company.pl/media/posts/7//gallery/final_2-thumbnail.png" alt="" width="696" height="823"></a></figure>
<figure class="gallery__item"><a href="http://workshop.l300company.pl/media/posts/7//gallery/final_3.jpg" data-size="2840x1599"><img loading="lazy" src="http://workshop.l300company.pl/media/posts/7//gallery/final_3-thumbnail.jpg" alt="" width="768" height="432"></a></figure>
</div></div>
<h2>The finished bumper</h2>
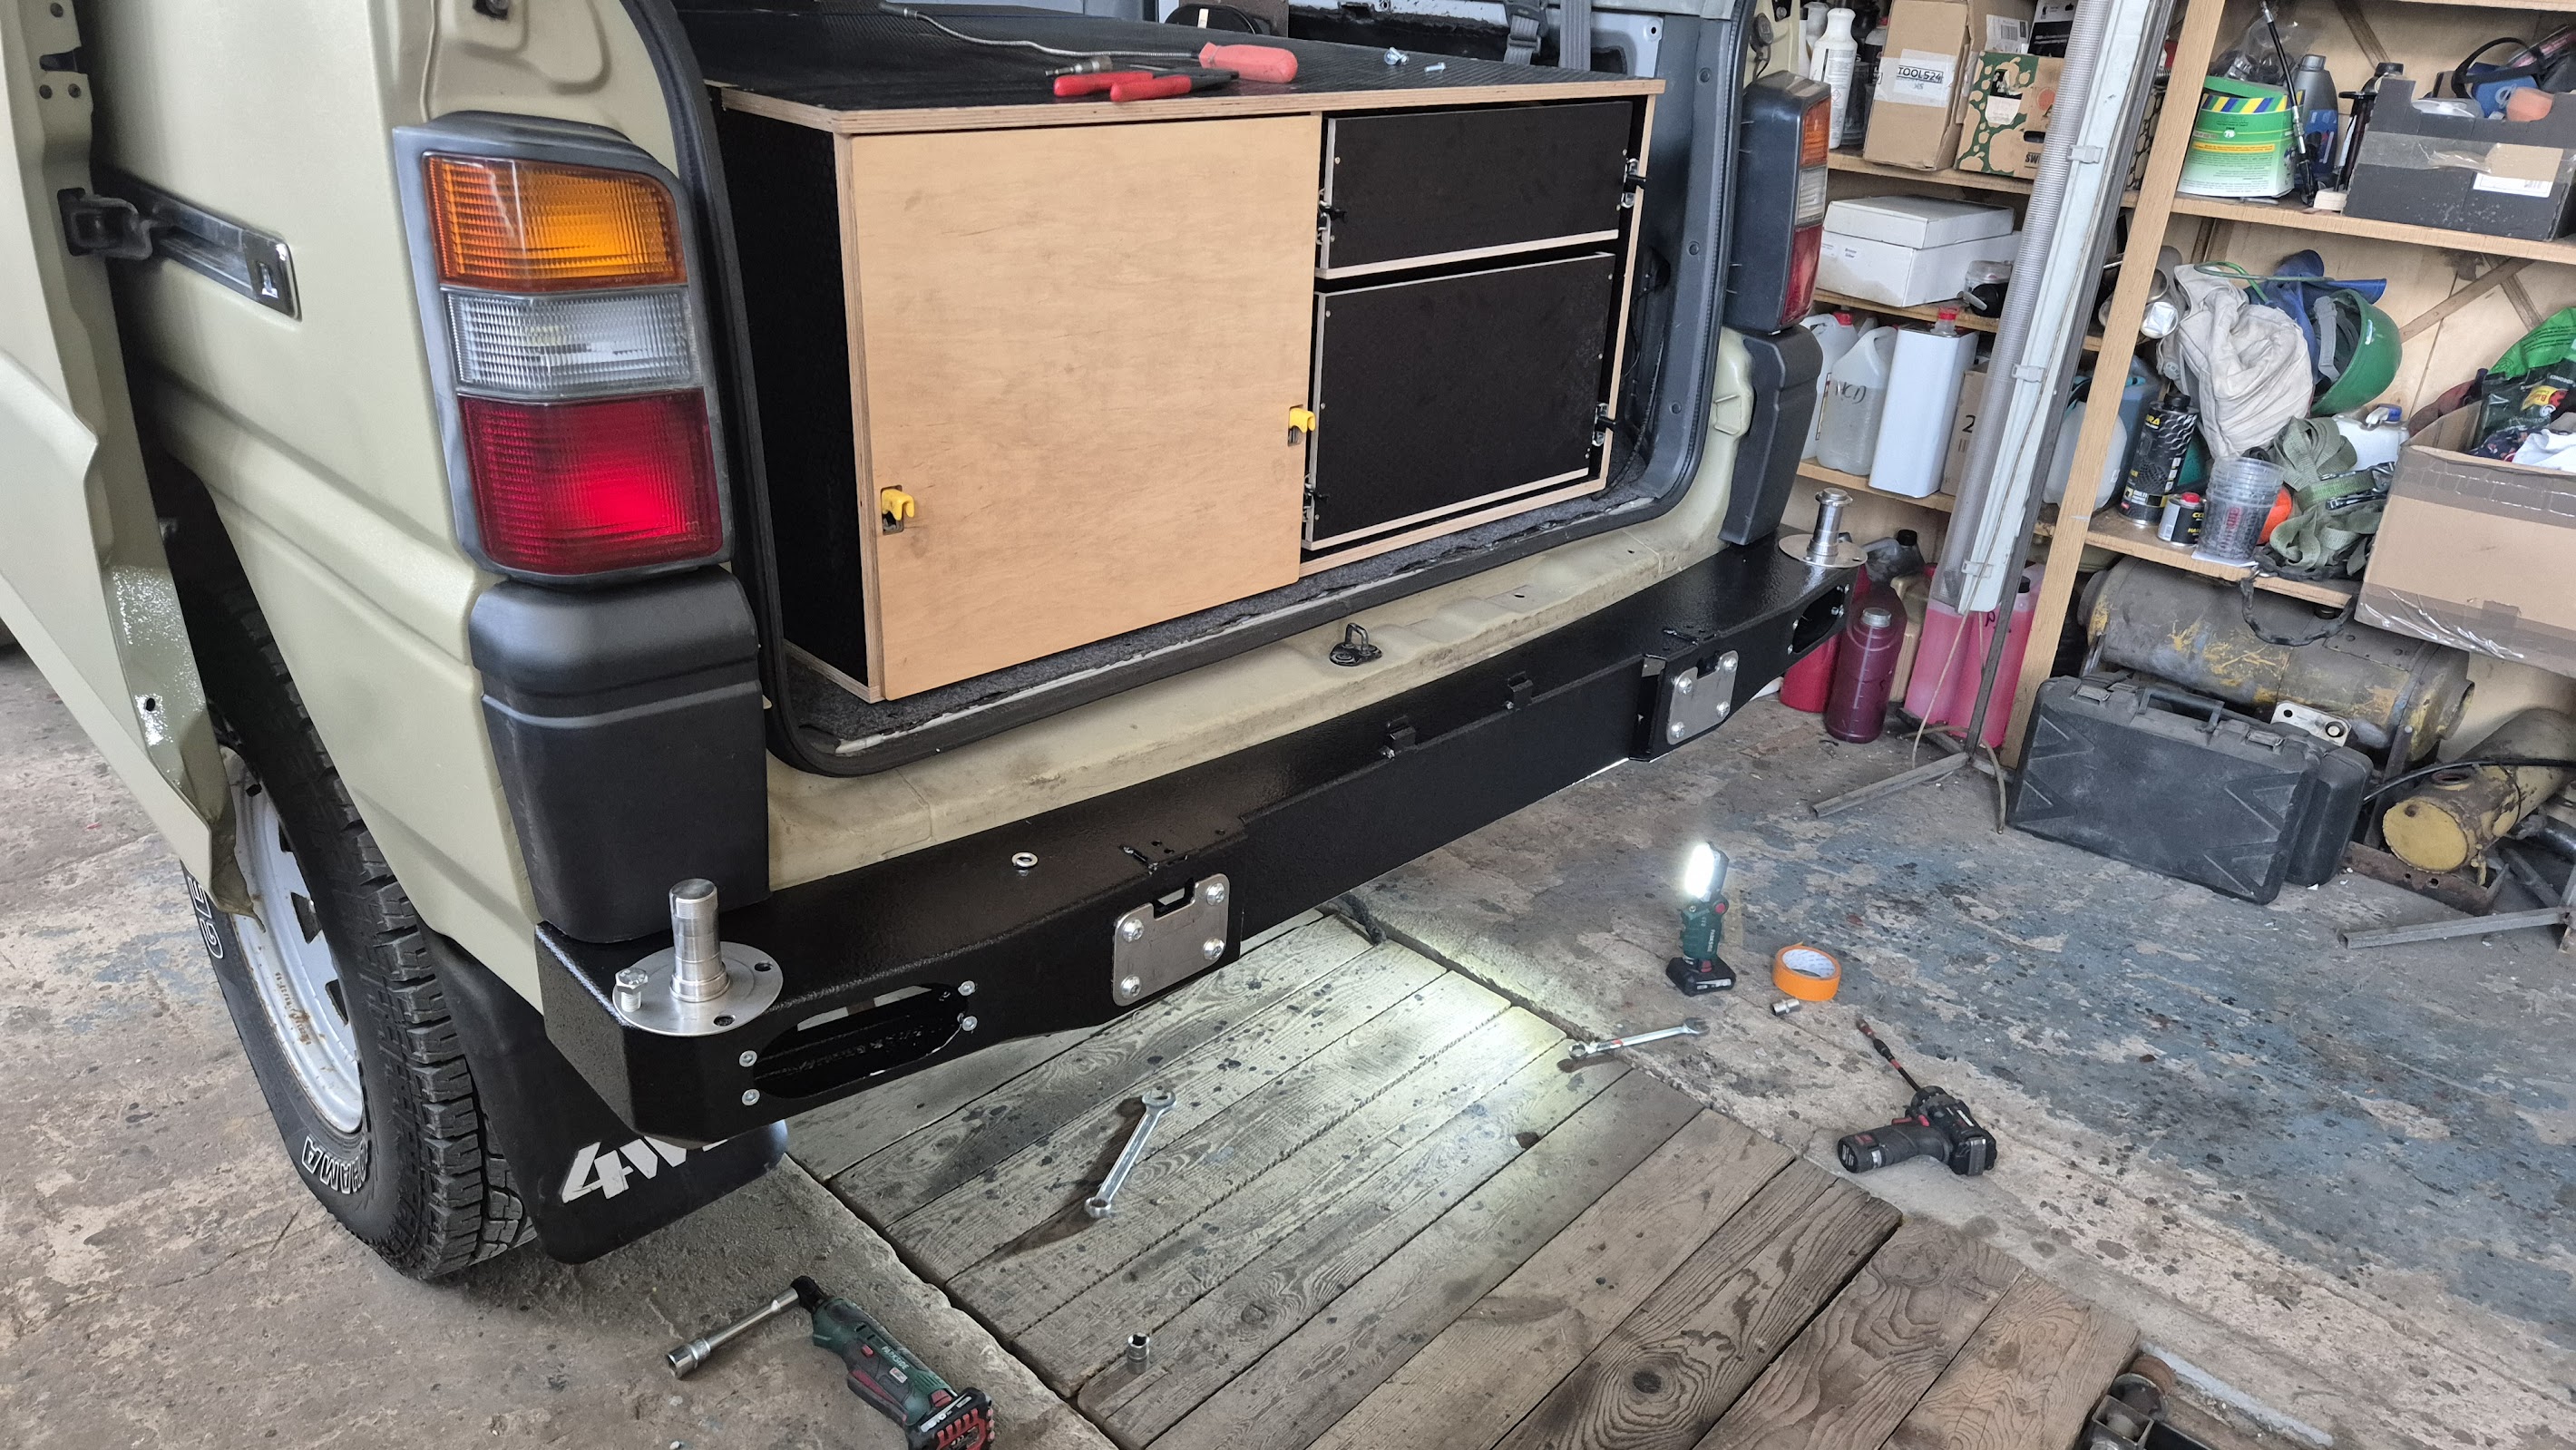
<p>The bumper is made from laser-cut steel parts that were bent on CNC press brakes.</p>
<p>The main body is formed from one bent steel panel instead of several welded pieces. This gives cleaner lines, better consistency and a stronger structure.</p>
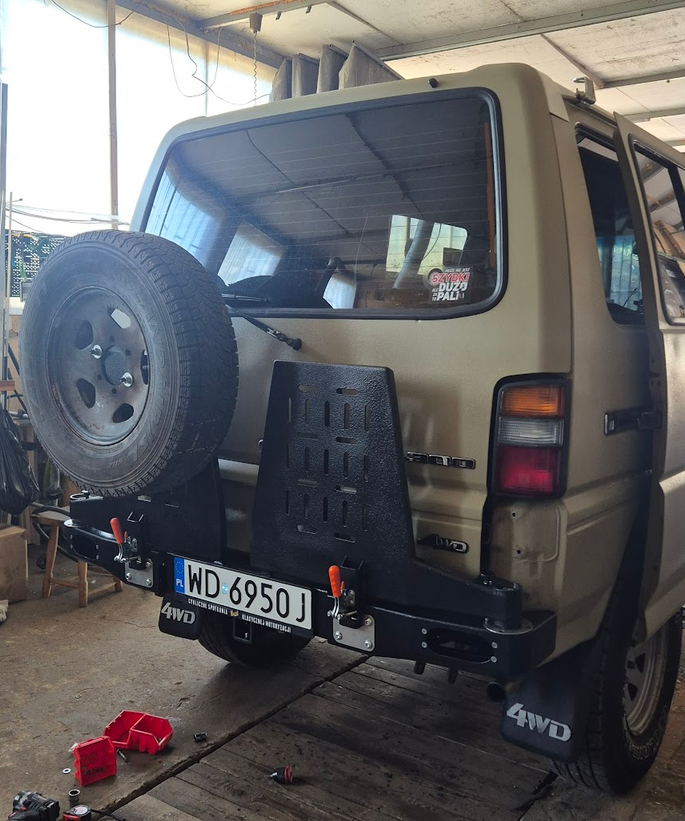
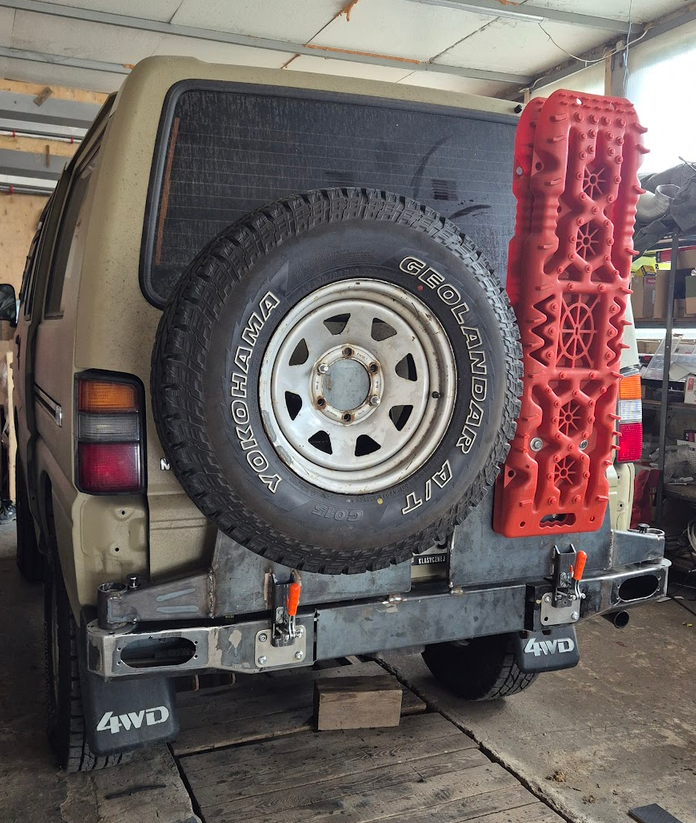
<p>The bumper is mounted to the custom tow bar crossmember and has two swing-out arms with universal mounting plates.</p>
<p>Right now one arm carries the spare wheel, but the system was designed to grow. I already plan to design mounts for recovery boards, fuel cans and other equipment.</p>
<p>Another important part of the project was the lighting.</p>
<p>An off-road bumper doesn't feel complete without proper lights, so I designed them into the bumper from the beginning.</p>
<p>I chose dual-function LED lights. White light is used for reversing and as a work light around the vehicle. Red light works as the rear fog light. One set of lights does both jobs while keeping the rear of the van clean and simple.</p>
<p>Corrosion protection was just as important.</p>
<p>After welding, every part was coated with two layers of epoxy primer before being finished with polyurethane coating. The visible parts have a thicker textured finish to match the front bumper and hide small scratches from everyday use. The hidden structural parts have a smoother finish, with the focus on long-term protection.</p>
<figure class="post__video"><iframe loading="lazy" width="697" height="391" style="width: 852px; height: 476px;" src="https://www.youtube.com/embed/zk5rATJVwLo" allowfullscreen="allowfullscreen" data-mce-fragment="1"></iframe></figure>
<h2>This is only the beginning</h2>
<p>Looking at the finished bumper, it's easy to see only the final result.</p>
<p>The interesting part is everything that happened before that.</p>
<p>Why did I design my own tow bar?</p>
<p>Why did I use tapered roller bearings for the swing arms?</p>
<p>How does the locking system work?</p>
<p>Why is the bumper made from one bent panel?</p>
<p>In the next articles I'll go through each part of the project, explain the design decisions and show how the bumper developed from the first CAD model into the finished product mounted on my Mitsubishi L300.</p>
            ]]>
        </content>
    </entry>
    <entry>
        <title>Bigger battery and additional power distribution</title>
        <author>
            <name>Piotr</name>
        </author>
        <link href="http://workshop.l300company.pl/bigger-battery-and-additional-power-distribution.html"/>
        <id>http://workshop.l300company.pl/bigger-battery-and-additional-power-distribution.html</id>
        <media:content url="http://workshop.l300company.pl/media/posts/6/20260517_130327.jpg" medium="image" />
            <category term="electrical"/>

        <updated>2026-05-17T23:33:54+02:00</updated>
            <summary>
                <![CDATA[
                        <img src="http://workshop.l300company.pl/media/posts/6/20260517_130327.jpg" alt="" />
                    People on forums and Facebook groups ask about battery upgrades for the L300 all the time. The factory battery is&hellip;
                ]]>
            </summary>
        <content type="html">
            <![CDATA[
                    <p><img src="http://workshop.l300company.pl/media/posts/6/20260517_130327.jpg" class="type:primaryImage" alt="" /></p>
                <h2 data-section-id="1urrqqm" data-start="0" data-end="64"> </h2>
<p data-start="66" data-end="288">People on forums and Facebook groups ask about battery upgrades for the L300 all the time. The factory battery is quite small, especially if the van has extra accessories like additional lights, audio equipment or a winch.</p>
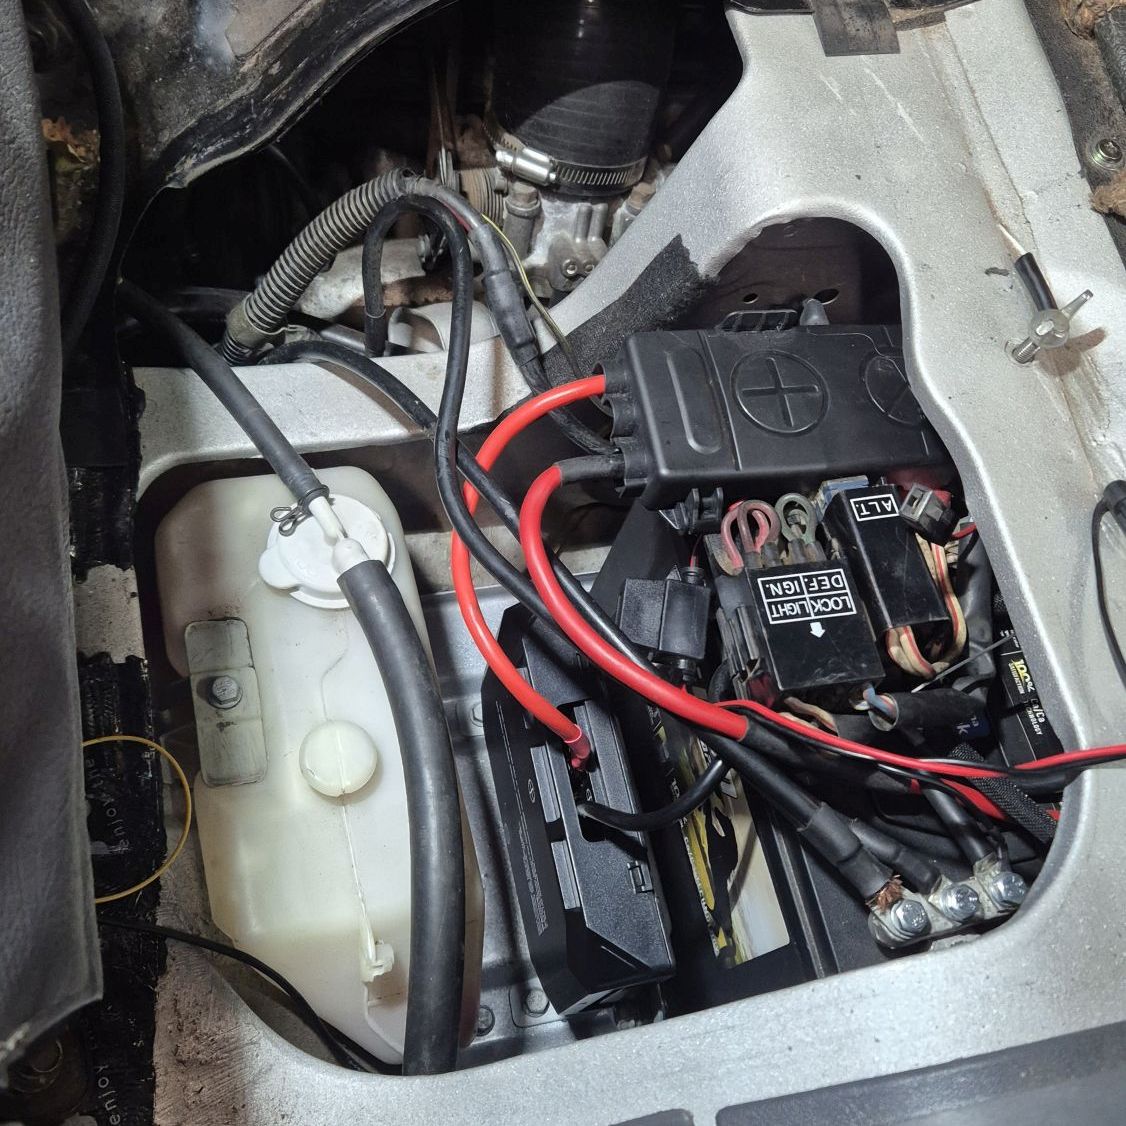
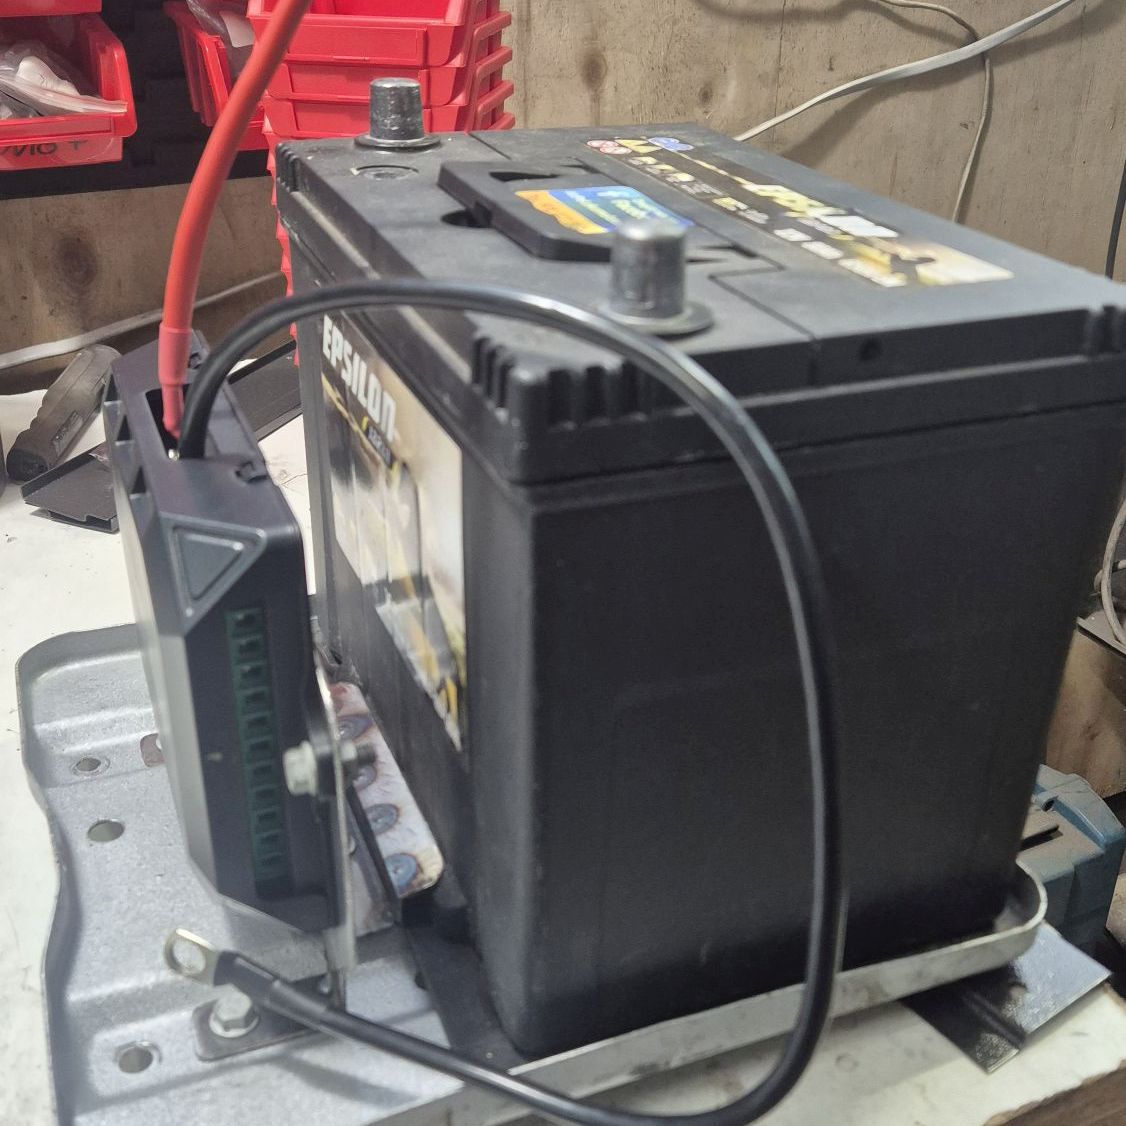
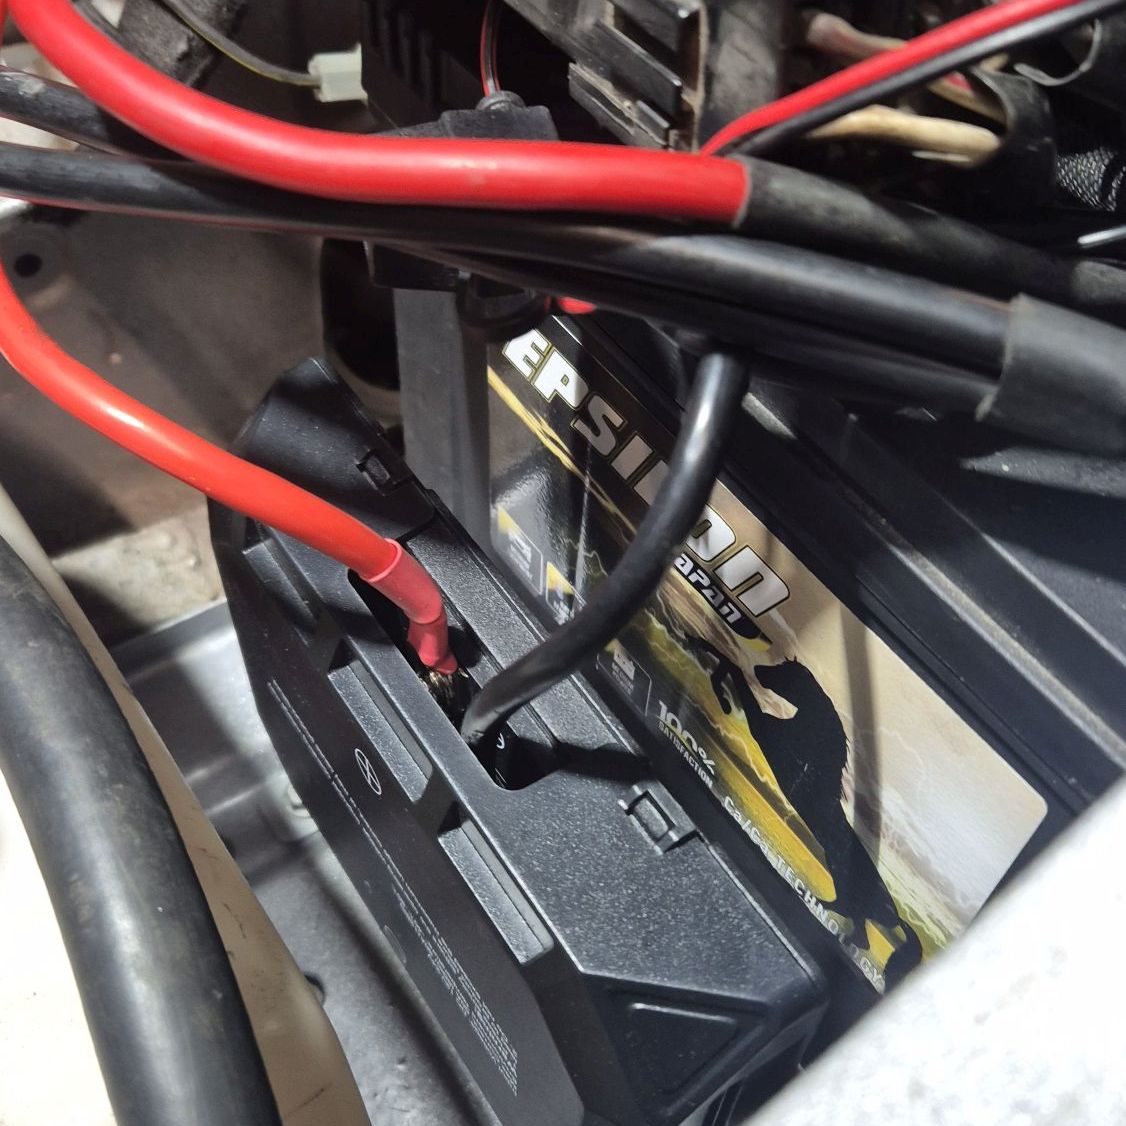
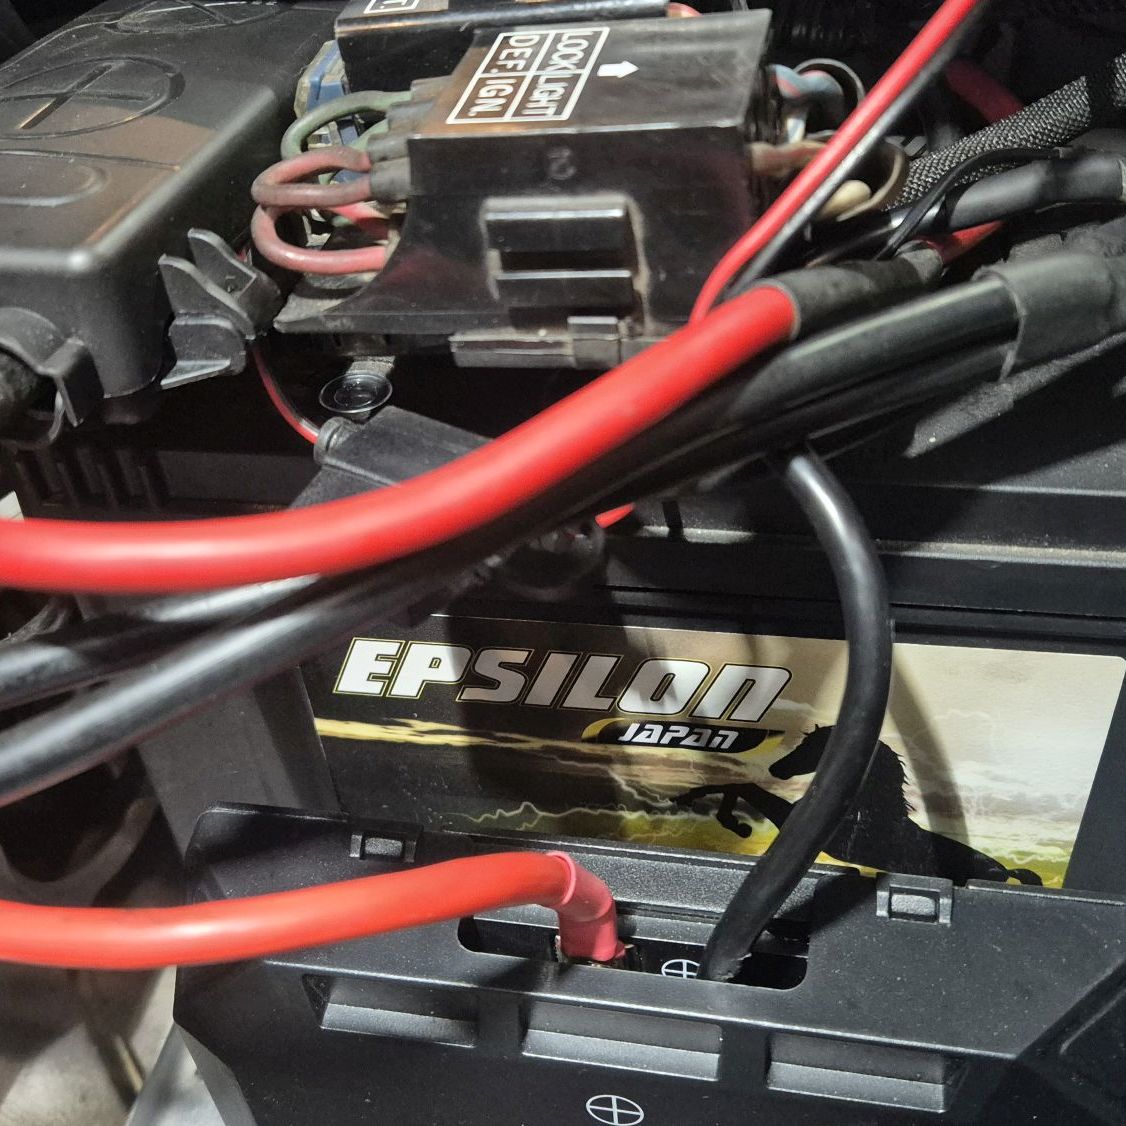
<p data-start="290" data-end="565">After a few different setups, I finally ended up with a solution that works really well for me.<br data-start="385" data-end="388">I managed to fit an 80Ah battery in the factory location and still make room for a relay module and an additional fuse/distribution box mounted directly on the battery terminal.</p>
<figure class="post__image"><img loading="lazy"  src="http://workshop.l300company.pl/media/posts/6/20260515_142651.jpg" alt="" width="1126" height="1126" sizes="(min-width: 37.5em) 1600px, 80vw" srcset="http://workshop.l300company.pl/media/posts/6/responsive/20260515_142651-xs.jpg 384w ,http://workshop.l300company.pl/media/posts/6/responsive/20260515_142651-sm.jpg 600w ,http://workshop.l300company.pl/media/posts/6/responsive/20260515_142651-md.jpg 768w ,http://workshop.l300company.pl/media/posts/6/responsive/20260515_142651-lg.jpg 1200w ,http://workshop.l300company.pl/media/posts/6/responsive/20260515_142651-xl.jpg 1600w"></figure>
<p data-start="567" data-end="594">The main goals were simple:</p>
<ul data-start="595" data-end="788">
<li data-section-id="1c3xm8c" data-start="595" data-end="640">fit a bigger battery in the stock location,</li>
<li data-section-id="1o55226" data-start="641" data-end="675">keep the original fusible links,</li>
<li data-section-id="1uhlyp9" data-start="676" data-end="708">add extra fused power outputs,</li>
<li data-section-id="i4c6i4" data-start="709" data-end="744">make a proper starter connection,</li>
<li data-section-id="1yd7dgp" data-start="745" data-end="788">and keep the whole thing simple to build.</li>
</ul>
<p data-start="790" data-end="803">Final result:</p>
<ul data-start="804" data-end="1073">
<li data-section-id="pvlvht" data-start="804" data-end="845">80Ah battery fits in the factory place,</li>
<li data-section-id="1b36570" data-start="846" data-end="886">original fusible links stay untouched,</li>
<li data-section-id="a7o9a4" data-start="887" data-end="922">3 additional fused power outputs,</li>
<li data-section-id="1pcsnhb" data-start="923" data-end="976">starter connected directly to the battery terminal,</li>
<li data-section-id="ic9xyj" data-start="977" data-end="1073">if you keep the stock battery mounting style, the whole job is actually pretty quick and easy.</li>
</ul>
<hr data-start="1075" data-end="1078">
<p><strong>If you want to copy this setup, the full parts list is included near the end of the article.</strong></p>
<hr data-start="1325" data-end="1328">
<h2 data-section-id="mmfyi0" data-start="1330" data-end="1358">Battery tray modification</h2>
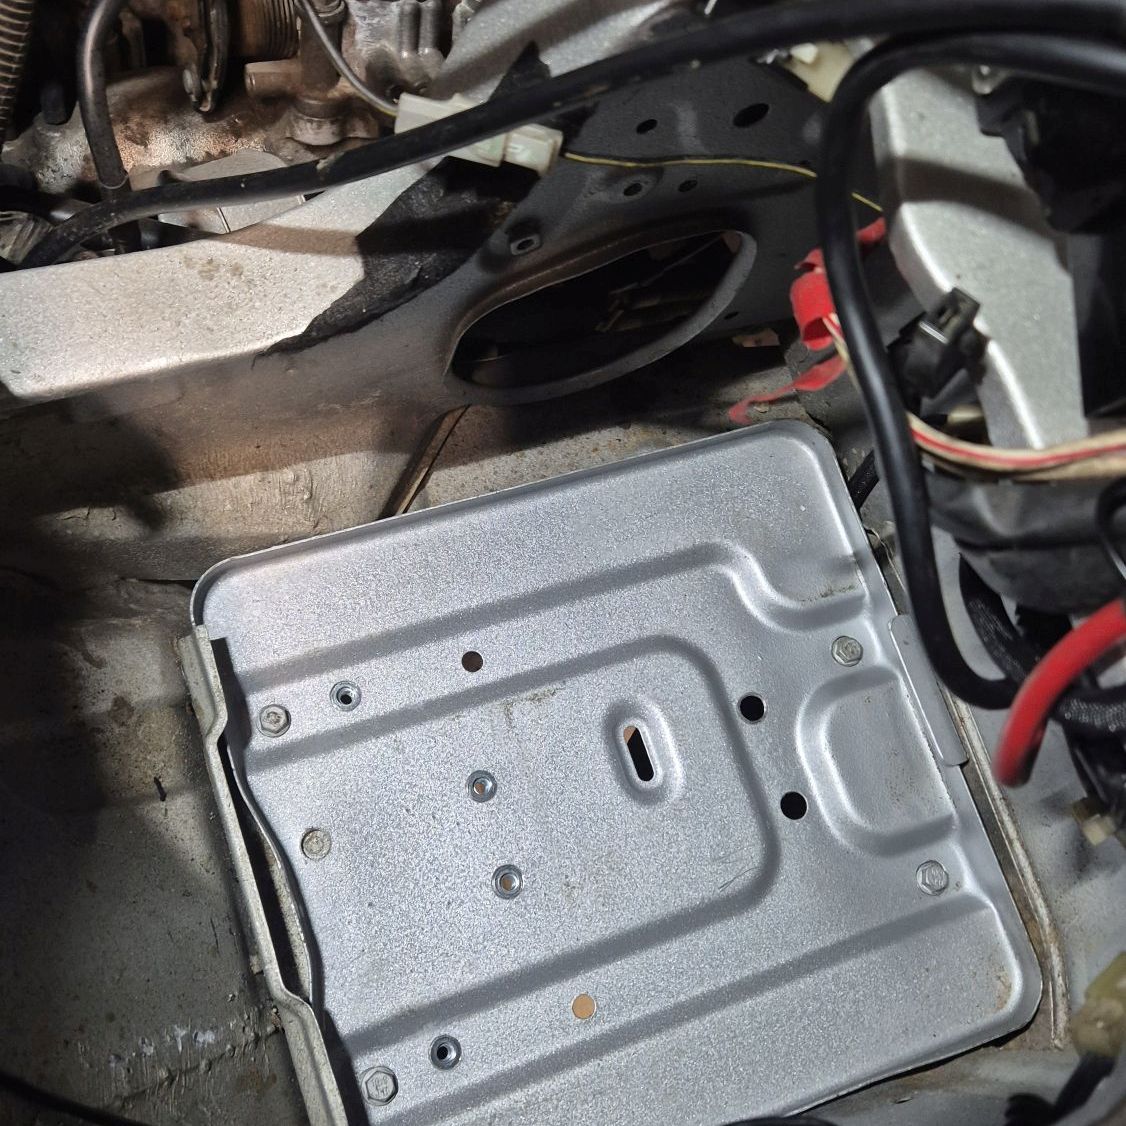
<p data-start="1360" data-end="1545">There are many ways to mount a battery in an L300.<br data-start="1410" data-end="1413">You can keep the factory-style mounting with two threaded rods over the top of the battery. Or use a strap or other custom solution.</p>
<p data-start="1547" data-end="1666">I decided to modify the tray and mount the battery by its base, like in modern cars. There were three reasons for that:</p>
<ul data-start="1668" data-end="1883">
<li data-section-id="s7d55k" data-start="1668" data-end="1721">more free space above the battery for the fuse box,</li>
<li data-section-id="qe6mnf" data-start="1722" data-end="1811">ability to move the battery as far back as possible to free space for the relay module,</li>
<li data-section-id="foq2r0" data-start="1812" data-end="1883">and I already planned to make a mounting plate for the relays anyway.</li>
</ul>
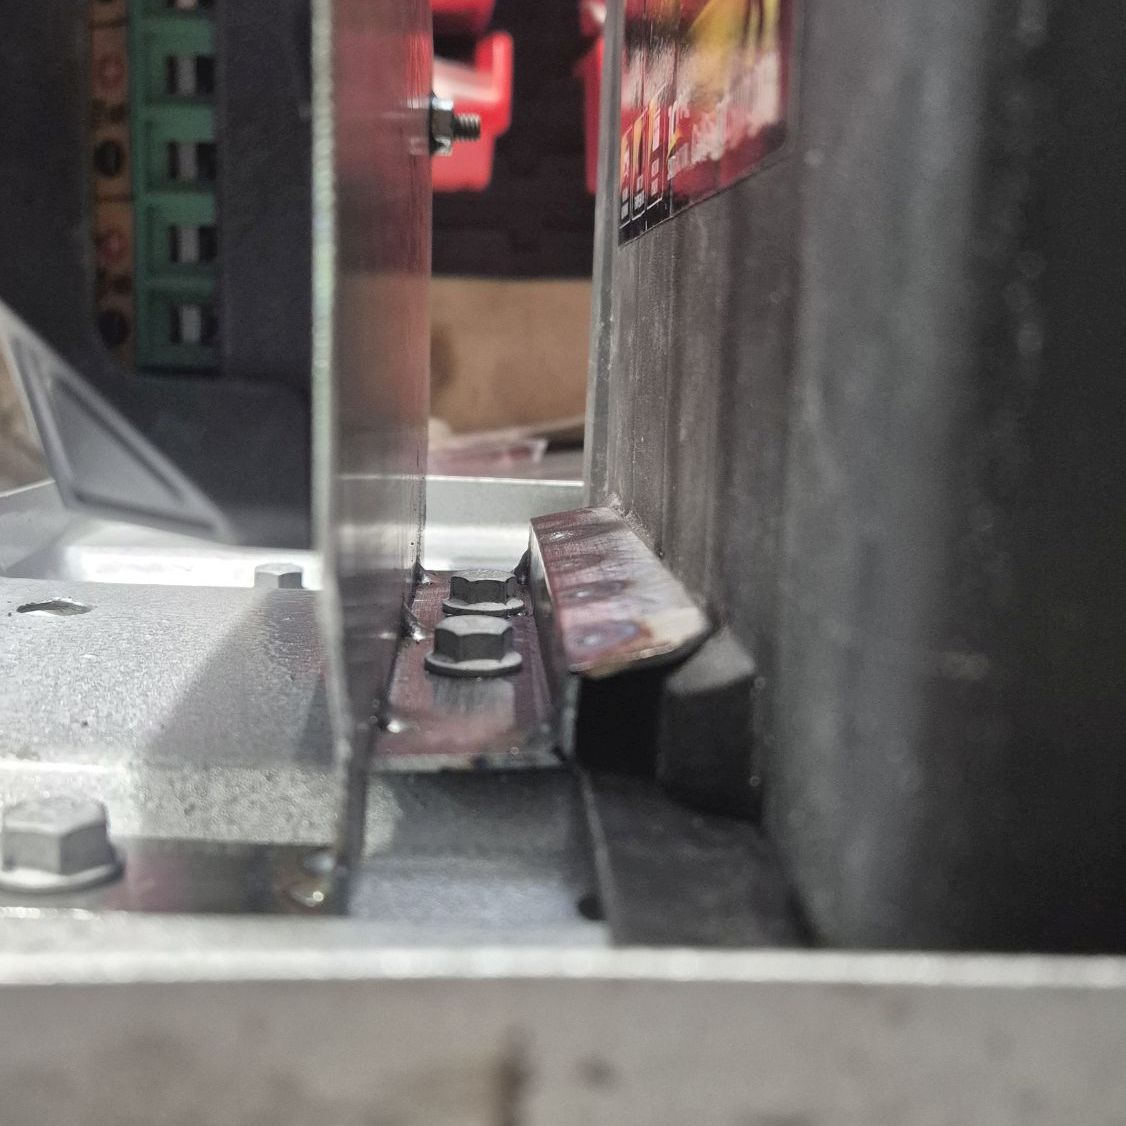
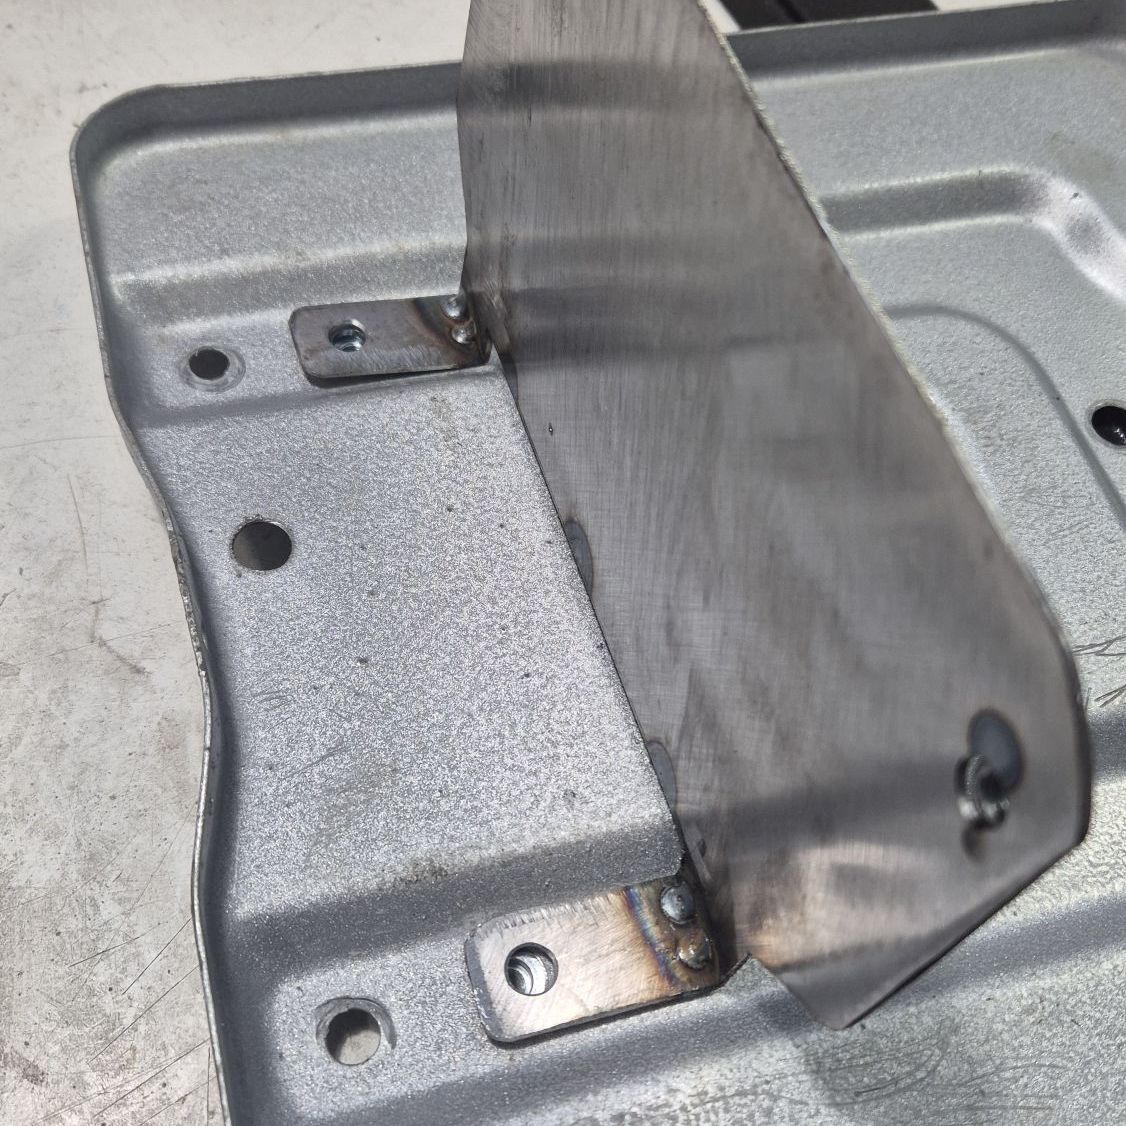
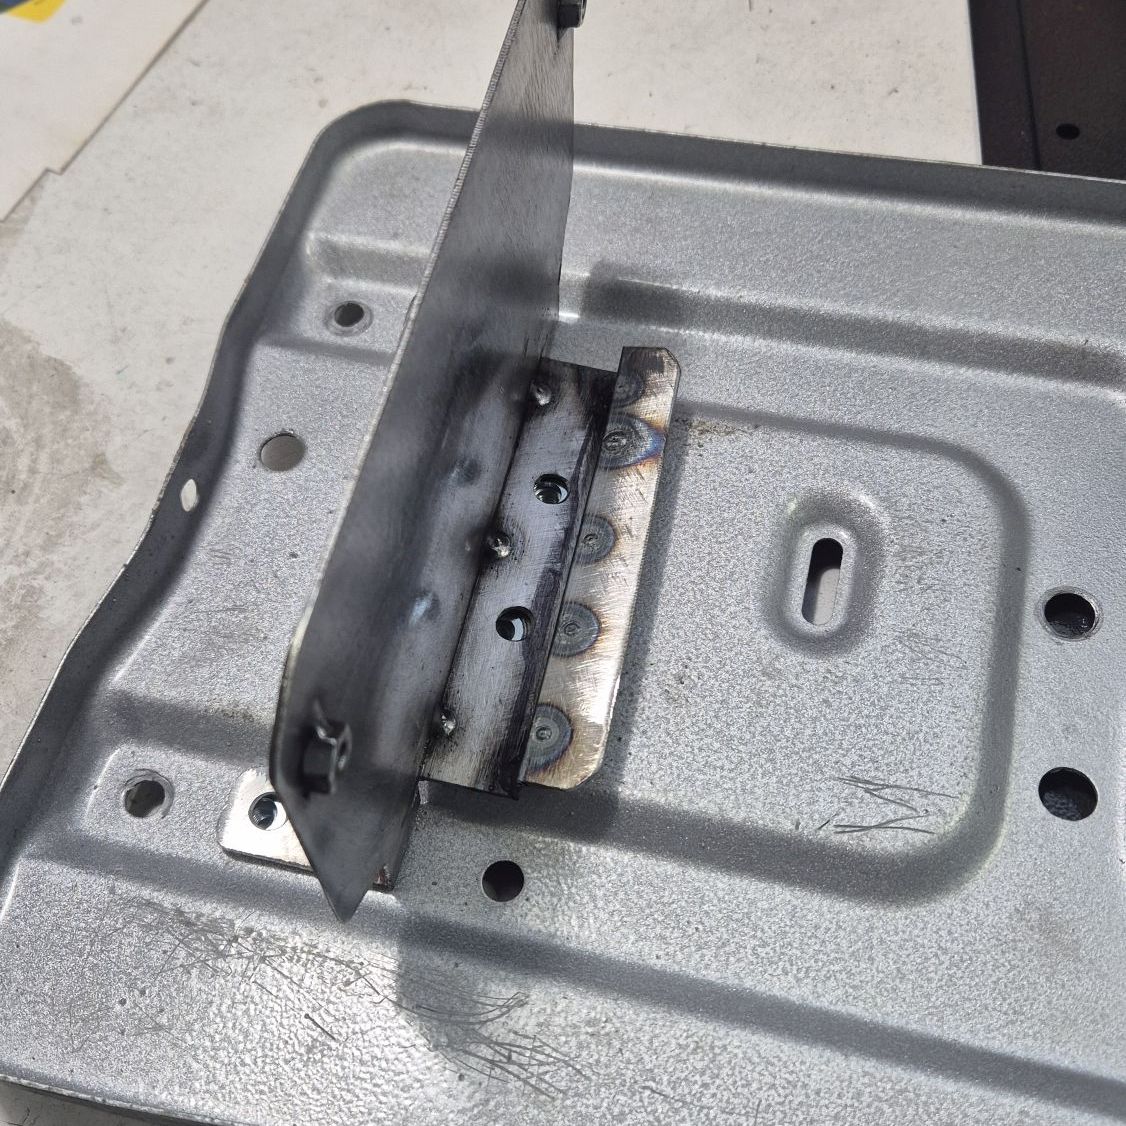
<p data-start="1885" data-end="1997">To hold the battery at the rear side, I welded a small piece onto the tray that locks the battery foot in place.</p>
<figure class="post__image"><img loading="lazy"  src="http://workshop.l300company.pl/media/posts/6/20260517_121907.jpg" alt="" width="1126" height="1126" sizes="(min-width: 37.5em) 1600px, 80vw" srcset="http://workshop.l300company.pl/media/posts/6/responsive/20260517_121907-xs.jpg 384w ,http://workshop.l300company.pl/media/posts/6/responsive/20260517_121907-sm.jpg 600w ,http://workshop.l300company.pl/media/posts/6/responsive/20260517_121907-md.jpg 768w ,http://workshop.l300company.pl/media/posts/6/responsive/20260517_121907-lg.jpg 1200w ,http://workshop.l300company.pl/media/posts/6/responsive/20260517_121907-xl.jpg 1600w"></figure>
<p data-start="2008" data-end="2158">The front mount was made from 3mm steel plate.<br data-start="2054" data-end="2057">At the same time it also works as the mounting plate for the relay module, so one part does two jobs.<br><br><strong><a href="http://workshop.l300company.pl/12-switches-zero-holes-in-the-dash.html">If you are interested in the relay module used in this setup, check out the separate article where I describe it in more detail.</a></strong></p>
<p data-start="2160" data-end="2295">I installed four M6 rivet nuts into the battery tray to bolt everything down.<br data-start="2237" data-end="2240">Once assembled, the battery sits very solid and stable.</p>
<div class="gallery-wrapper"><div class="gallery"  data-is-empty="false" data-translation="Add images" data-columns="2">
<figure class="gallery__item"><a href="http://workshop.l300company.pl/media/posts/6/gallery/20260516_184013.jpg" data-size="1126x1126"><img loading="lazy" src="http://workshop.l300company.pl/media/posts/6/gallery/20260516_184013-thumbnail.jpg" alt="" width="768" height="768"></a></figure>
<figure class="gallery__item"><a href="http://workshop.l300company.pl/media/posts/6/gallery/20260516_183739.jpg" data-size="1126x1126"><img loading="lazy" src="http://workshop.l300company.pl/media/posts/6/gallery/20260516_183739-thumbnail.jpg" alt="" width="768" height="768"></a></figure>
<figure class="gallery__item"><a href="http://workshop.l300company.pl/media/posts/6/gallery/20260516_183741.jpg" data-size="1126x1126"><img loading="lazy" src="http://workshop.l300company.pl/media/posts/6/gallery/20260516_183741-thumbnail.jpg" alt="" width="768" height="768"></a></figure>
<figure class="gallery__item"><a href="http://workshop.l300company.pl/media/posts/6/gallery/20260516_184006.jpg" data-size="1126x1126"><img loading="lazy" src="http://workshop.l300company.pl/media/posts/6/gallery/20260516_184006-thumbnail.jpg" alt="" width="768" height="768"></a></figure>
</div></div>
<hr data-start="2308" data-end="2311">
<h2 data-section-id="1fo90a6" data-start="2313" data-end="2338">Electrical connections</h2>
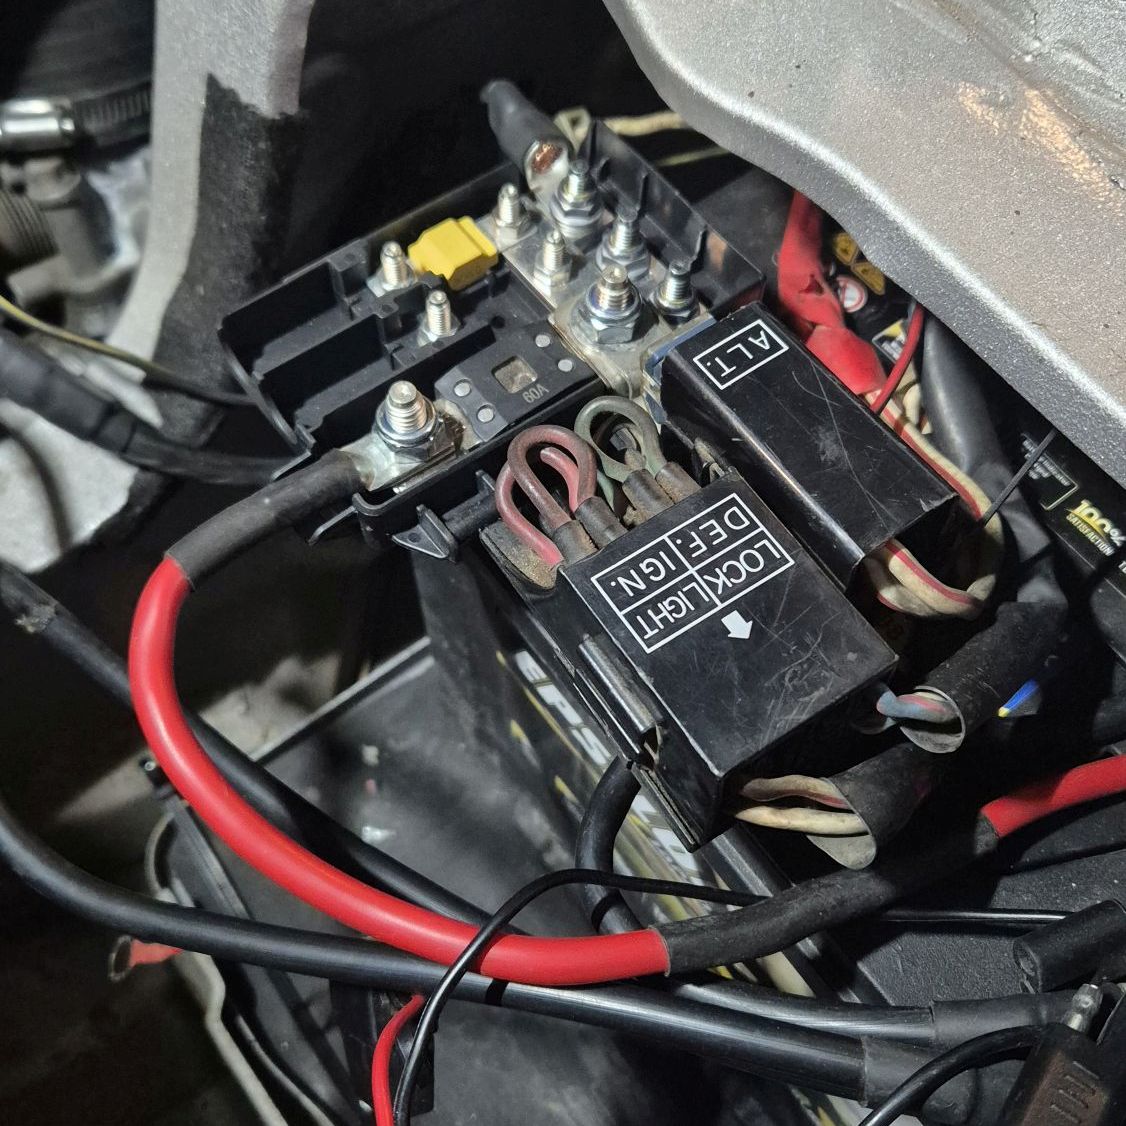
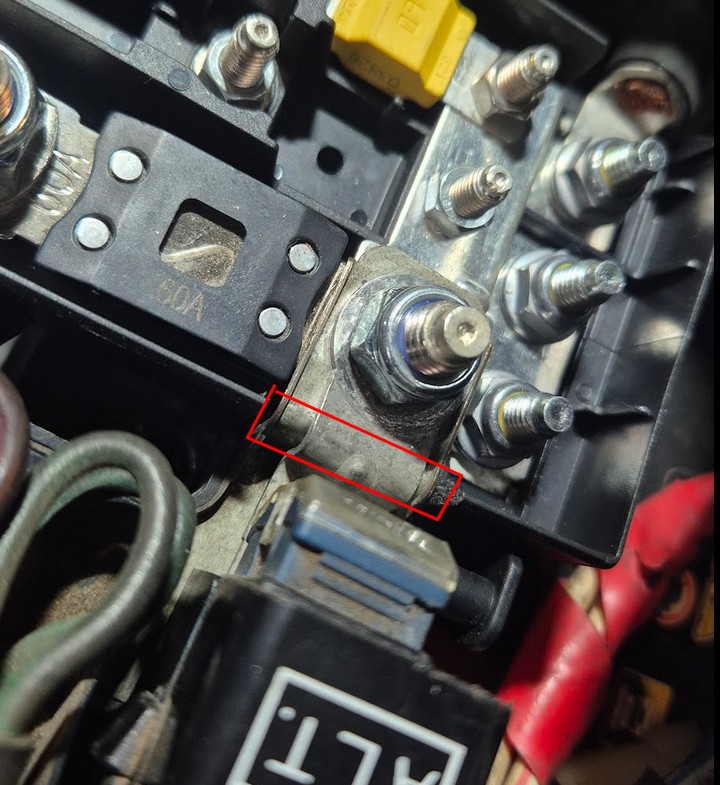
<p data-start="2340" data-end="2481">This is not completely plug &amp; play.<br data-start="2375" data-end="2378">To make the MTA box fit properly, three small modifications are needed. Luckily all of them are simple.</p>
<h5 data-section-id="1c26y7u" data-start="2488" data-end="2522">1. Cutting the MTA box housing</h5>
<p data-start="2524" data-end="2618">To keep the factory fusible links, a small section of the MTA box housing needs to be trimmed.</p>
<p data-start="2620" data-end="2685">Without this cut there is simply no proper space to connect them.</p>
<figure class="post__image">After trimming, you get perfect access to the M8 stud, making the fusible link installation clean and easy.<br><img loading="lazy"  src="http://workshop.l300company.pl/media/posts/6/2.jpg" alt="" width="720" height="785" sizes="(min-width: 37.5em) 1600px, 80vw" srcset="http://workshop.l300company.pl/media/posts/6/responsive/2-xs.jpg 384w ,http://workshop.l300company.pl/media/posts/6/responsive/2-sm.jpg 600w ,http://workshop.l300company.pl/media/posts/6/responsive/2-md.jpg 768w ,http://workshop.l300company.pl/media/posts/6/responsive/2-lg.jpg 1200w ,http://workshop.l300company.pl/media/posts/6/responsive/2-xl.jpg 1600w"></figure>
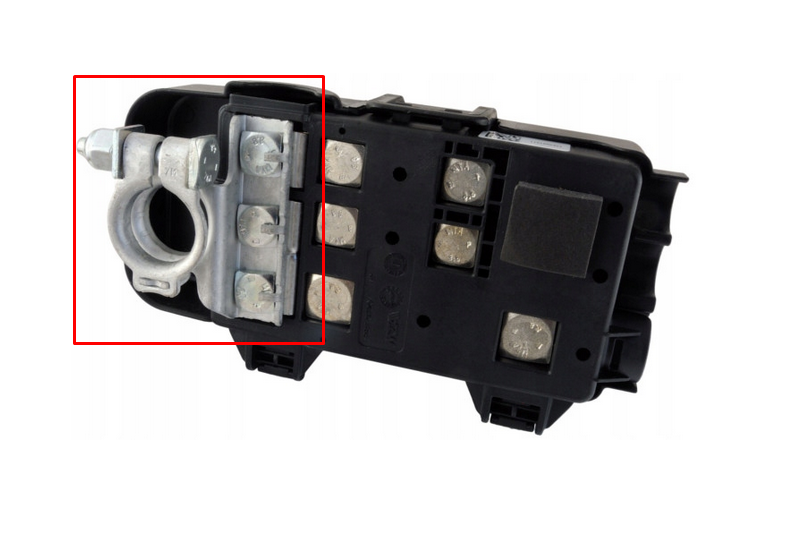
<h5 data-section-id="1jw3ch4" data-start="2811" data-end="2845">2. Rotating the terminal clamp</h5>
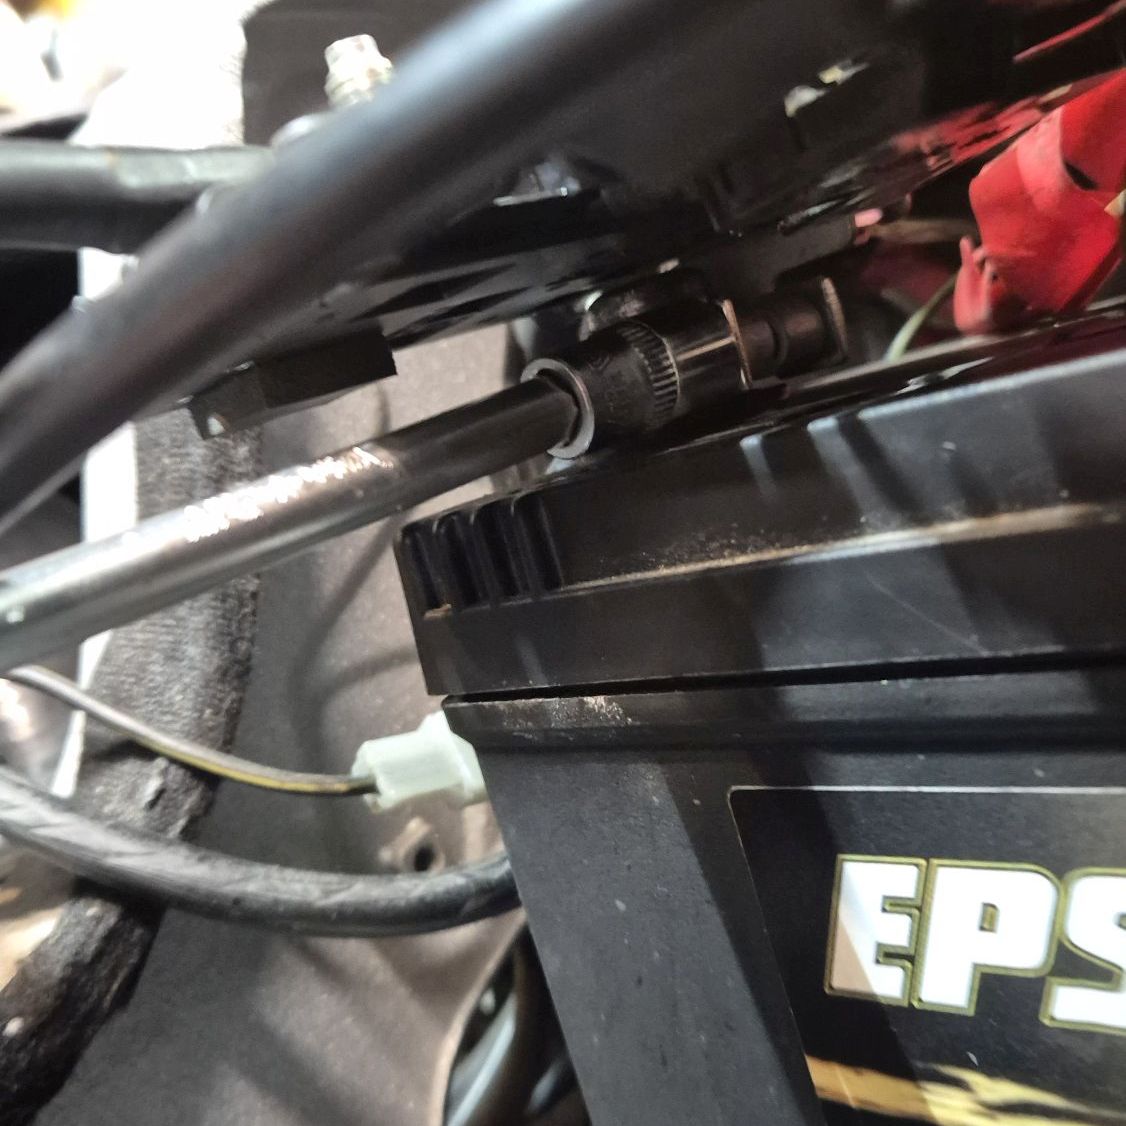
<p data-start="2847" data-end="2917">The MTA box comes with the battery clamp mounted using three M6 bolts.</p>
<p data-start="2919" data-end="3029">In the factory position, space is very tight and access to the terminal bolt on the battery post is not great.</p>
<p data-start="3031" data-end="3078">The solution is simple — rotate the clamp 180°.</p>
<p data-start="3080" data-end="3184">This gives more room and makes installation easier while still keeping good access to the mounting bolt.</p>
<p data-start="3186" data-end="3229">The whole process takes only a few minutes:</p>
<ul data-start="3230" data-end="3296">
<li data-section-id="15xqwmi" data-start="3230" data-end="3251">remove three bolts,</li>
<li data-section-id="1lhhxqv" data-start="3252" data-end="3271">rotate the clamp,</li>
<li data-section-id="rq6nrr" data-start="3272" data-end="3296">bolt it back together.<br><br><figure class="post__image"><img loading="lazy"  src="http://workshop.l300company.pl/media/posts/6/mta3.png" alt="" width="798" height="540" sizes="(min-width: 37.5em) 1600px, 80vw" srcset="http://workshop.l300company.pl/media/posts/6/responsive/mta3-xs.png 384w ,http://workshop.l300company.pl/media/posts/6/responsive/mta3-sm.png 600w ,http://workshop.l300company.pl/media/posts/6/responsive/mta3-md.png 768w ,http://workshop.l300company.pl/media/posts/6/responsive/mta3-lg.png 1200w ,http://workshop.l300company.pl/media/posts/6/responsive/mta3-xl.png 1600w"></figure></li>
</ul>
<h5 data-section-id="1gxf1x6" data-start="3314" data-end="3348">3. Extending the starter cable</h5>
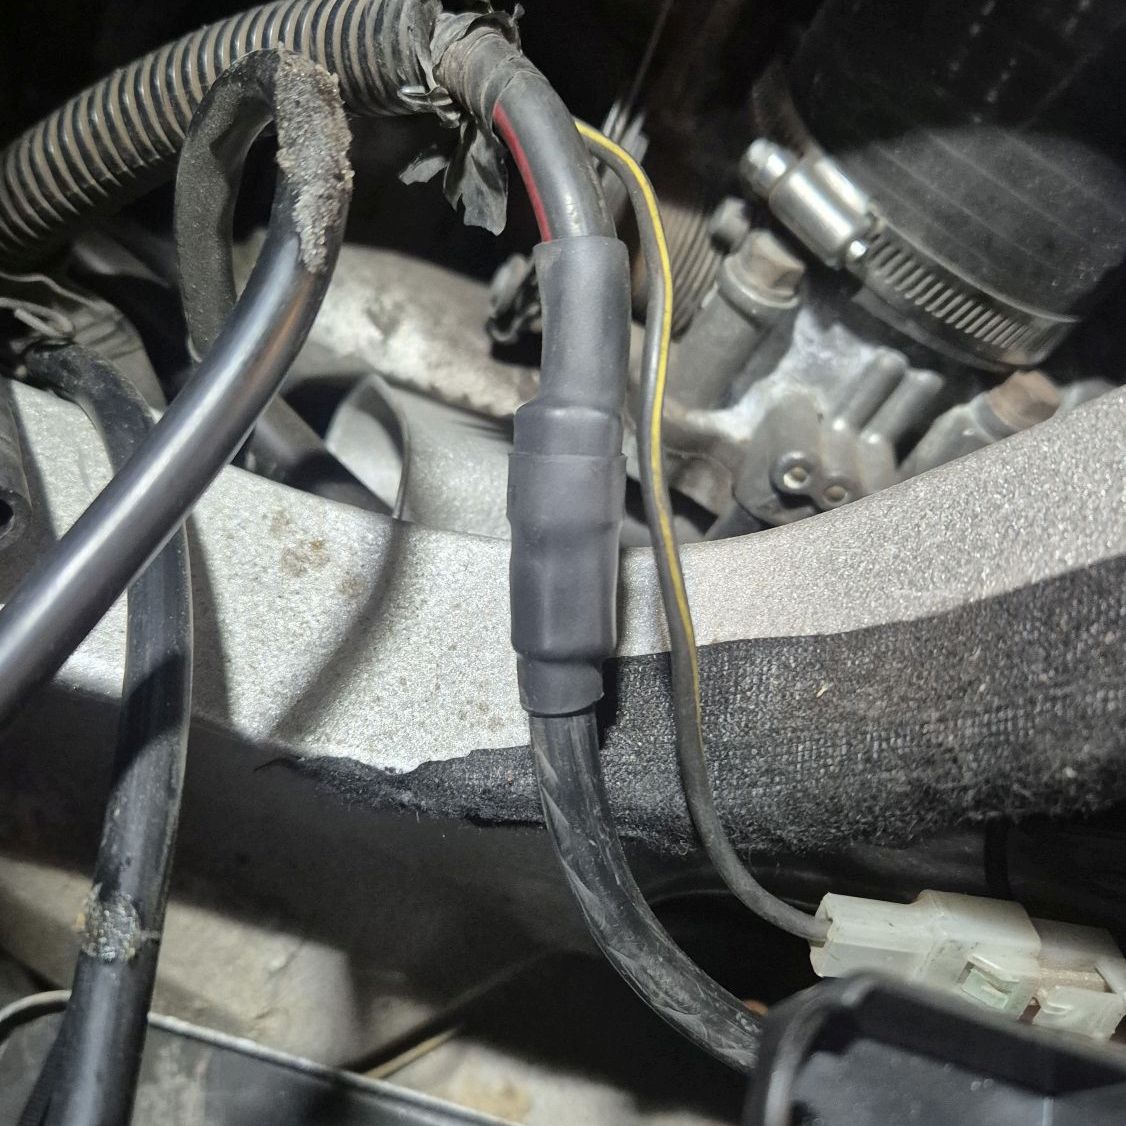
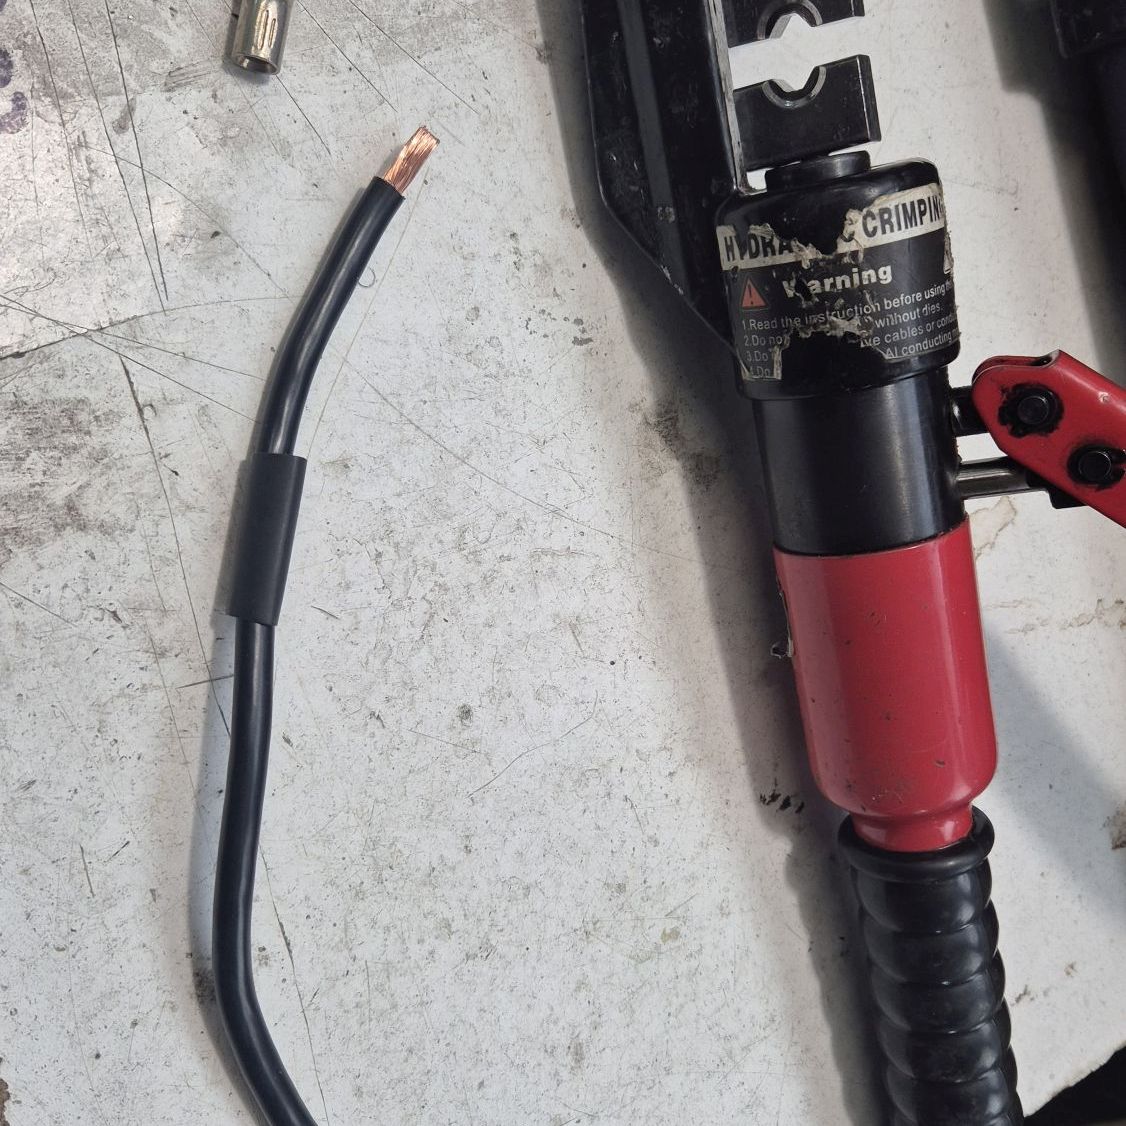
<p data-start="3350" data-end="3471">Because the battery is moved further back compared to the factory position, the original starter cable becomes too short.</p>
<p data-start="3473" data-end="3579">You can make a completely new cable, but mine was still in very good condition, so I decided to extend it.</p>
<p data-start="3581" data-end="3597">For this I used:</p>
<ul data-start="3598" data-end="3699">
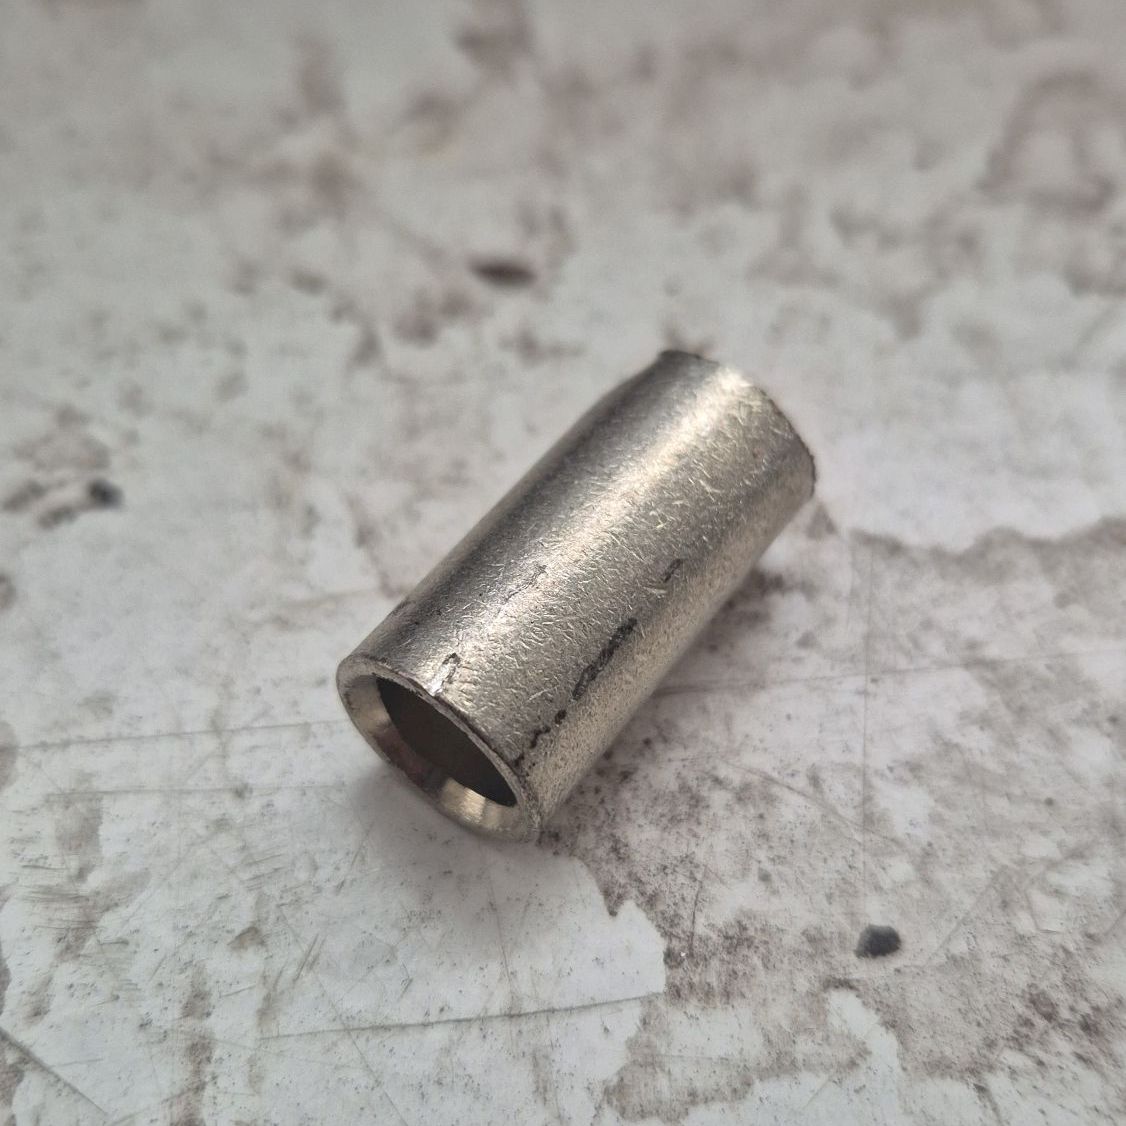
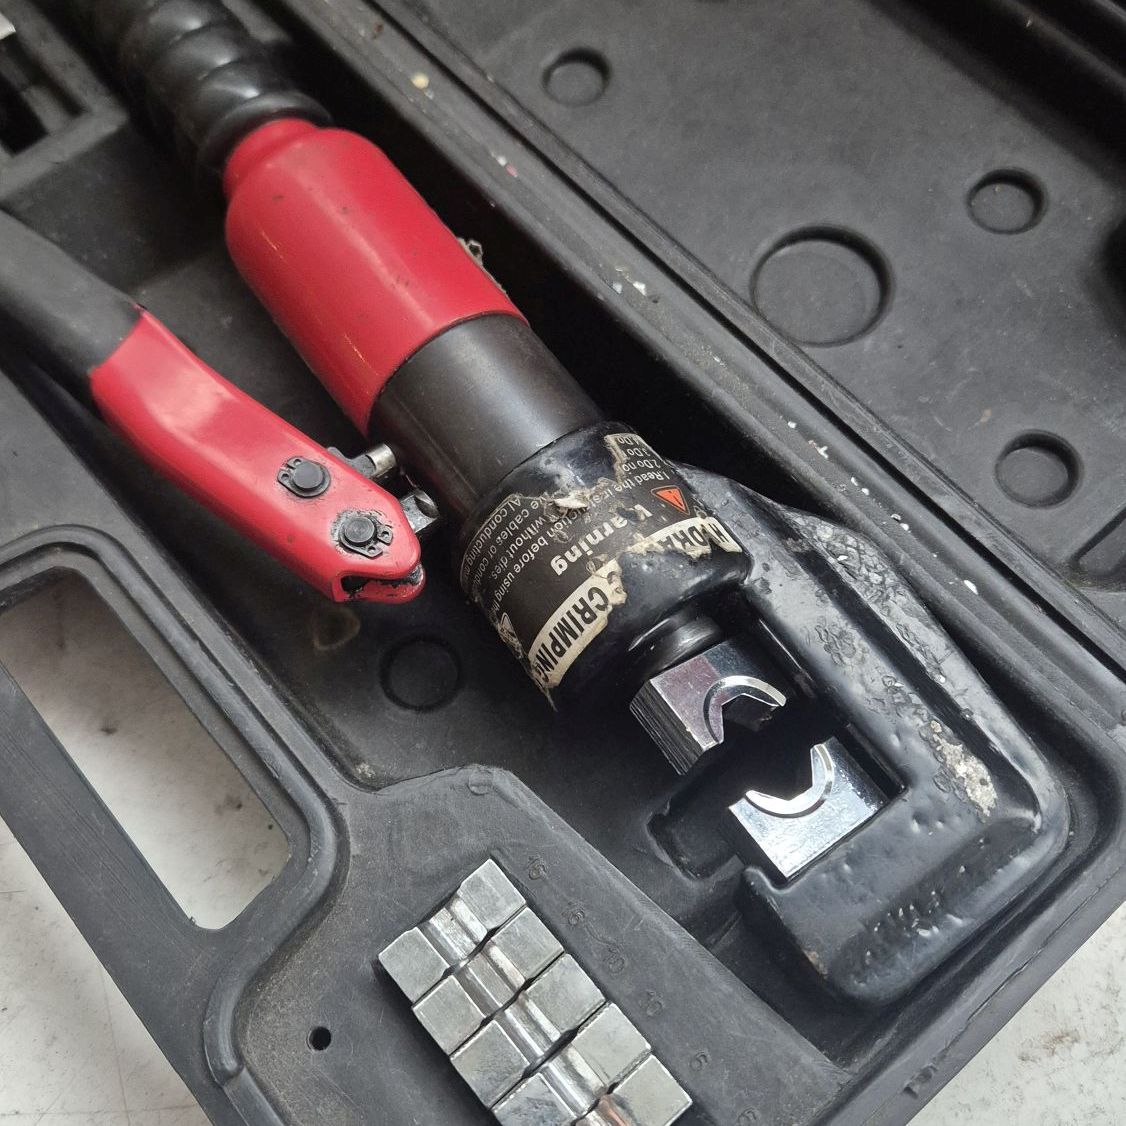
<li data-section-id="wne195" data-start="3598" data-end="3625">a hydraulic crimp sleeve,</li>
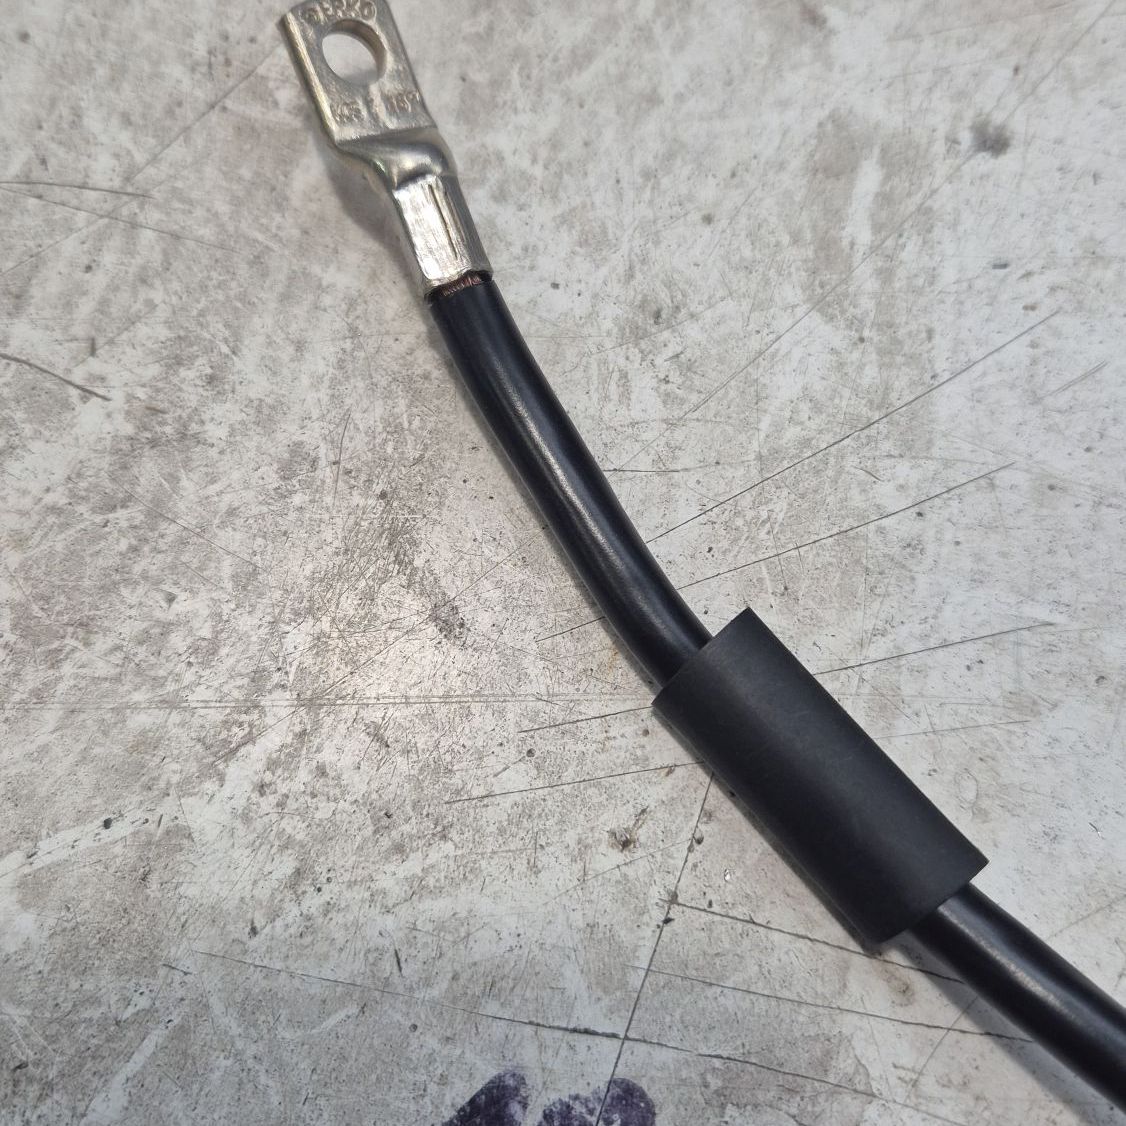
<li data-section-id="1iljlr4" data-start="3626" data-end="3660">an M6 cable lug for 25mm² cable,</li>
<li data-section-id="15op104" data-start="3661" data-end="3699">quality adhesive heat shrink tubing.</li>
</ul>
<p data-start="3701" data-end="3840">To join two 25mm² cables together, I used a 50mm² crimp sleeve.<br data-start="3764" data-end="3767">After hydraulic crimping, the connection becomes very solid and reliable.</p>
<p data-start="3842" data-end="3902">Then everything was sealed with adhesive heat shrink tubing. </p>
<div class="gallery-wrapper"><div class="gallery"  data-is-empty="false" data-translation="Add images" data-columns="3">
<figure class="gallery__item"><a href="http://workshop.l300company.pl/media/posts/6/gallery/20260515_142708.jpg" data-size="1126x1126"><img loading="lazy" src="http://workshop.l300company.pl/media/posts/6/gallery/20260515_142708-thumbnail.jpg" alt="" width="768" height="768"></a></figure>
<figure class="gallery__item"><a href="http://workshop.l300company.pl/media/posts/6/gallery/20260515_142718-2.jpg" data-size="1126x1126"><img loading="lazy" src="http://workshop.l300company.pl/media/posts/6/gallery/20260515_142718-2-thumbnail.jpg" alt="" width="768" height="768"></a></figure>
<figure class="gallery__item"><a href="http://workshop.l300company.pl/media/posts/6/gallery/20260515_143110-2.jpg" data-size="1126x1126"><img loading="lazy" src="http://workshop.l300company.pl/media/posts/6/gallery/20260515_143110-2-thumbnail.jpg" alt="" width="768" height="768"></a></figure>
<figure class="gallery__item"><a href="http://workshop.l300company.pl/media/posts/6/gallery/20260515_143139-2.jpg" data-size="1126x1126"><img loading="lazy" src="http://workshop.l300company.pl/media/posts/6/gallery/20260515_143139-2-thumbnail.jpg" alt="" width="768" height="768"></a></figure>
</div></div>
<hr data-start="3915" data-end="3918">
<h2 data-section-id="5f6ifd" data-start="3920" data-end="3942">Current connections</h2>
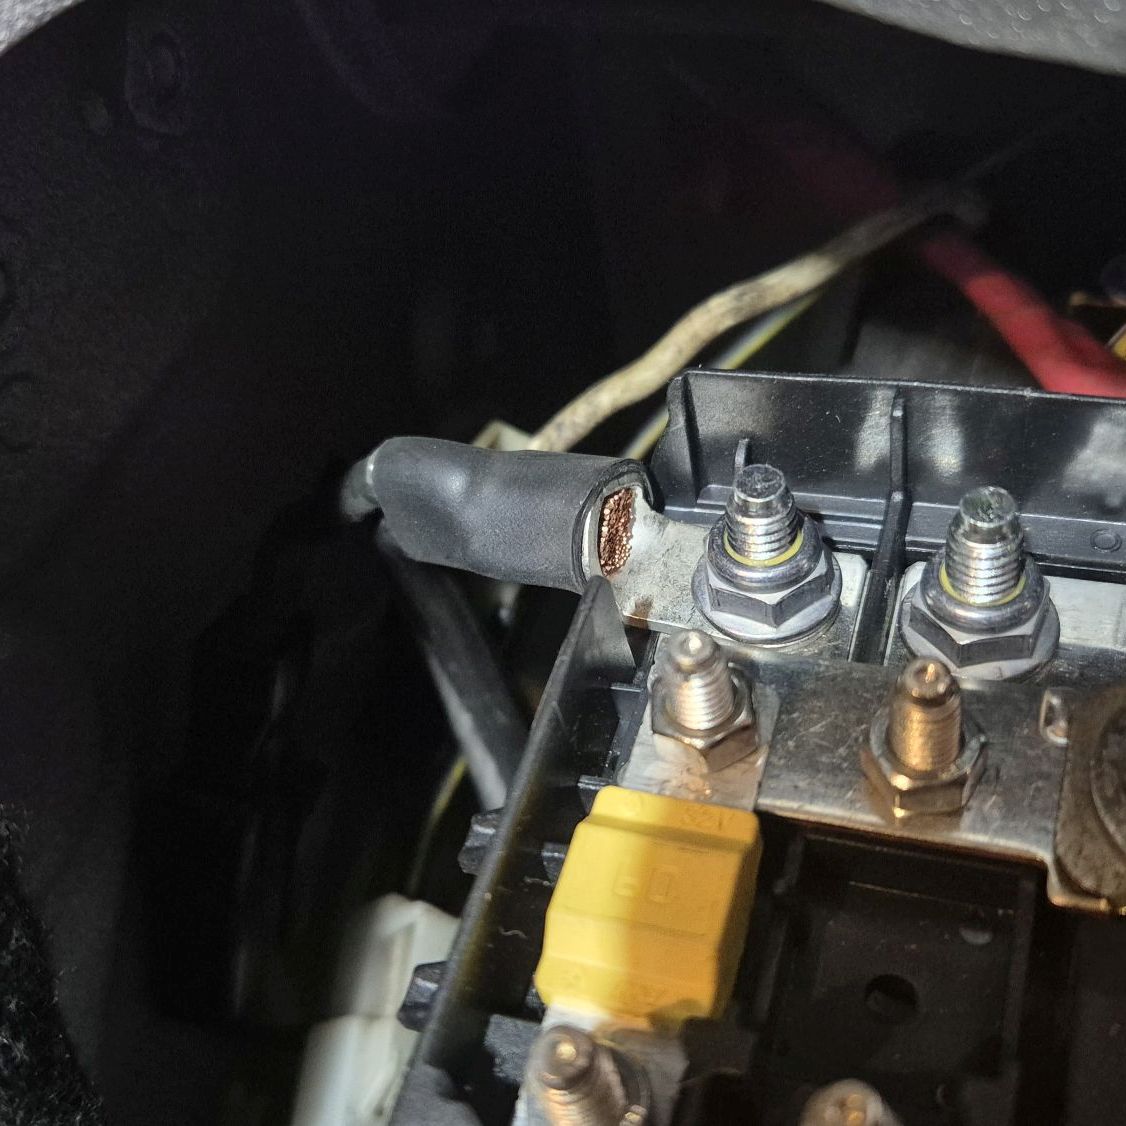
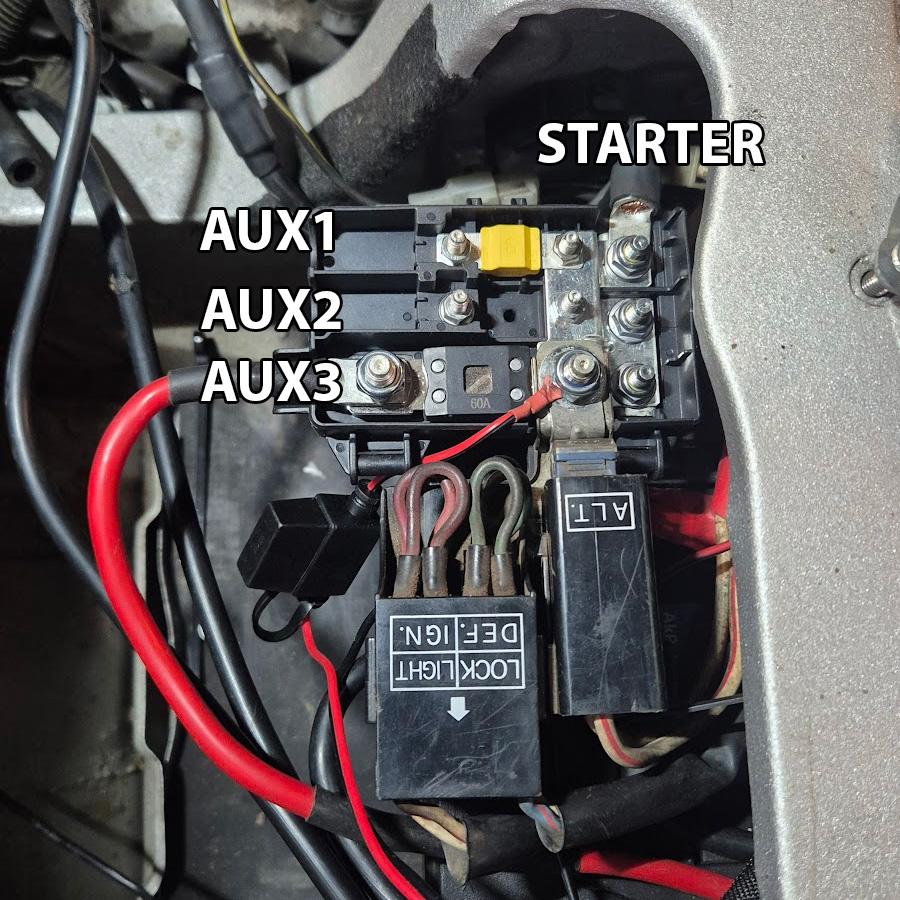
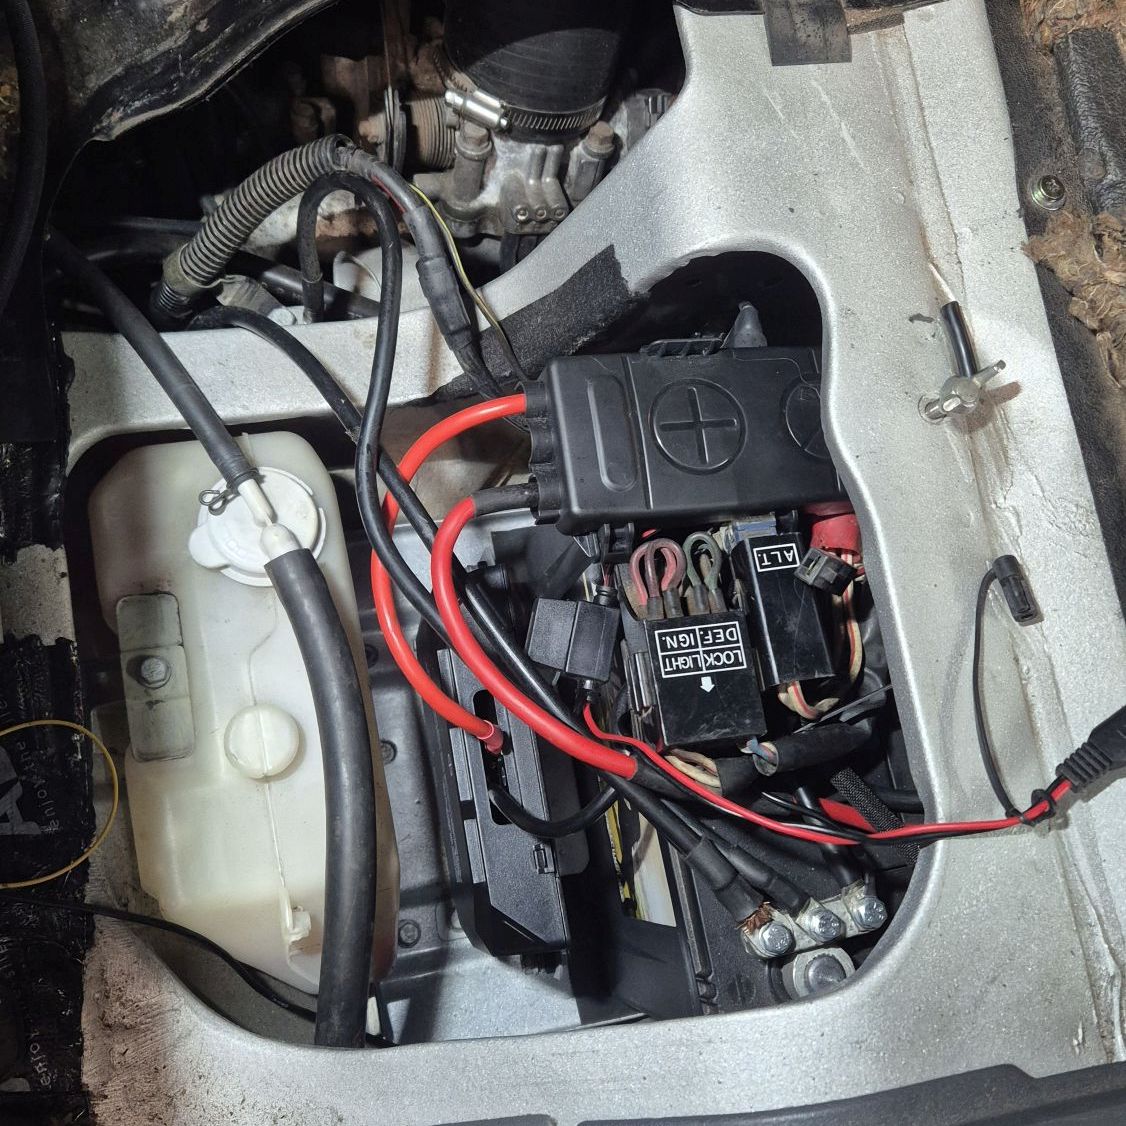
<p data-start="3944" data-end="3964">Through the MTA box:</p>
<ul data-start="3965" data-end="4053">
<li data-section-id="b9e90a" data-start="3965" data-end="3997">AUX1 — relay module, 60A fuse,</li>
<li data-section-id="1nsxxmv" data-start="3998" data-end="4023">AUX2 — currently empty,</li>
<li data-section-id="59s0qy" data-start="4024" data-end="4053">AUX3 — car audio amplifier.</li>
</ul>
<p data-start="4055" data-end="4151">The amplifier will probably move to AUX2 later to free up space for a bigger cable for a future winch power supply.</p>
<p data-start="4153" data-end="4226">I also connected a battery maintainer charger for longer parking periods.</p>
<figure class="post__image"><img loading="lazy"  src="http://workshop.l300company.pl/media/posts/6/Bez-nazwy-1-2.jpg" alt="" width="900" height="900" sizes="(min-width: 37.5em) 1600px, 80vw" srcset="http://workshop.l300company.pl/media/posts/6/responsive/Bez-nazwy-1-2-xs.jpg 384w ,http://workshop.l300company.pl/media/posts/6/responsive/Bez-nazwy-1-2-sm.jpg 600w ,http://workshop.l300company.pl/media/posts/6/responsive/Bez-nazwy-1-2-md.jpg 768w ,http://workshop.l300company.pl/media/posts/6/responsive/Bez-nazwy-1-2-lg.jpg 1200w ,http://workshop.l300company.pl/media/posts/6/responsive/Bez-nazwy-1-2-xl.jpg 1600w"></figure>
<hr data-start="3915" data-end="3918">
<h2 data-section-id="17j1zty" data-start="1080" data-end="1093">Parts used</h2>
<ul data-start="1095" data-end="1323">
<li data-section-id="11y1vqi" data-start="1095" data-end="1153">80D26L battery — Yuasa Epsilon 80Ah 650A (left positive)</li>
<li data-section-id="ruf6jl" data-start="1154" data-end="1193">MTA CDB 0300839 fuse/distribution box</li>
<li data-section-id="purh7j" data-start="1194" data-end="1218">Triple ground terminal</li>
<li data-section-id="1hfaacg" data-start="1219" data-end="1237">Some 25mm² cable</li>
<li data-section-id="l98ffi" data-start="1238" data-end="1323">Cable lugs, crimp sleeves, heat shrink tubing and all the usual electrical supplies</li>
</ul>
<hr data-start="3915" data-end="3918">
<h2 data-section-id="1k5q749" data-start="5" data-end="15">Summary</h2>
<p data-start="17" data-end="304">This setup turned out to be a very practical upgrade for the L300.<br data-start="83" data-end="86">The bigger battery gives more reserve power, the additional fused outputs make future accessories much easier to connect, and keeping the factory fusible links means the whole system still looks clean and close to OEM.</p>
<p data-start="306" data-end="482">The battery tray modification takes some extra work, but it makes the whole layout much cleaner and creates enough space for both the relay module and the MTA distribution box.</p>
<p data-start="484" data-end="694">For anyone planning additional electrical accessories in the future — lights, compressor, audio system, inverter or winch — this kind of setup makes the electrical system much easier to organize from the start.</p>
<p data-start="696" data-end="838">And most importantly, everything still fits in the original battery location without turning the engine bay into a custom fabrication project.</p>
<div class="gallery-wrapper"><div class="gallery"  data-is-empty="false" data-translation="Add images" data-columns="3">
<figure class="gallery__item"><a href="http://workshop.l300company.pl/media/posts/6/gallery/20260517_122825.jpg" data-size="1126x1126"><img loading="lazy" src="http://workshop.l300company.pl/media/posts/6/gallery/20260517_122825-thumbnail.jpg" alt="" width="768" height="768"></a></figure>
<figure class="gallery__item"><a href="http://workshop.l300company.pl/media/posts/6/gallery/20260517_123555.jpg" data-size="1126x1126"><img loading="lazy" src="http://workshop.l300company.pl/media/posts/6/gallery/20260517_123555-thumbnail.jpg" alt="" width="768" height="768"></a></figure>
<figure class="gallery__item"><a href="http://workshop.l300company.pl/media/posts/6/gallery/20260517_124954.jpg" data-size="1126x1126"><img loading="lazy" src="http://workshop.l300company.pl/media/posts/6/gallery/20260517_124954-thumbnail.jpg" alt="" width="768" height="768"></a></figure>
<figure class="gallery__item"><a href="http://workshop.l300company.pl/media/posts/6/gallery/20260517_125029.jpg" data-size="1126x1126"><img loading="lazy" src="http://workshop.l300company.pl/media/posts/6/gallery/20260517_125029-thumbnail.jpg" alt="" width="768" height="768"></a></figure>
<figure class="gallery__item"><a href="http://workshop.l300company.pl/media/posts/6/gallery/20260517_130336.jpg" data-size="1126x1126"><img loading="lazy" src="http://workshop.l300company.pl/media/posts/6/gallery/20260517_130336-thumbnail.jpg" alt="" width="768" height="768"></a></figure>
<figure class="gallery__item"><a href="http://workshop.l300company.pl/media/posts/6/gallery/20260517_130338.jpg" data-size="1126x1126"><img loading="lazy" src="http://workshop.l300company.pl/media/posts/6/gallery/20260517_130338-thumbnail.jpg" alt="" width="768" height="768"></a></figure>
<figure class="gallery__item"><a href="http://workshop.l300company.pl/media/posts/6/gallery/20260517_130346.jpg" data-size="1126x1126"><img loading="lazy" src="http://workshop.l300company.pl/media/posts/6/gallery/20260517_130346-thumbnail.jpg" alt="" width="768" height="768"></a></figure>
</div></div>
<p data-start="4153" data-end="4226"> </p>
            ]]>
        </content>
    </entry>
    <entry>
        <title>Front Headlight Bi-LED Projector Conversion</title>
        <author>
            <name>Piotr</name>
        </author>
        <link href="http://workshop.l300company.pl/front-headlight-bi-led-projector-conversion.html"/>
        <id>http://workshop.l300company.pl/front-headlight-bi-led-projector-conversion.html</id>
        <media:content url="http://workshop.l300company.pl/media/posts/5/20260104_181718.jpg" medium="image" />
            <category term="electrical"/>

        <updated>2026-05-16T00:10:09+02:00</updated>
            <summary>
                <![CDATA[
                        <img src="http://workshop.l300company.pl/media/posts/5/20260104_181718.jpg" alt="" />
                    Factory headlights in the L300 Depending on the model year, the Mitsubishi L300 came with two different front headlight designs.
                ]]>

            </summary>
        <content type="html">
            <![CDATA[
                    <p><img src="http://workshop.l300company.pl/media/posts/5/20260104_181718.jpg" class="type:primaryImage" alt="" /></p>
                <h3 data-section-id="skna6u" data-start="48" data-end="82">Factory headlights in the L300</h3>
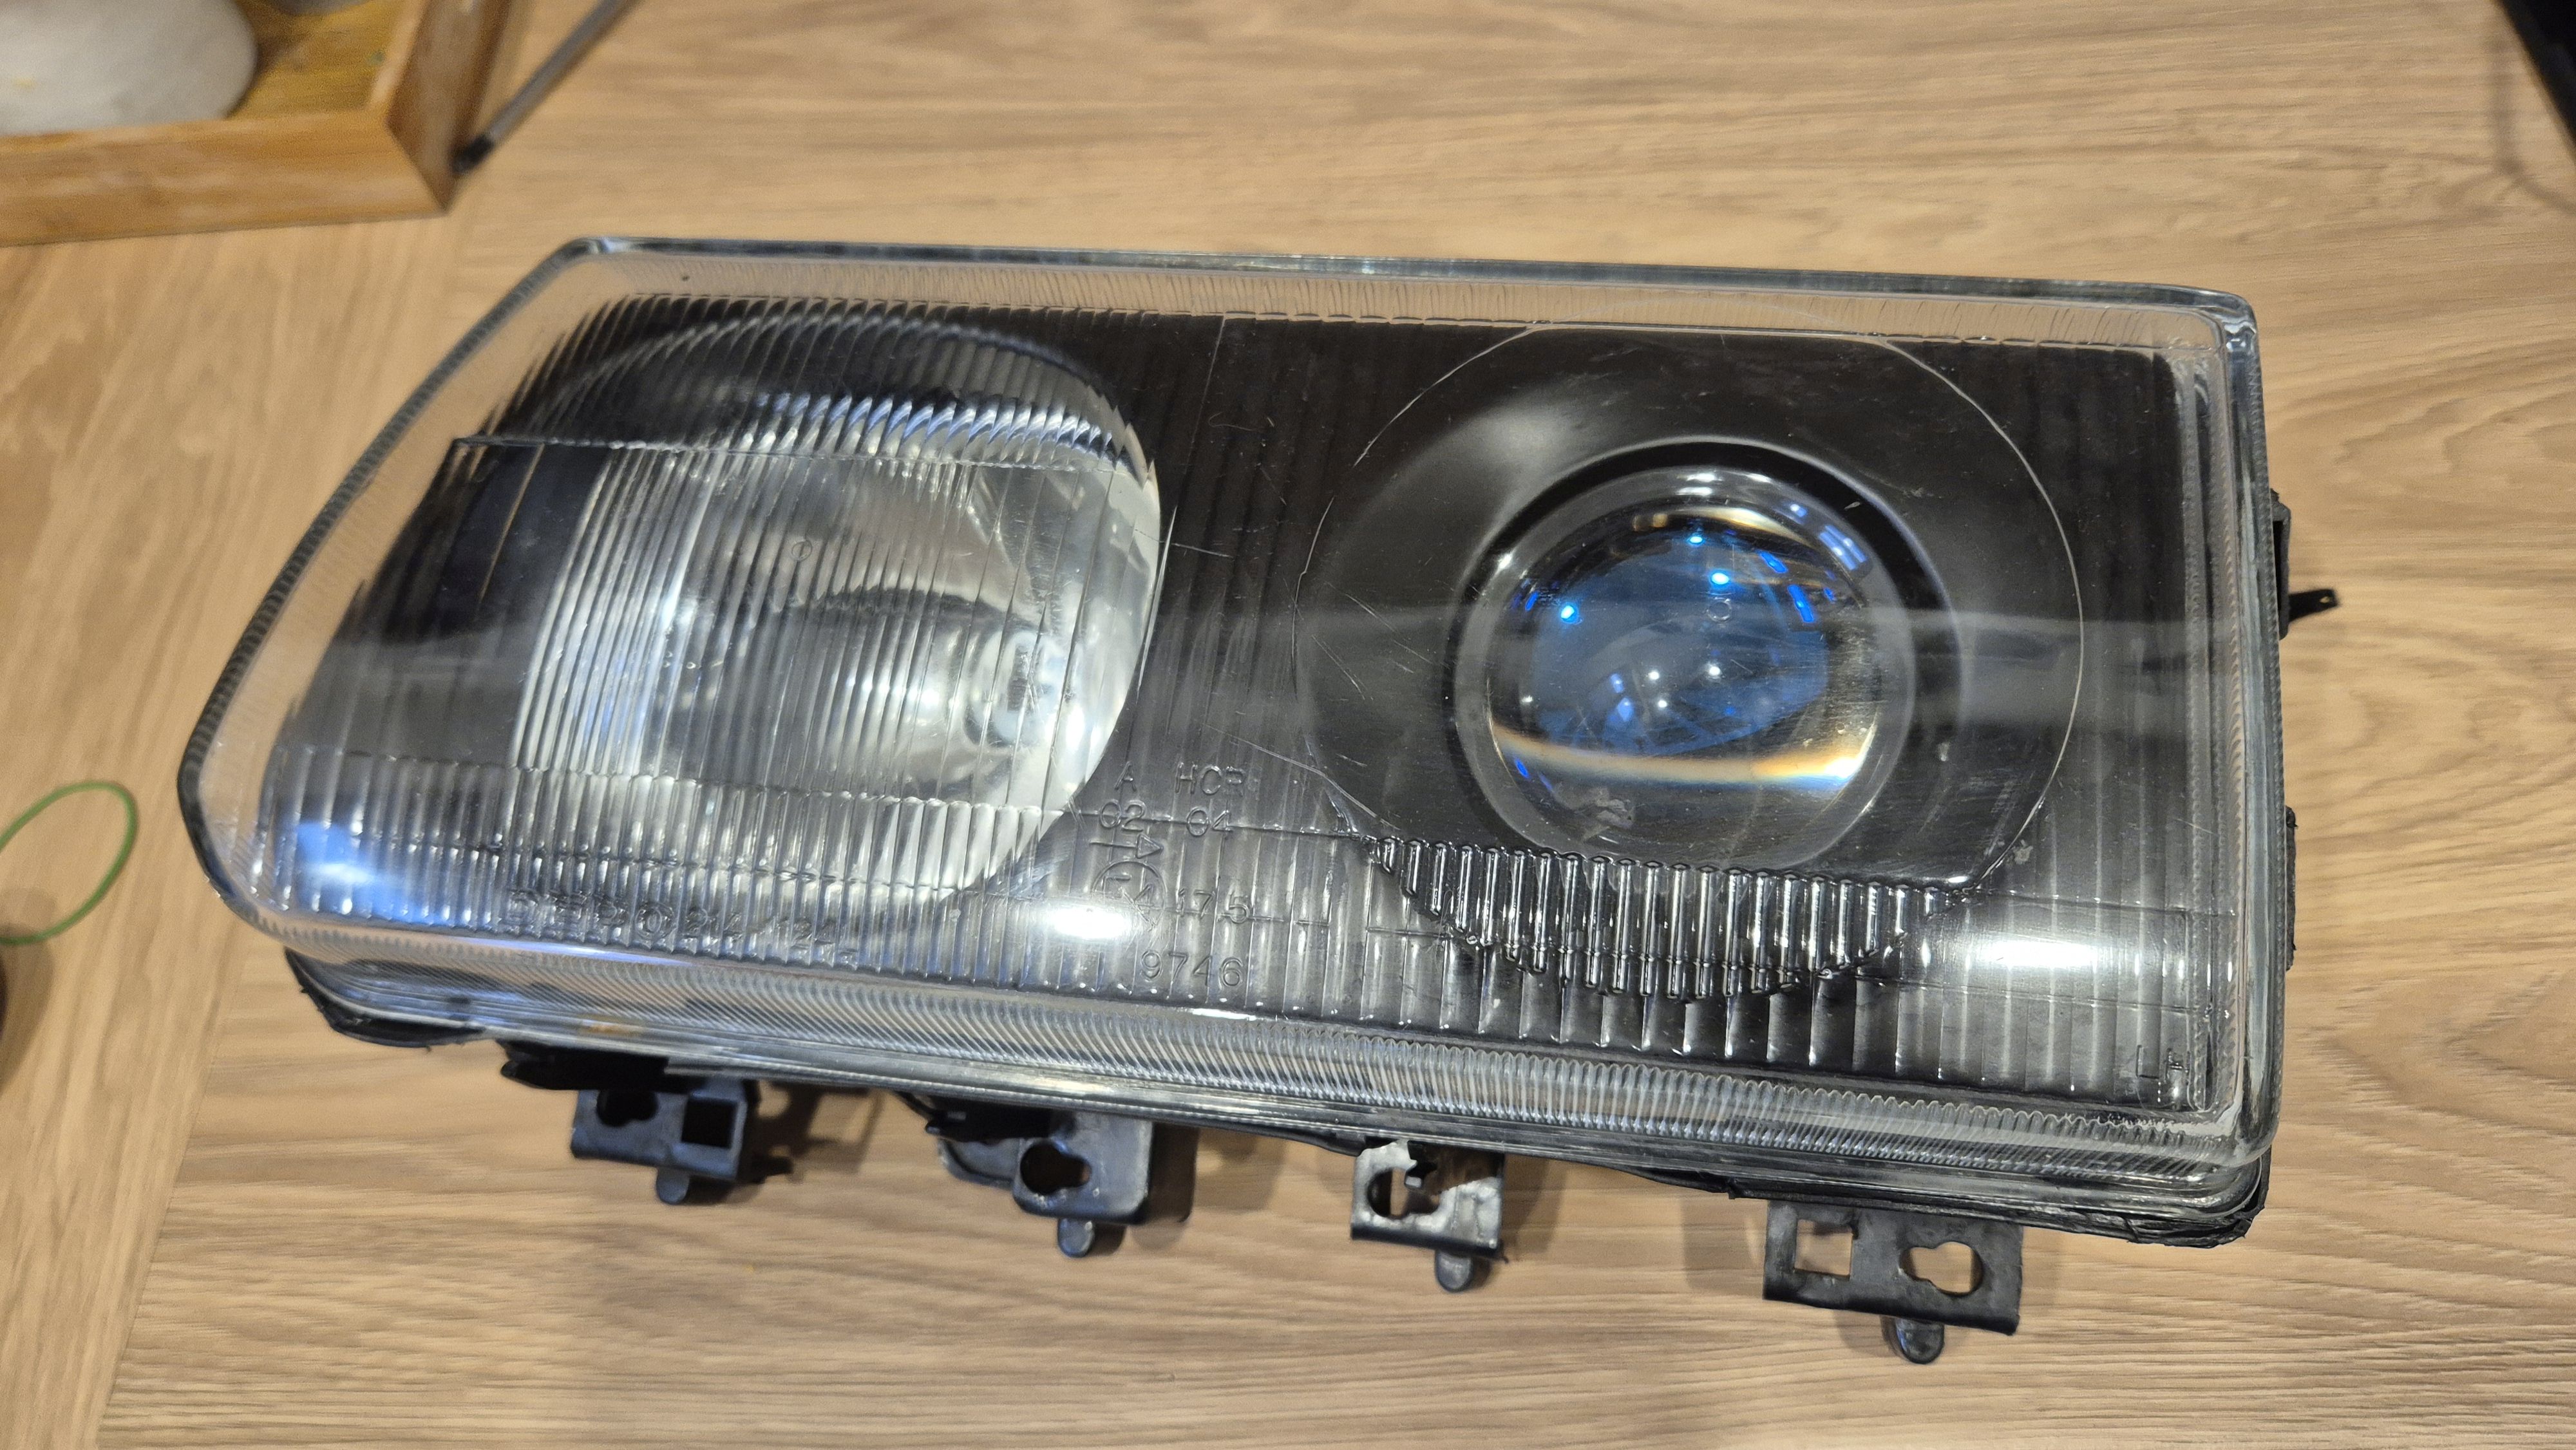
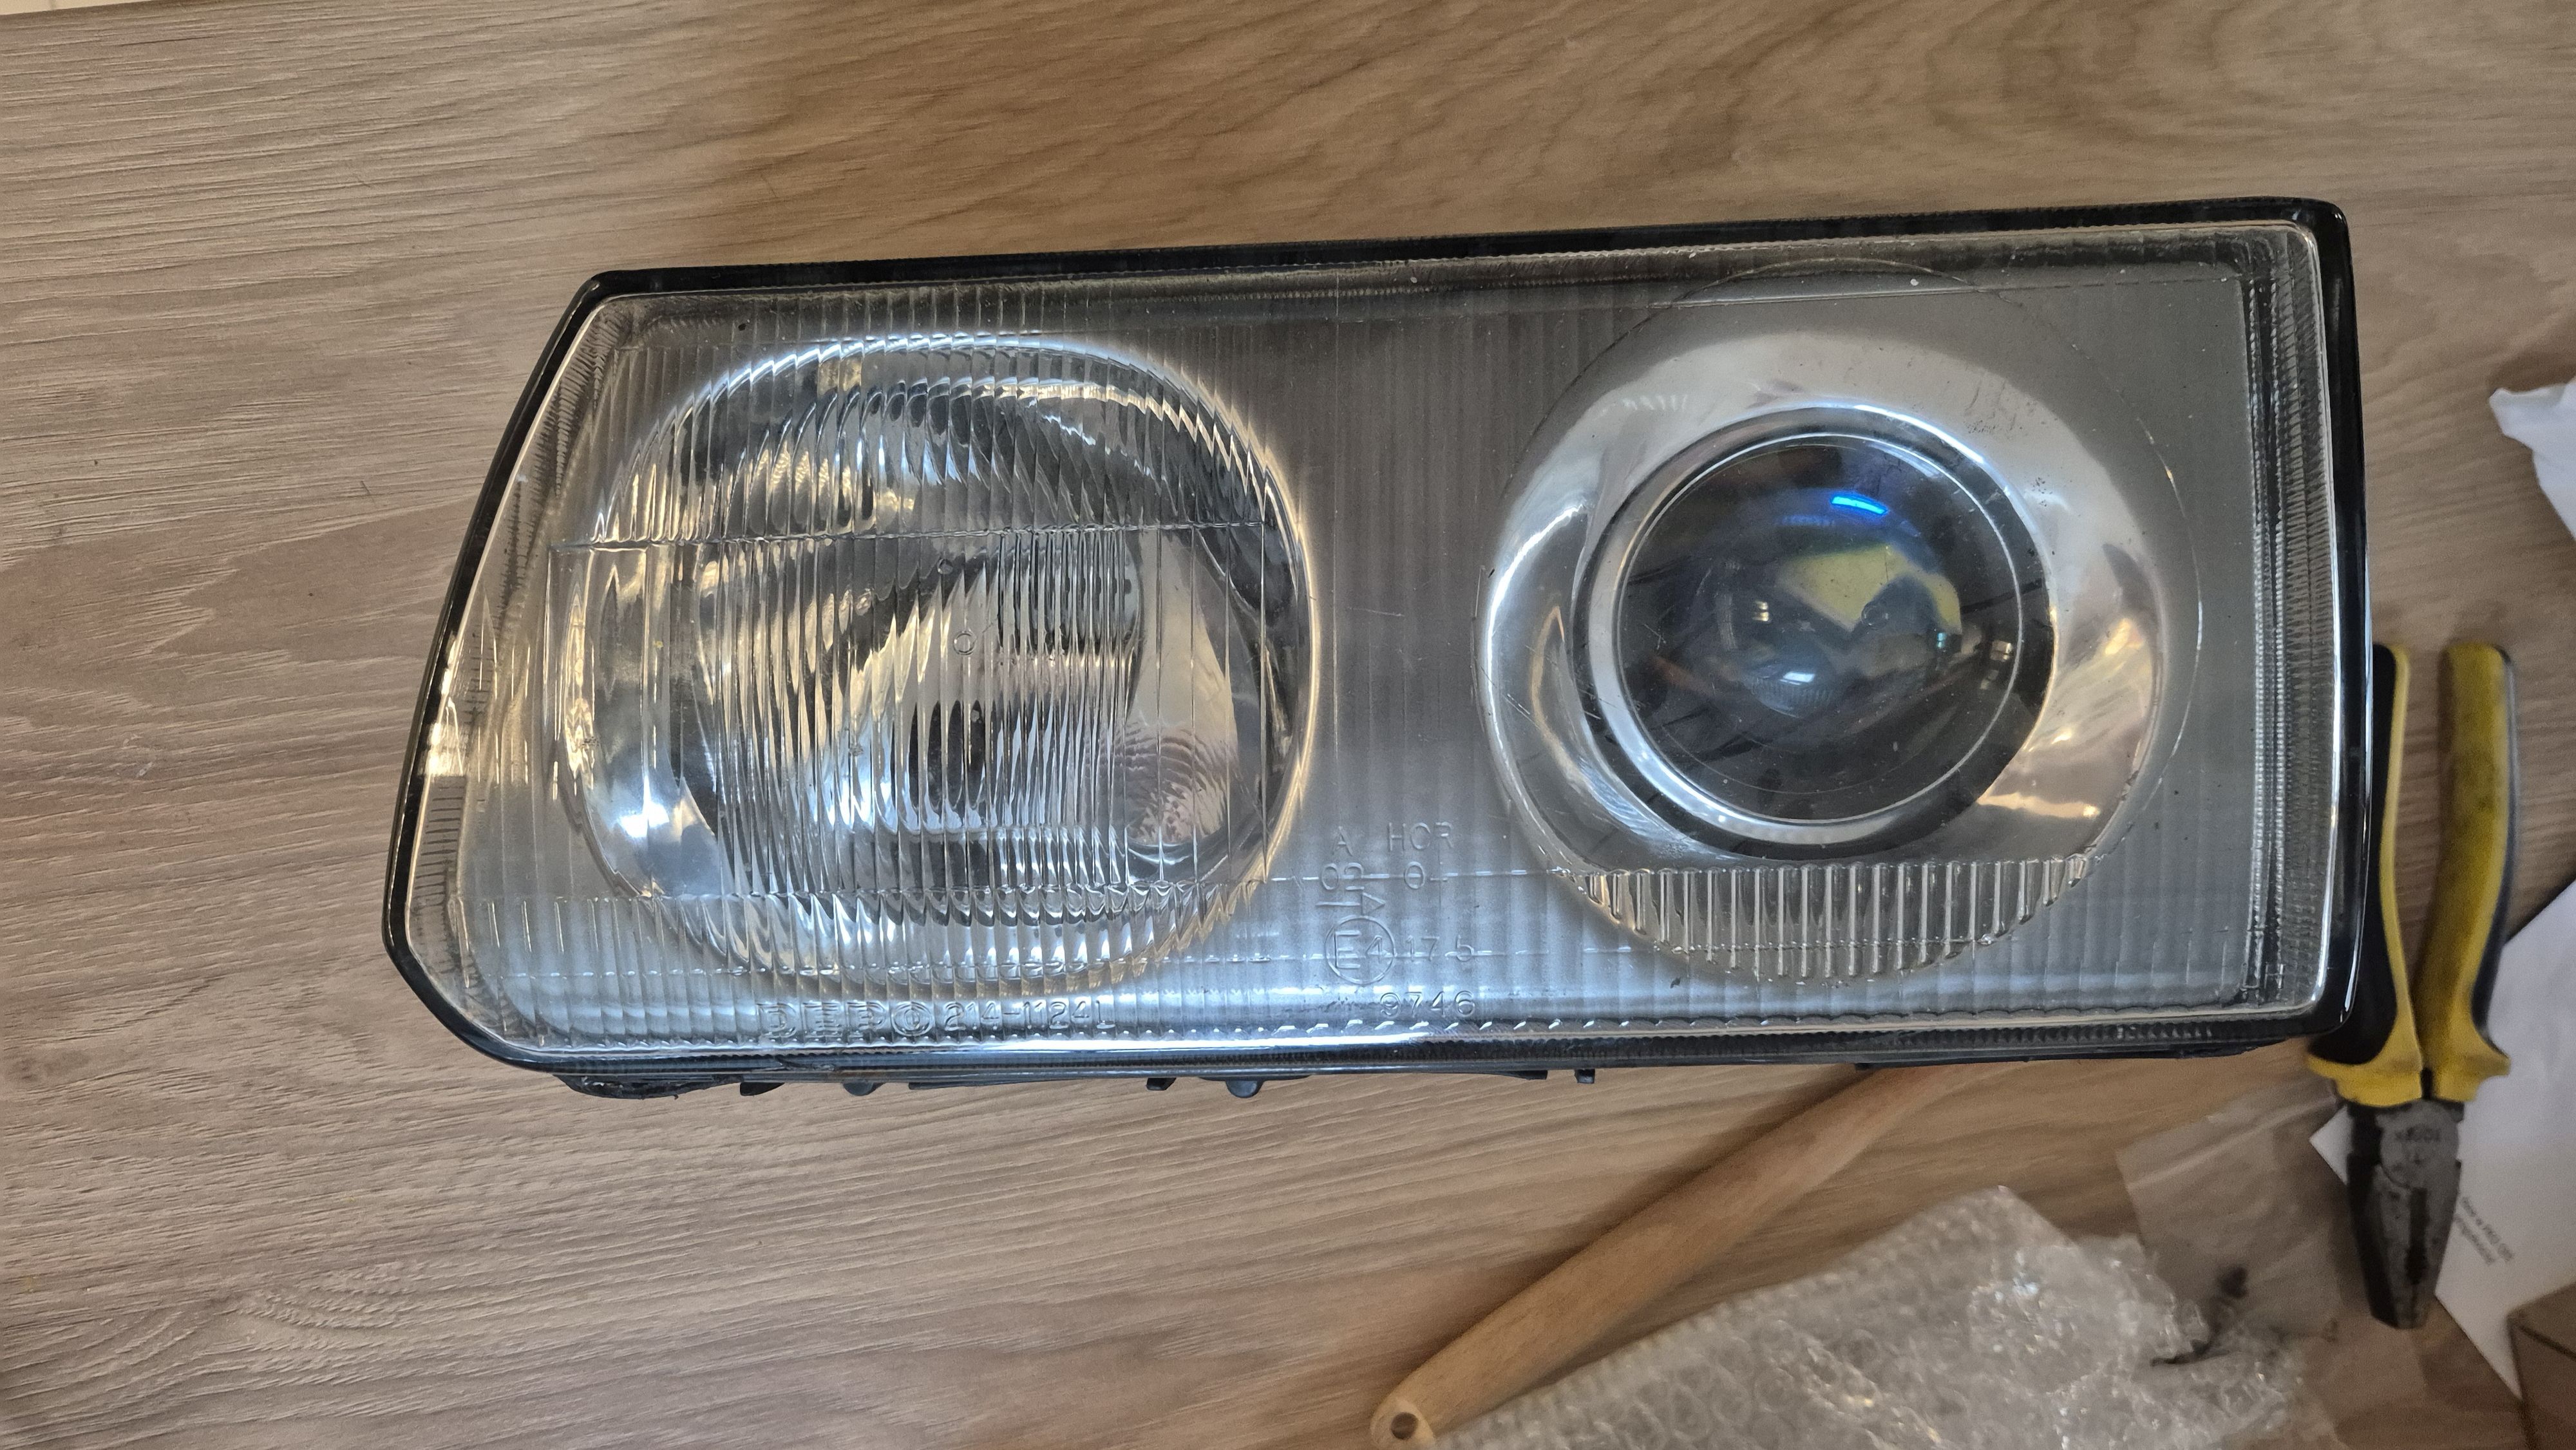
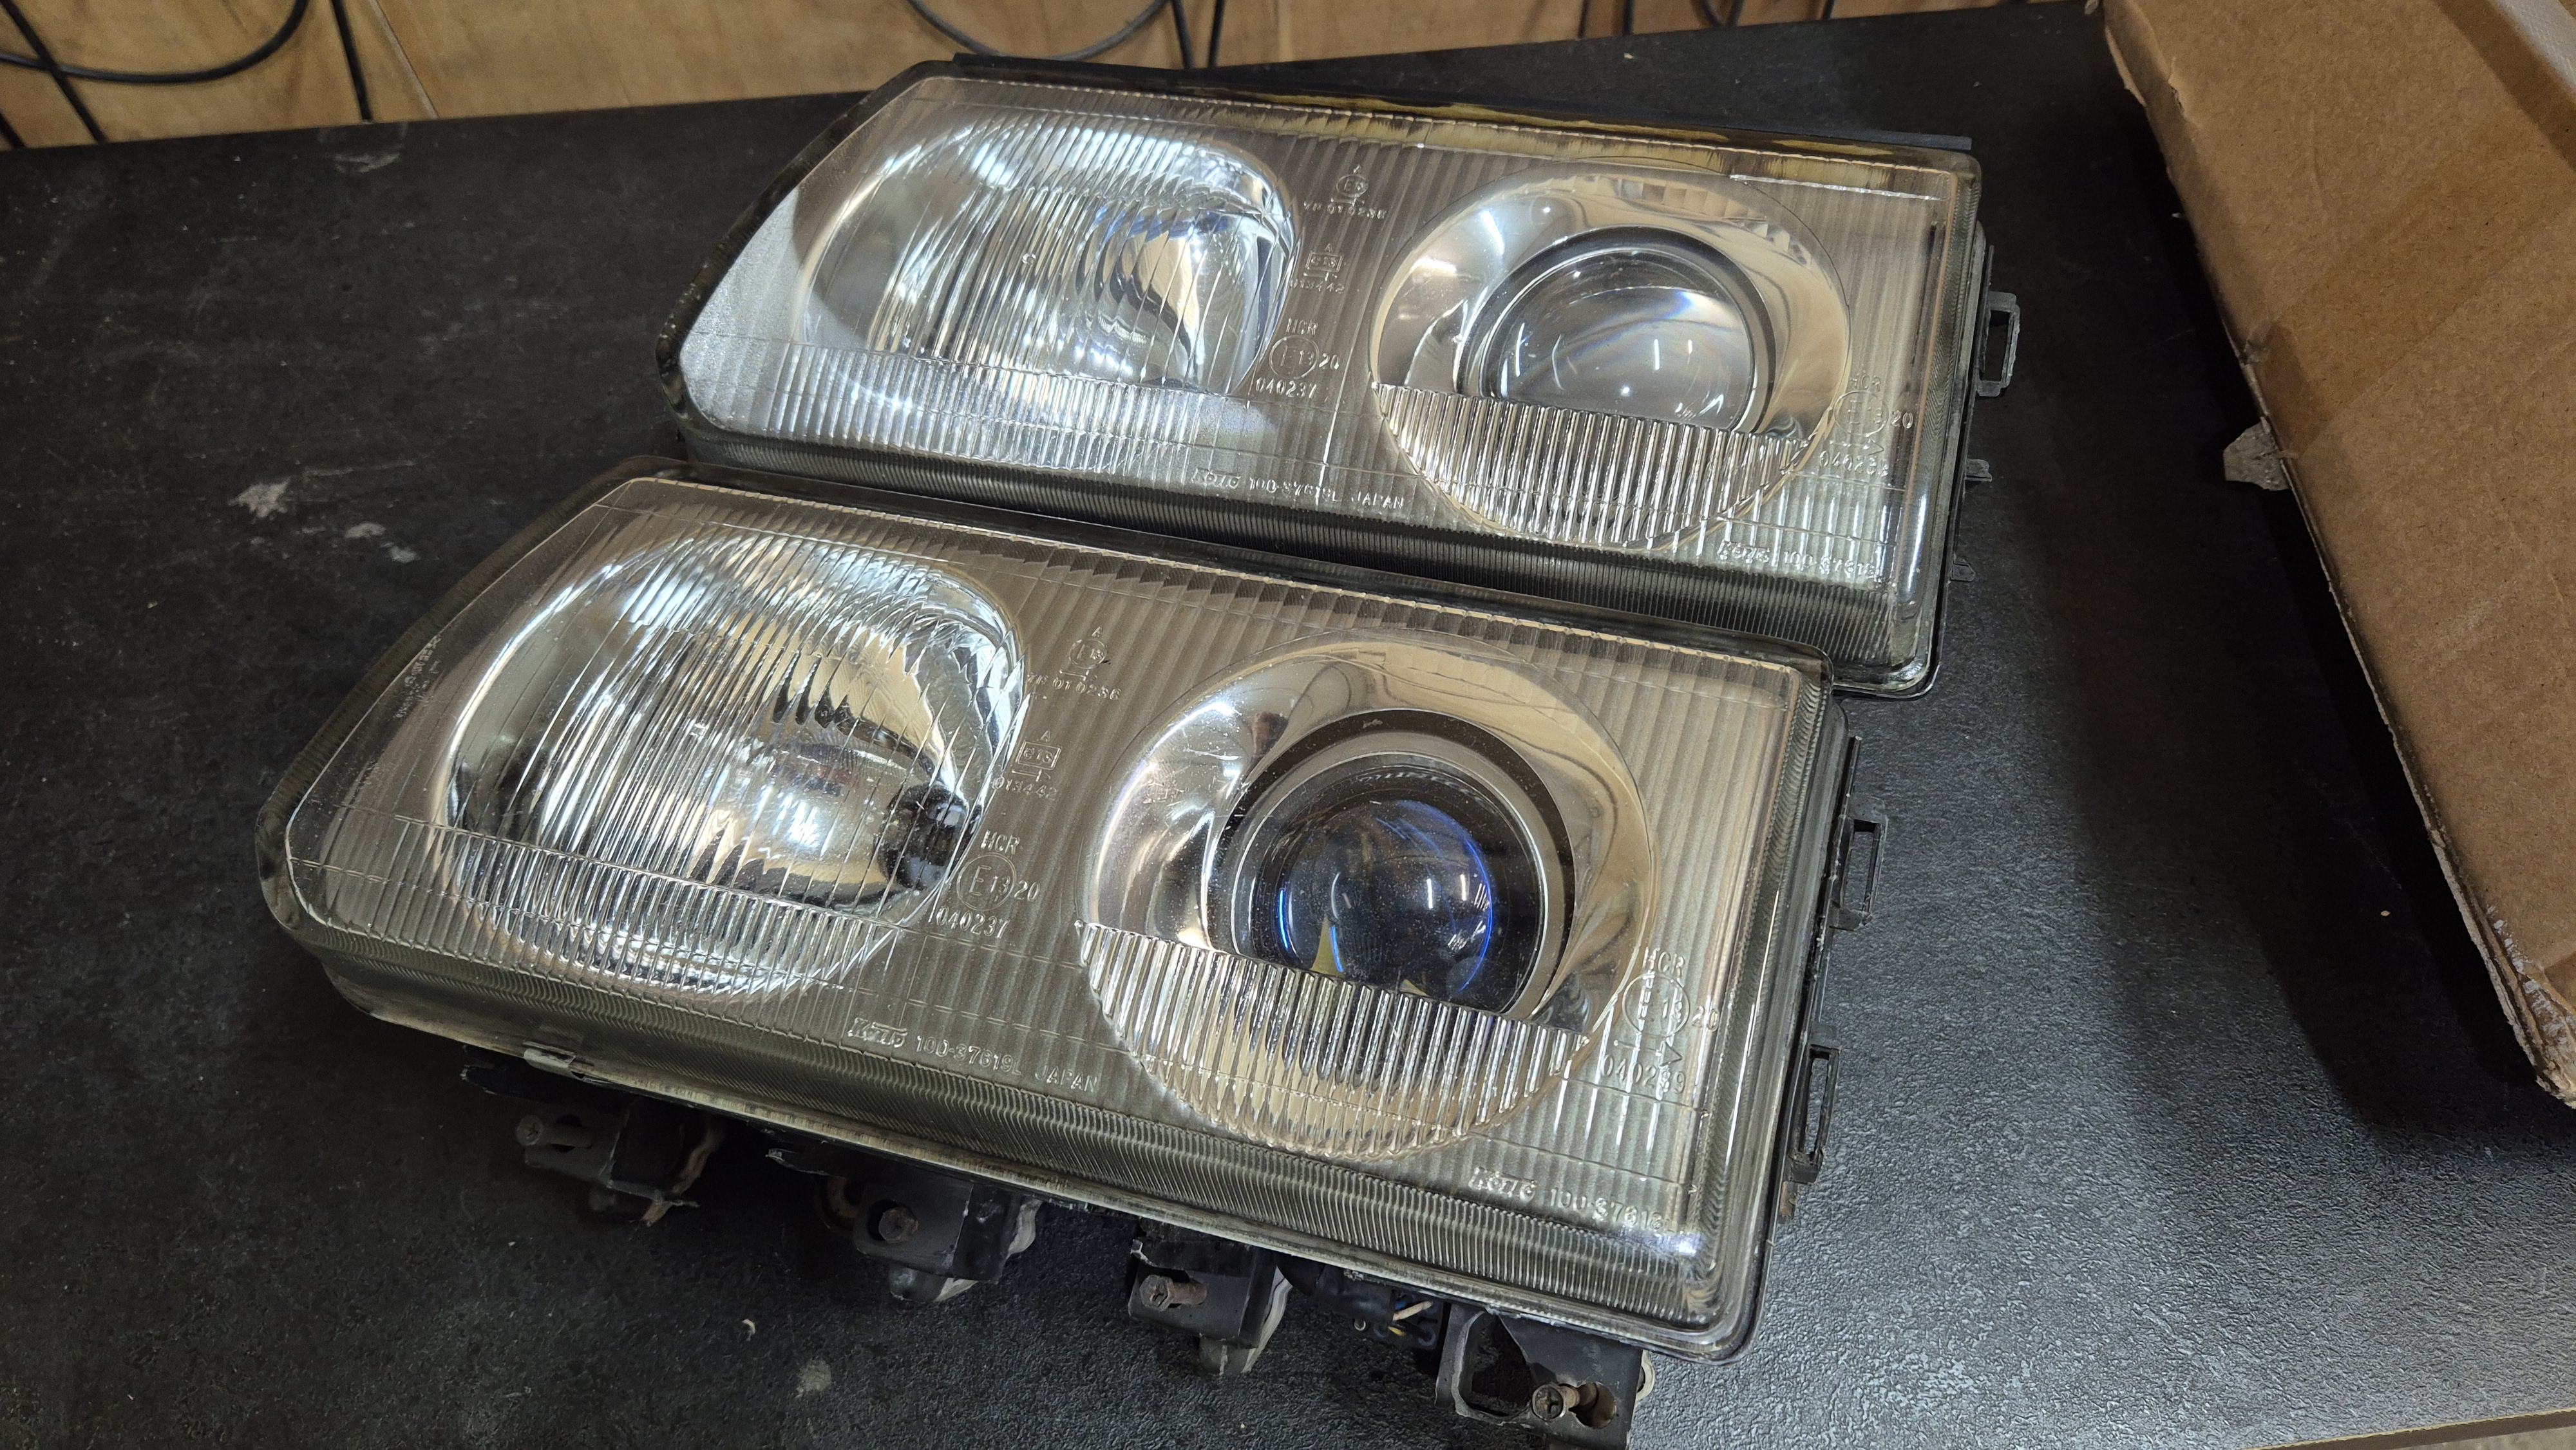
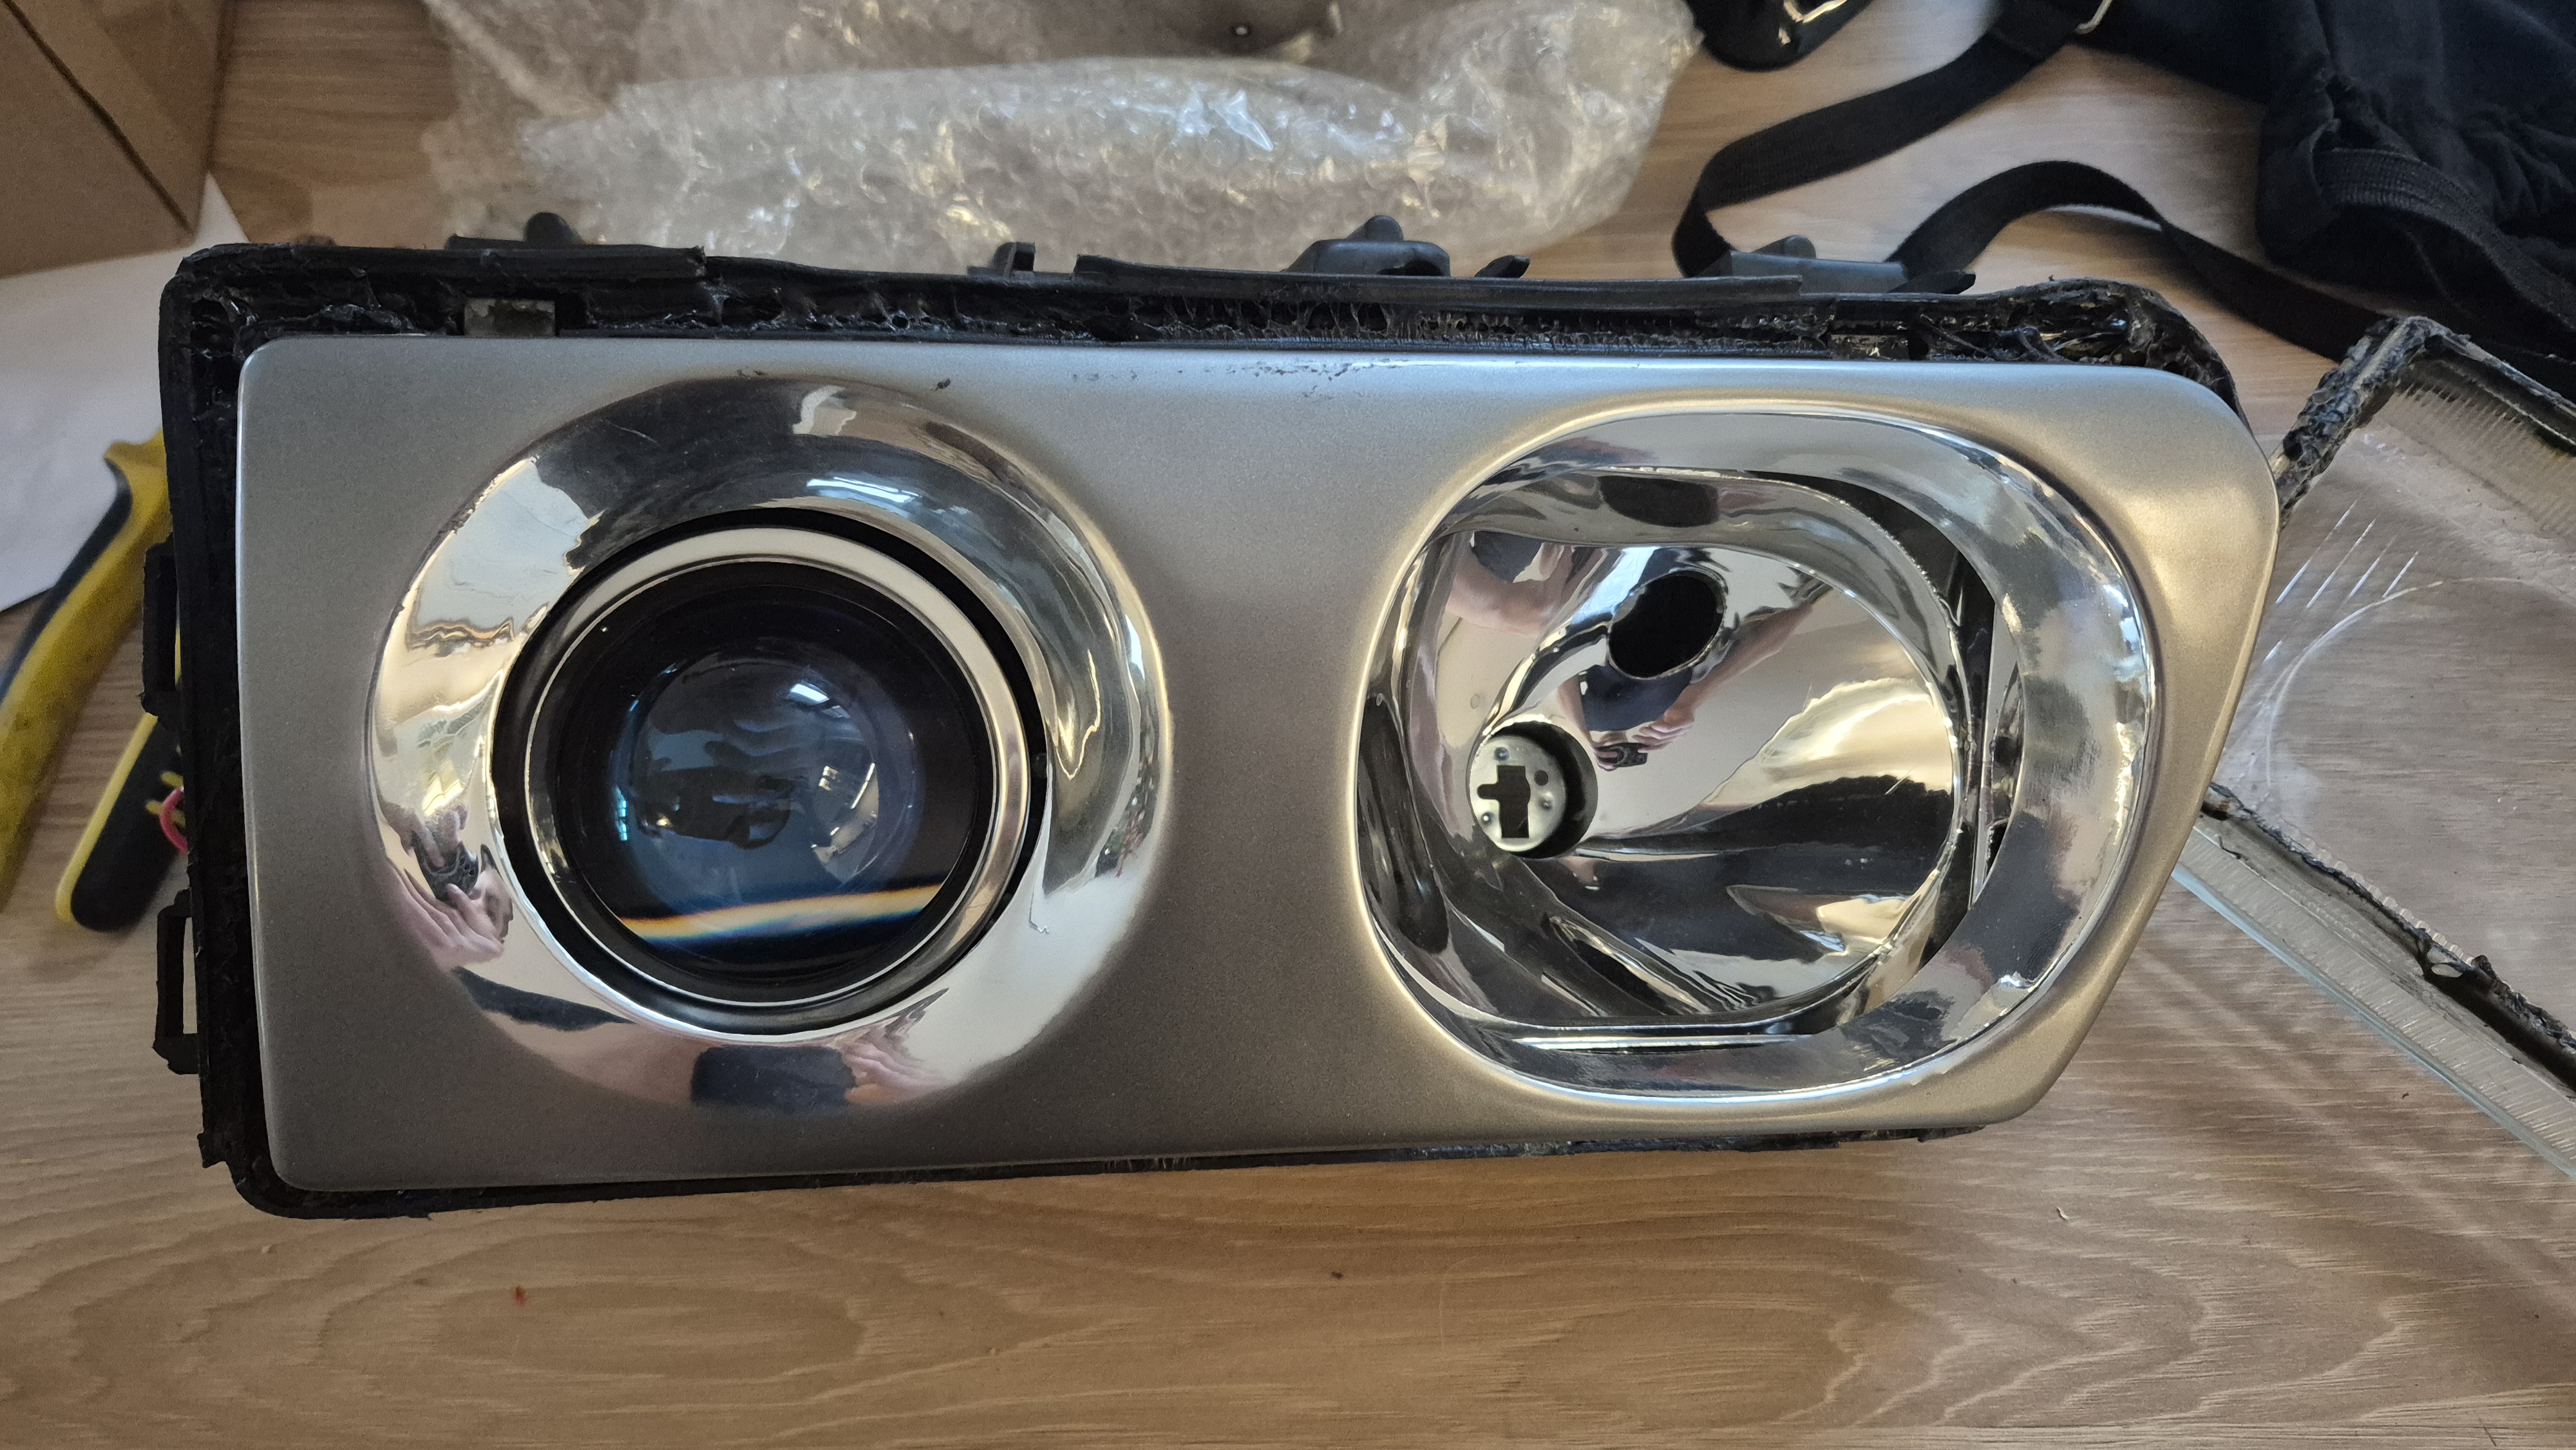
<p data-start="84" data-end="379">Depending on the model year, the Mitsubishi L300 came with two different front headlight designs. Early versions used simple square headlights with regular bulbs, while later models got a more modern combined headlight with a projector lens for low beam and a separate reflector for high beam.</p>
<p data-start="381" data-end="779">What’s interesting is that even after more than 30 years, the factory headlights are still surprisingly well made. Real glass lenses, solid metal reflectors and decent projector housings — back then things were built properly. Even today the original lights still perform reasonably well. But lighting technology has moved forward massively, and modern LED projectors are simply on another level.</p>
<figure class="post__image"><img loading="lazy"  src="http://workshop.l300company.pl/media/posts/5/20251221_235756.jpg" alt="" width="4000" height="2252" sizes="(min-width: 37.5em) 1600px, 80vw" srcset="http://workshop.l300company.pl/media/posts/5/responsive/20251221_235756-xs.jpg 384w ,http://workshop.l300company.pl/media/posts/5/responsive/20251221_235756-sm.jpg 600w ,http://workshop.l300company.pl/media/posts/5/responsive/20251221_235756-md.jpg 768w ,http://workshop.l300company.pl/media/posts/5/responsive/20251221_235756-lg.jpg 1200w ,http://workshop.l300company.pl/media/posts/5/responsive/20251221_235756-xl.jpg 1600w"></figure>
<hr data-start="781" data-end="784">
<h3 data-section-id="1hek2gj" data-start="786" data-end="818">If you want to copy this setup, the full parts list is included near the end of the article.</h3>
<hr data-start="781" data-end="784">
<h3 data-section-id="1hek2gj" data-start="786" data-end="818">Main goals of the conversion</h3>
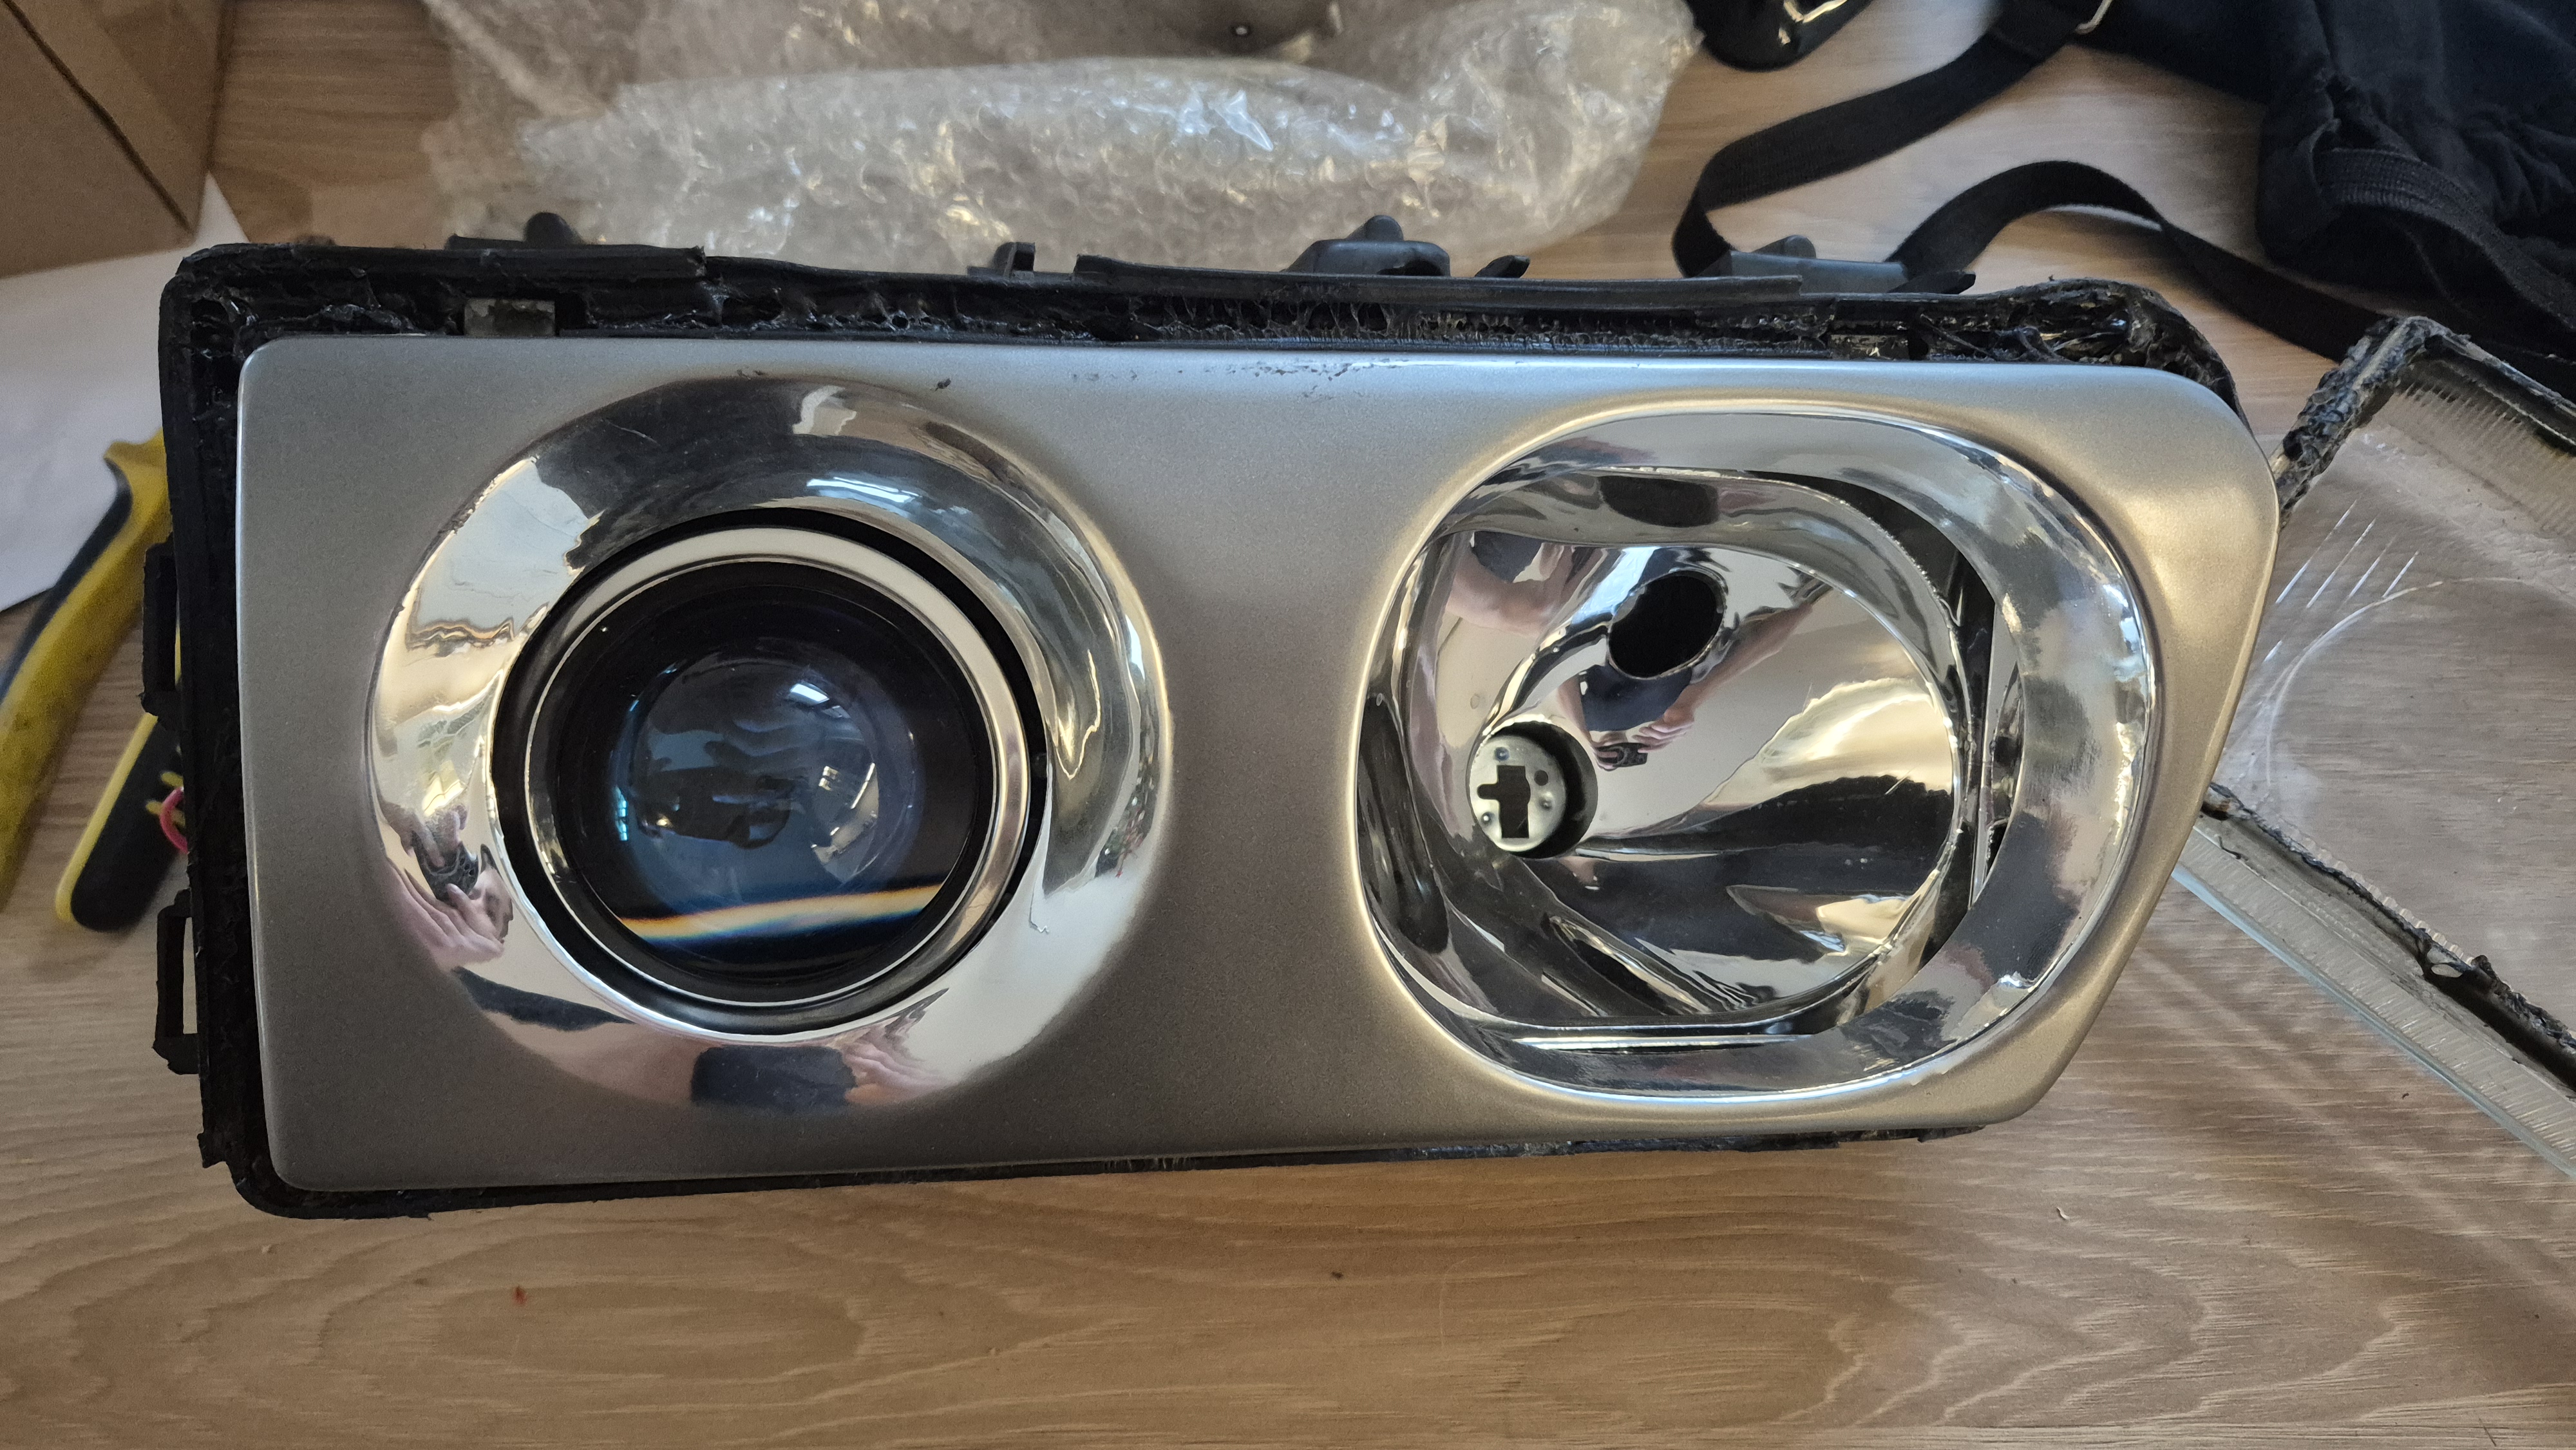
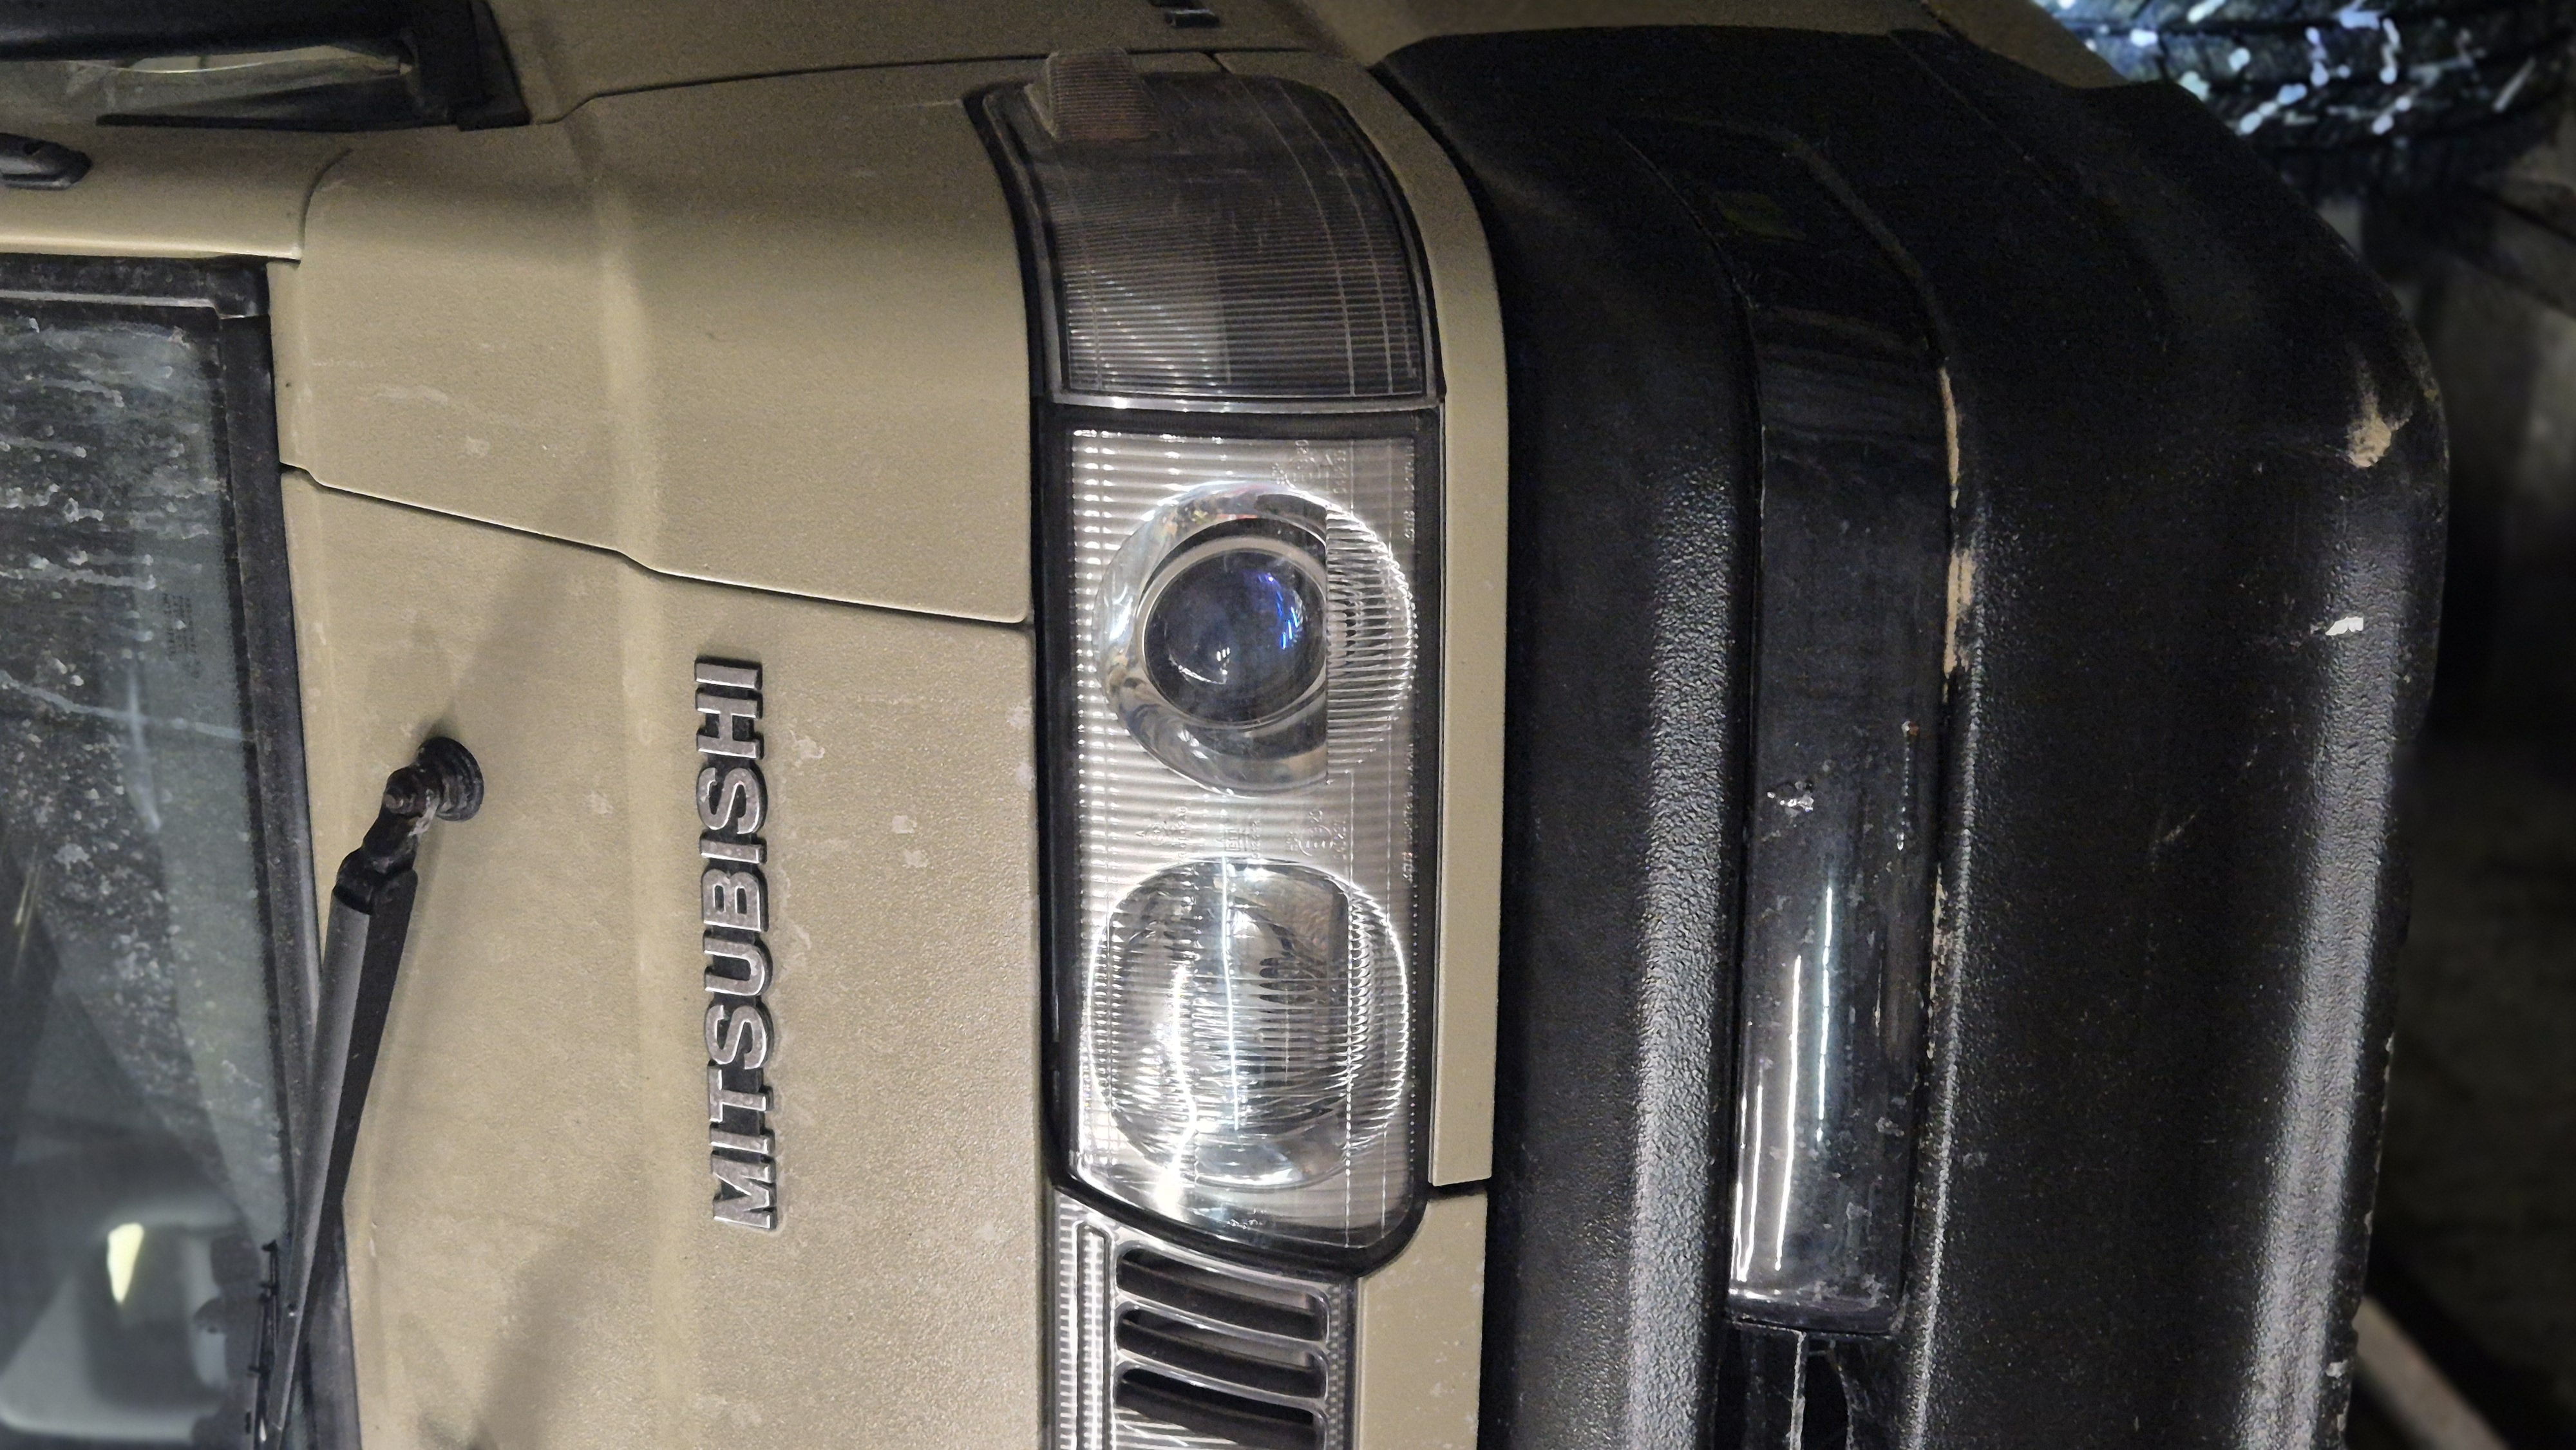
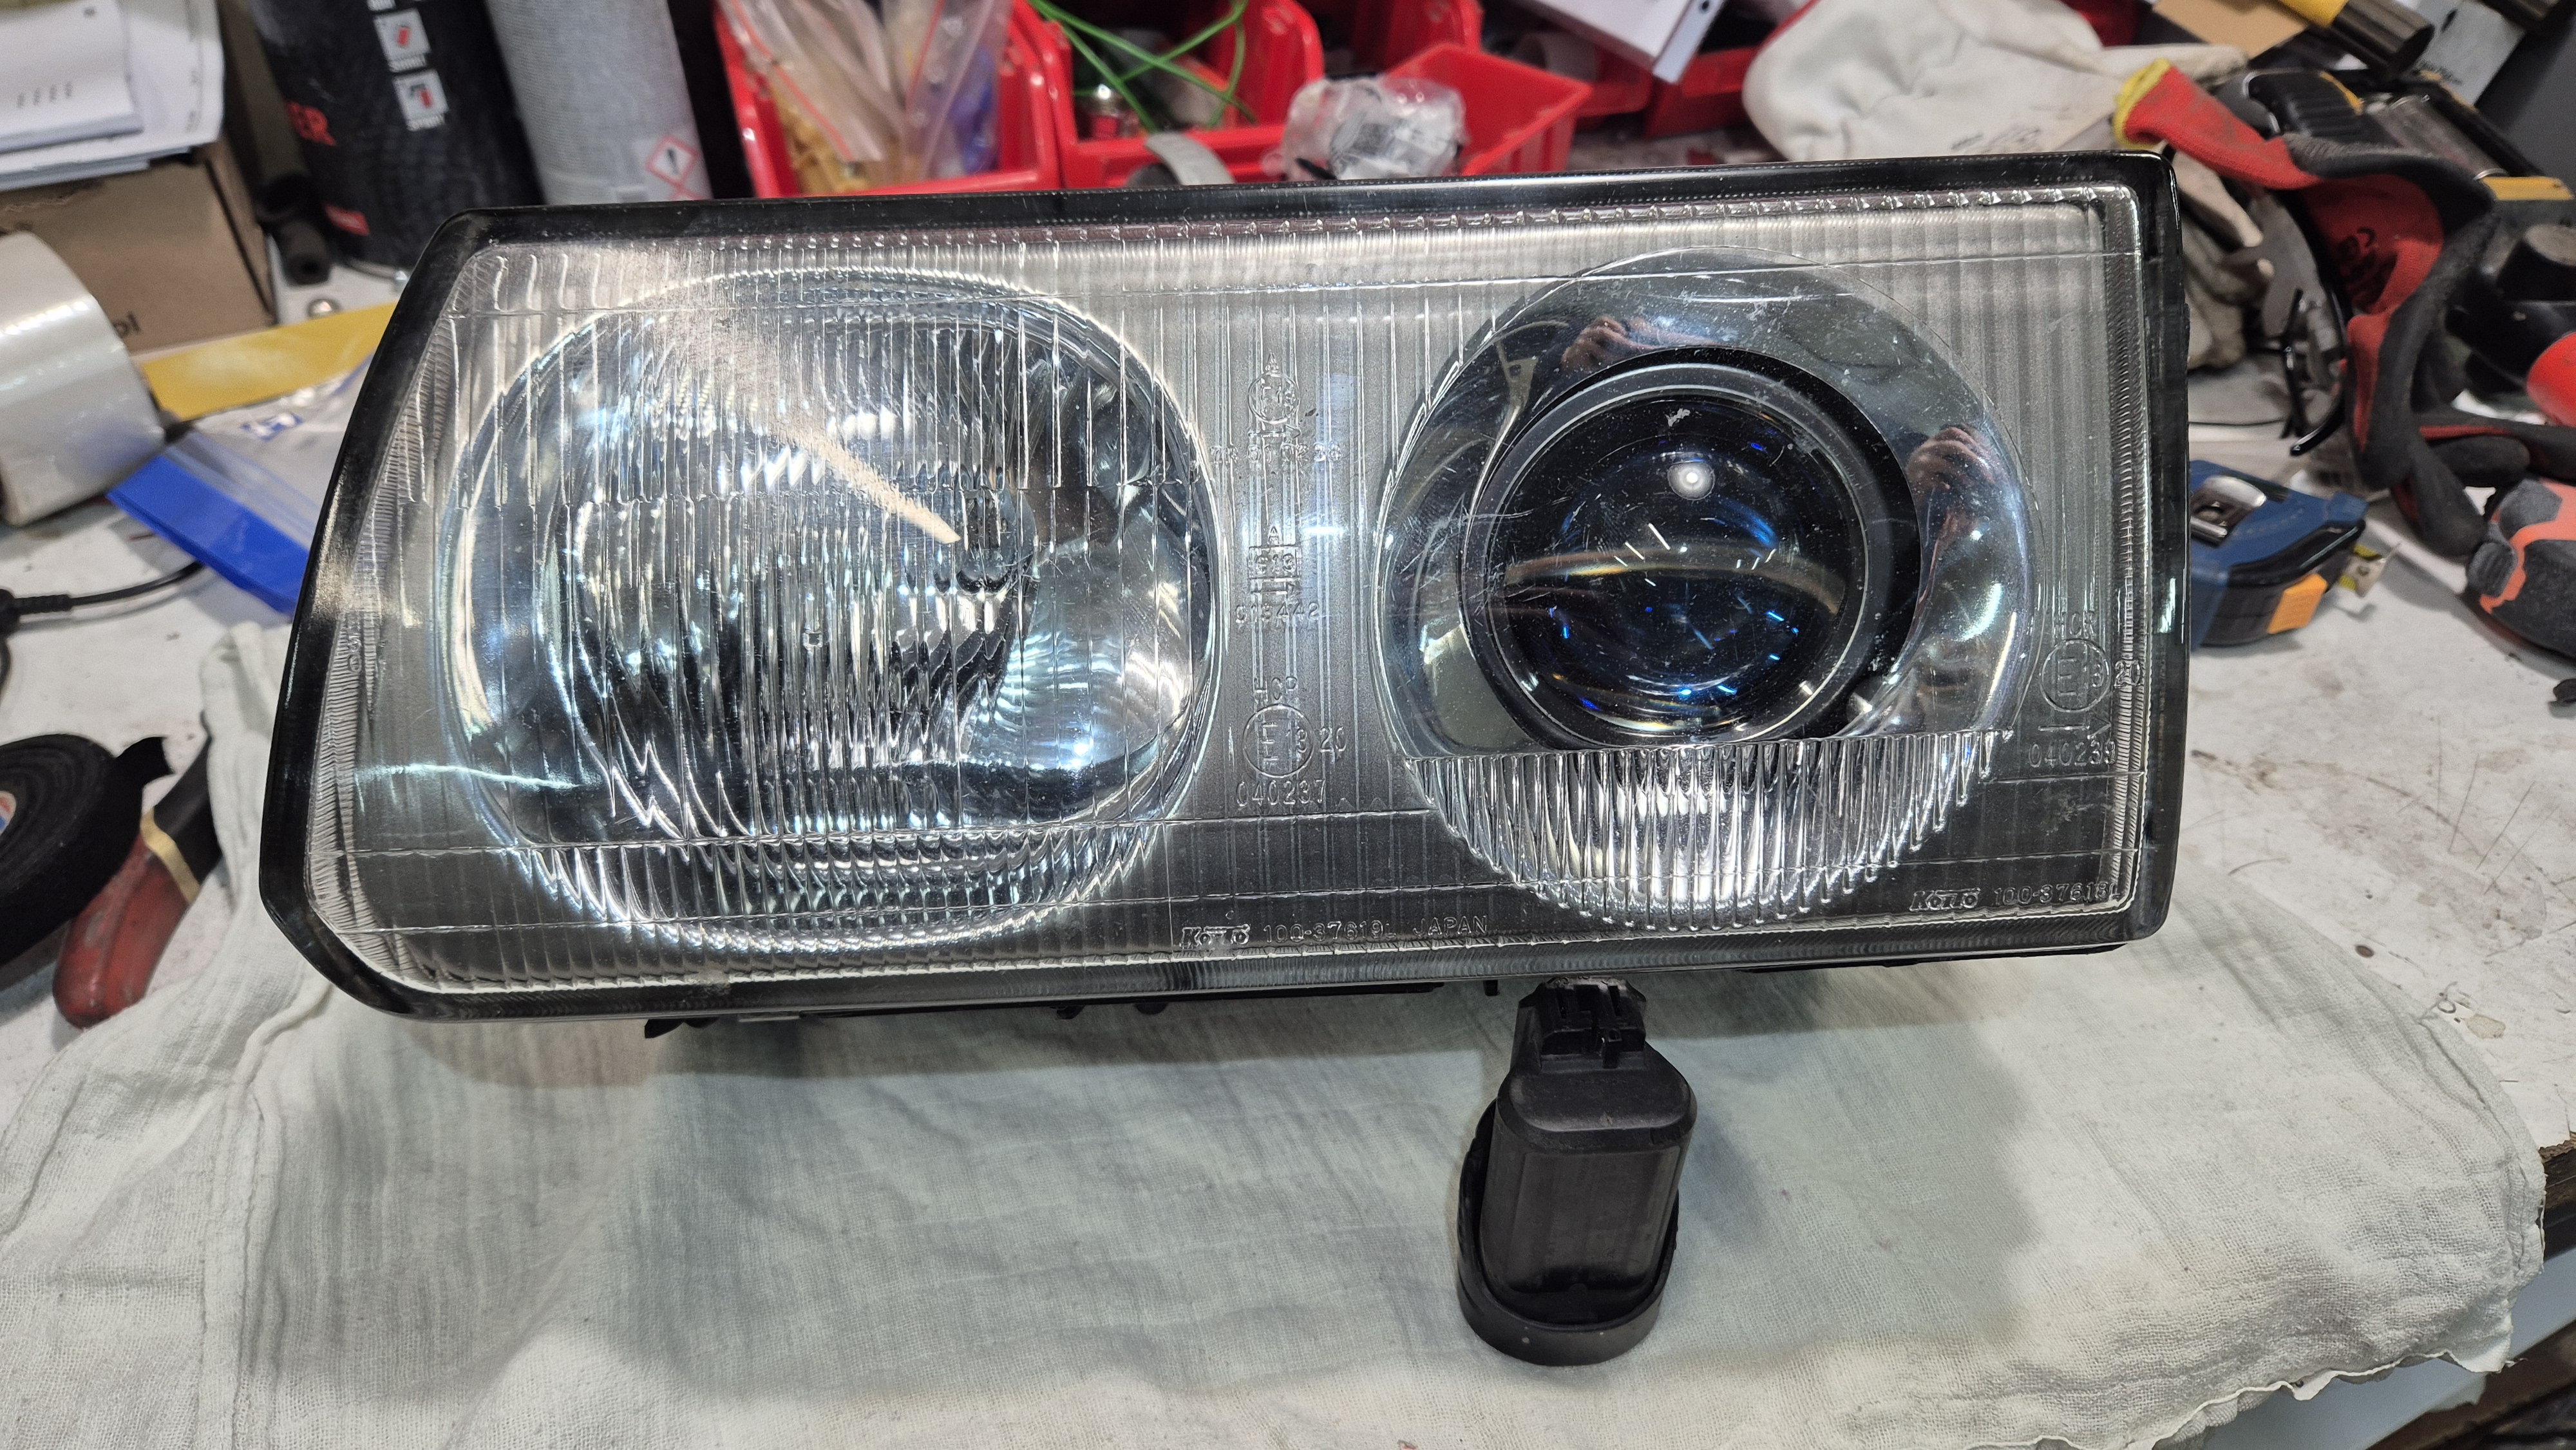
<p data-start="820" data-end="956">Like with most modifications on this build, the main goal was to keep everything fully reversible and avoid destroying original parts.</p>
<p data-start="958" data-end="985">The priorities were simple:</p>
<ul data-start="987" data-end="1224">
<li data-section-id="1o2hjiv" data-start="987" data-end="1019">fully reversible modification,</li>
<li data-section-id="1eaufln" data-start="1020" data-end="1049">keep all factory functions,</li>
<li data-section-id="1kmn863" data-start="1050" data-end="1105">retain both manual and electric headlight adjustment,</li>
<li data-section-id="7uj4c6" data-start="1106" data-end="1156">keep the original factory look from the outside,</li>
<li data-section-id="1953edm" data-start="1157" data-end="1224">projector stays in exactly the same position as the factory lens.</li>
</ul>
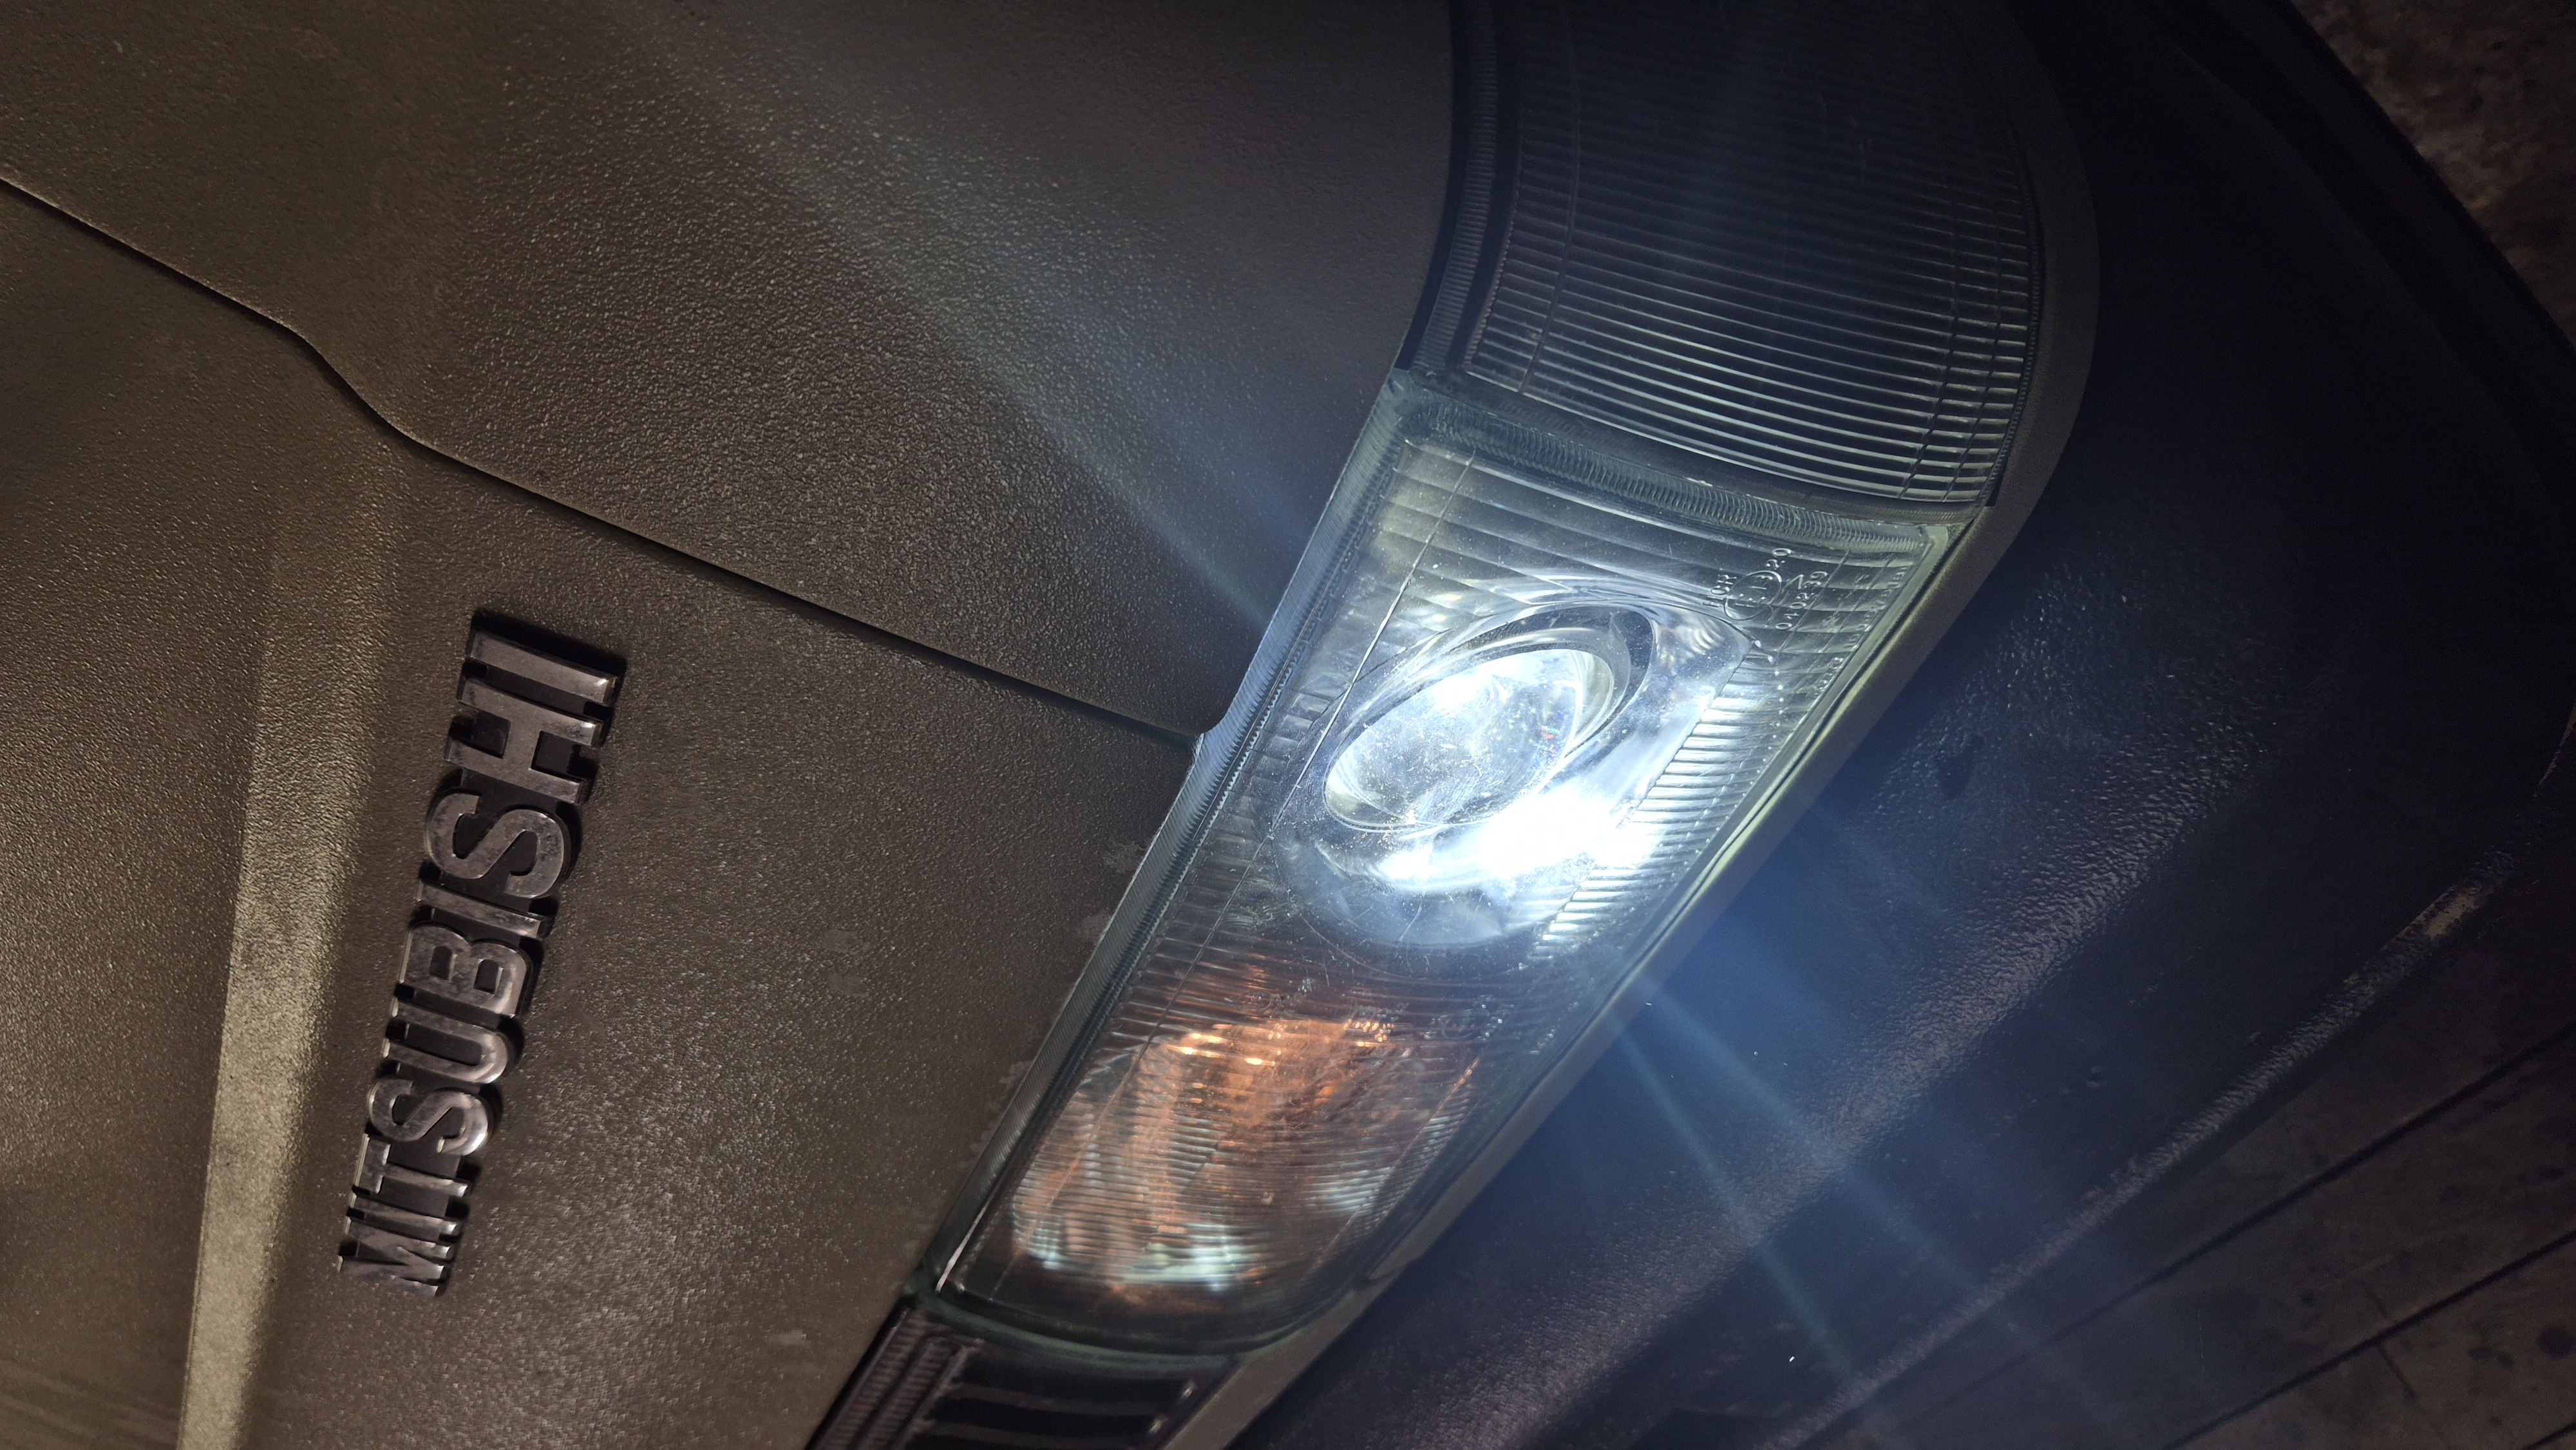
<figure class="post__image">From the outside, it’s honestly very difficult to notice that anything has been modified. The whole thing still looks almost factory unless you know exactly what to look for.<br><img loading="lazy"  src="http://workshop.l300company.pl/media/posts/5/20260104_171155.jpg" alt="" width="4000" height="2252" sizes="(min-width: 37.5em) 1600px, 80vw" srcset="http://workshop.l300company.pl/media/posts/5/responsive/20260104_171155-xs.jpg 384w ,http://workshop.l300company.pl/media/posts/5/responsive/20260104_171155-sm.jpg 600w ,http://workshop.l300company.pl/media/posts/5/responsive/20260104_171155-md.jpg 768w ,http://workshop.l300company.pl/media/posts/5/responsive/20260104_171155-lg.jpg 1200w ,http://workshop.l300company.pl/media/posts/5/responsive/20260104_171155-xl.jpg 1600w"></figure>
<hr data-start="1404" data-end="1407">
<h3 data-section-id="1x7p32m" data-start="1409" data-end="1435">Opening the headlights</h3>
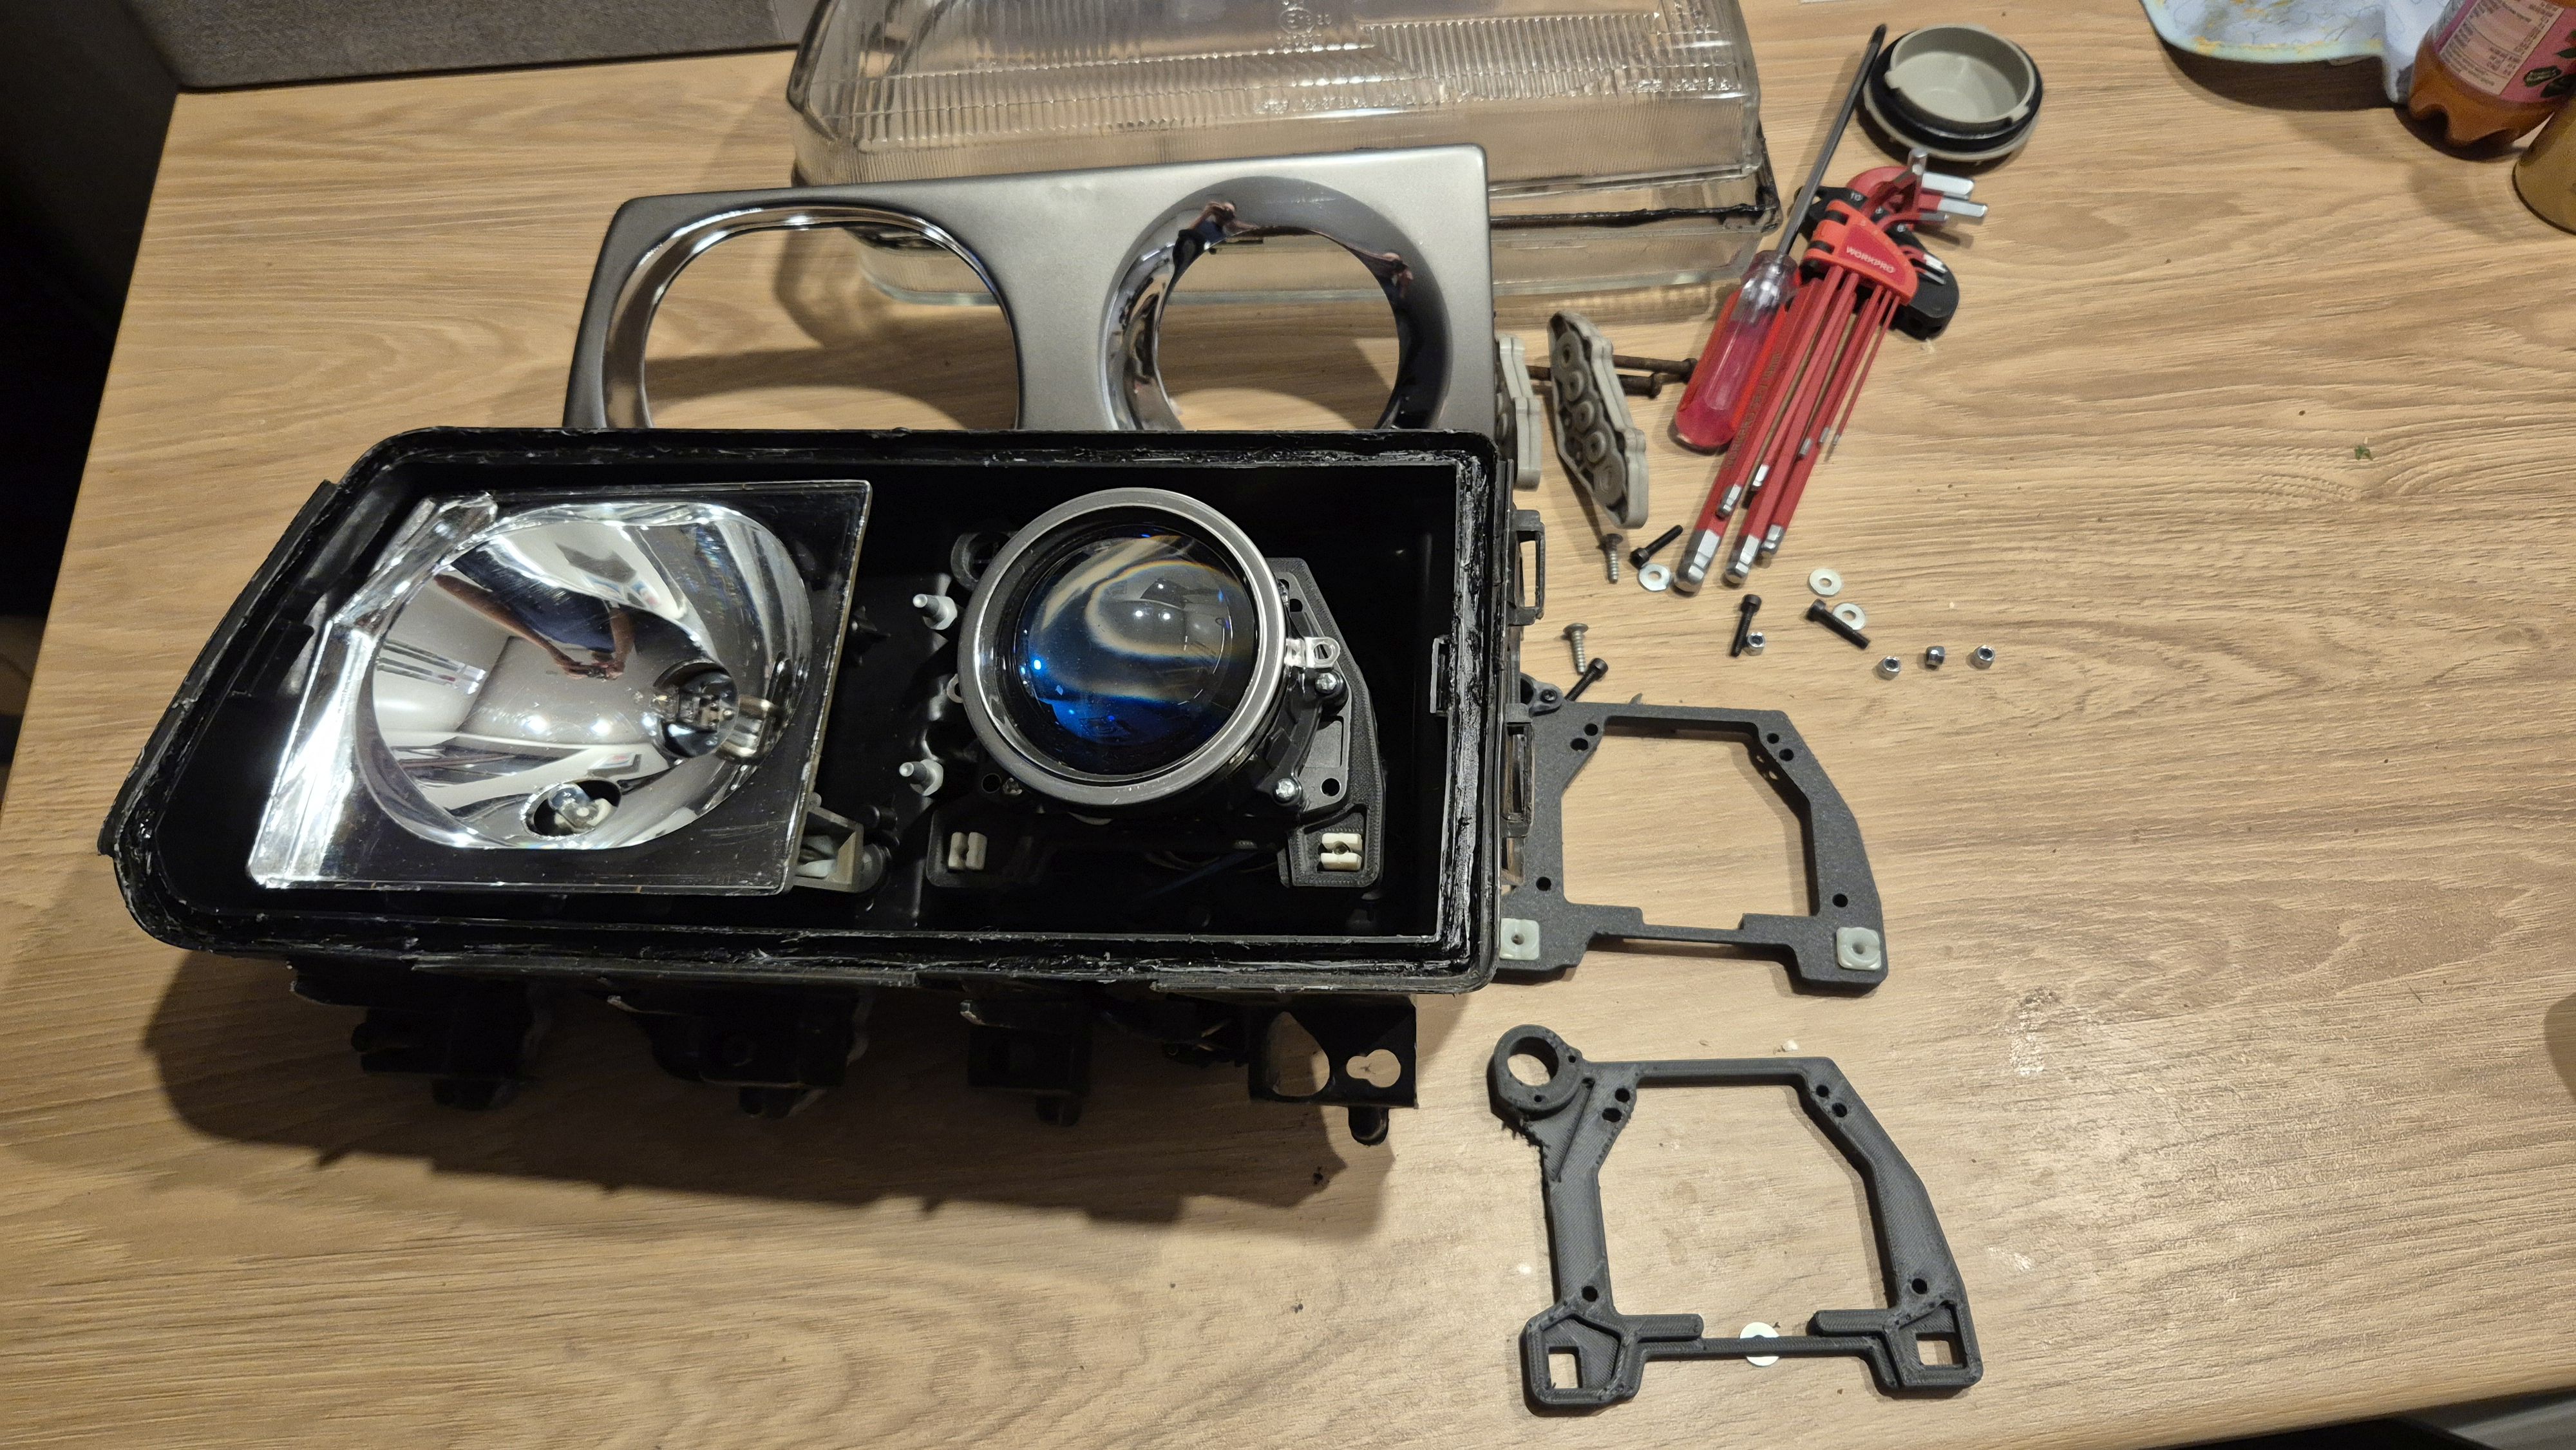
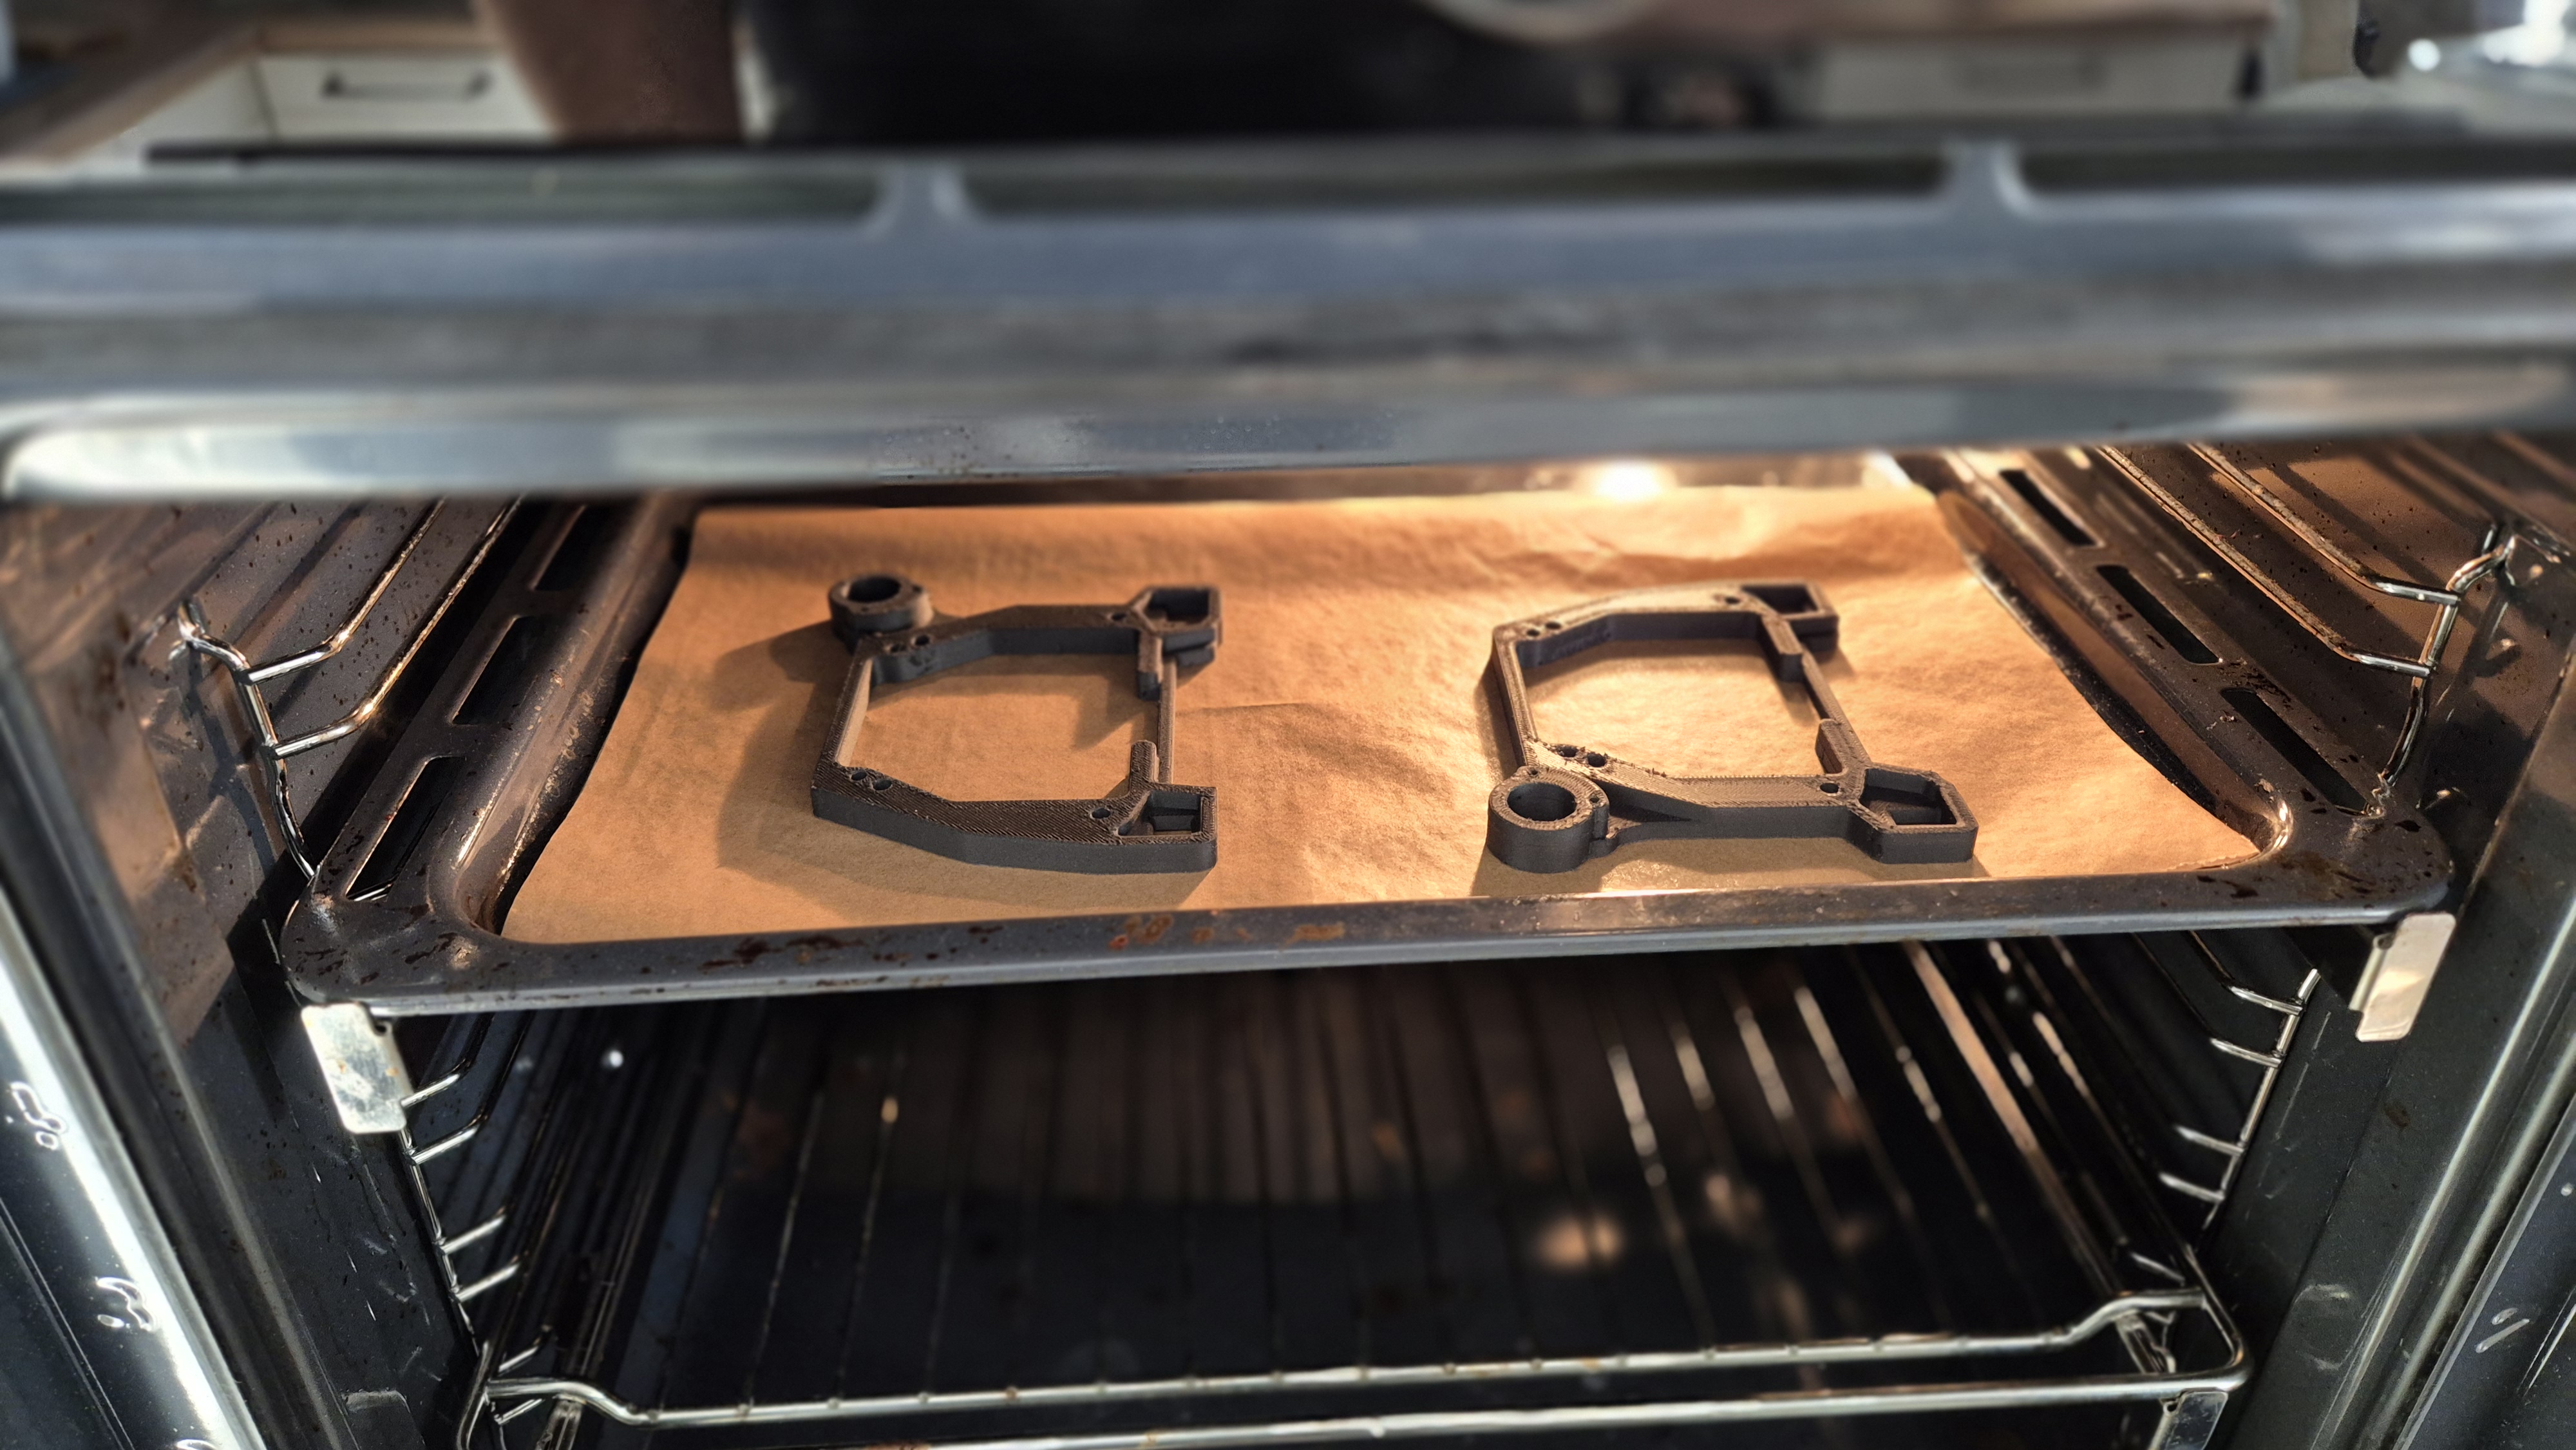
<p data-start="1437" data-end="1622">The original headlights had to be completely disassembled first. Since the lenses are real glass and the housings are properly sealed, opening them without damage takes some patience.</p>
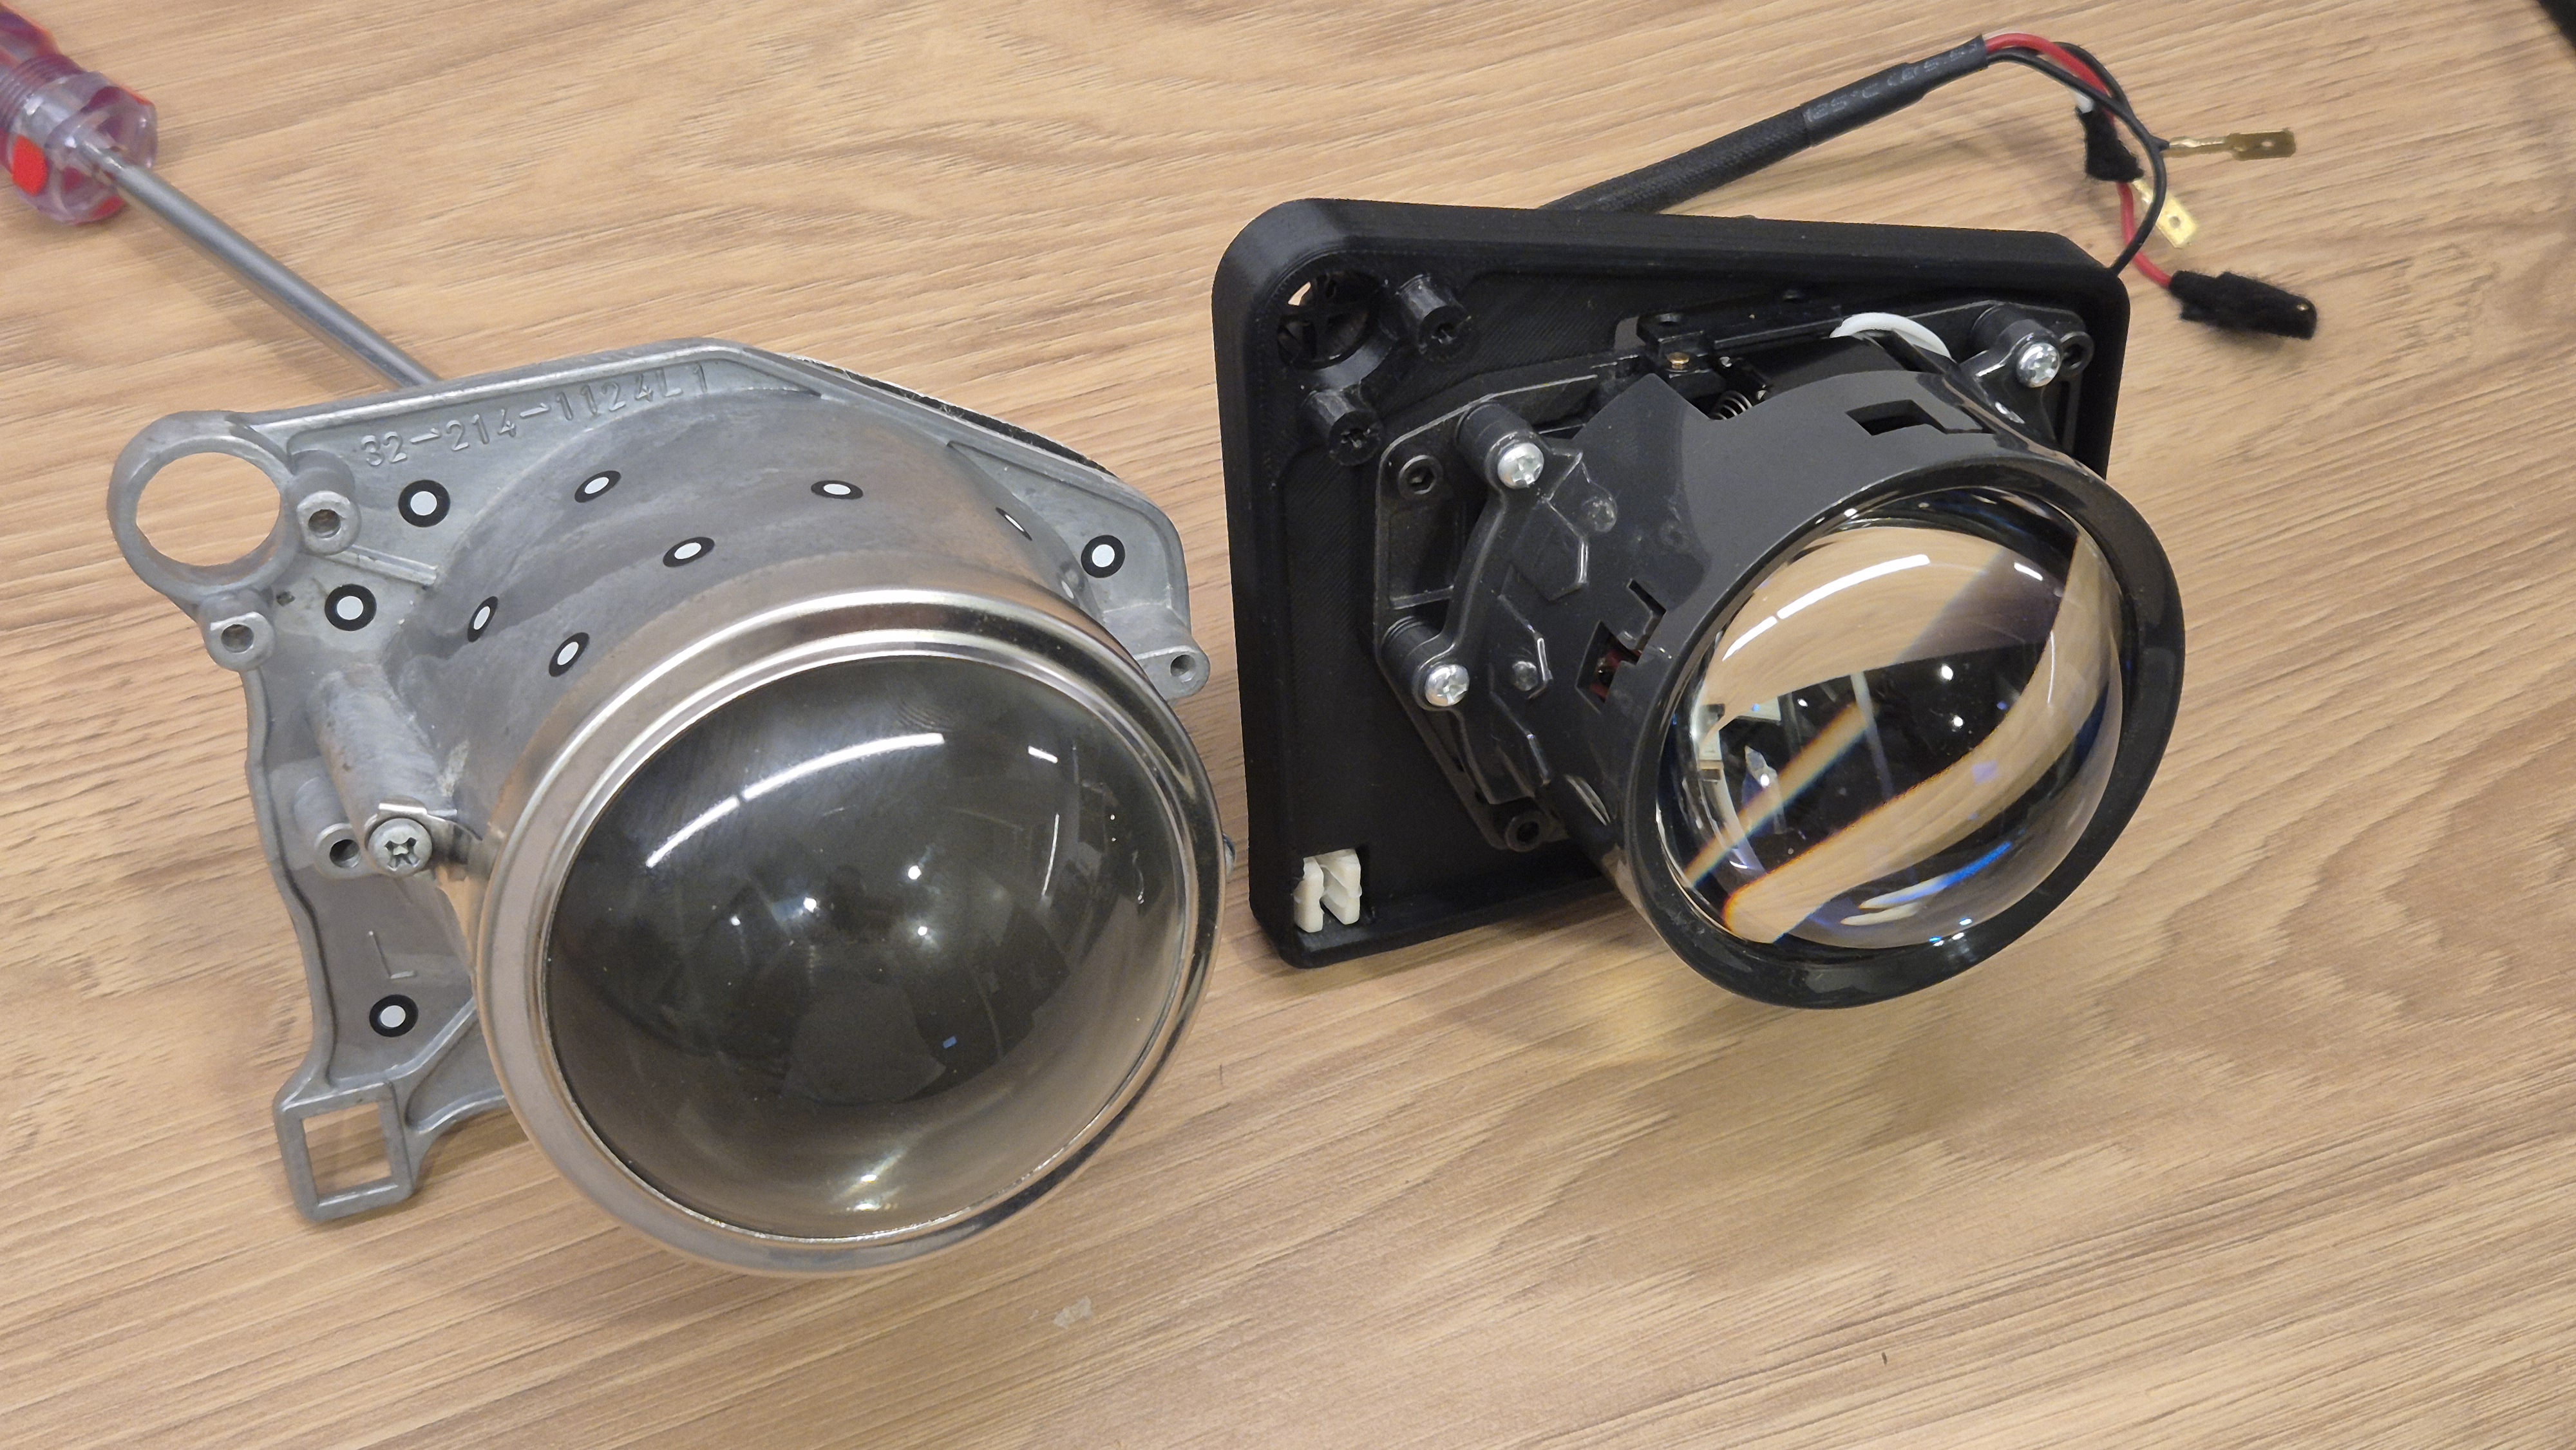
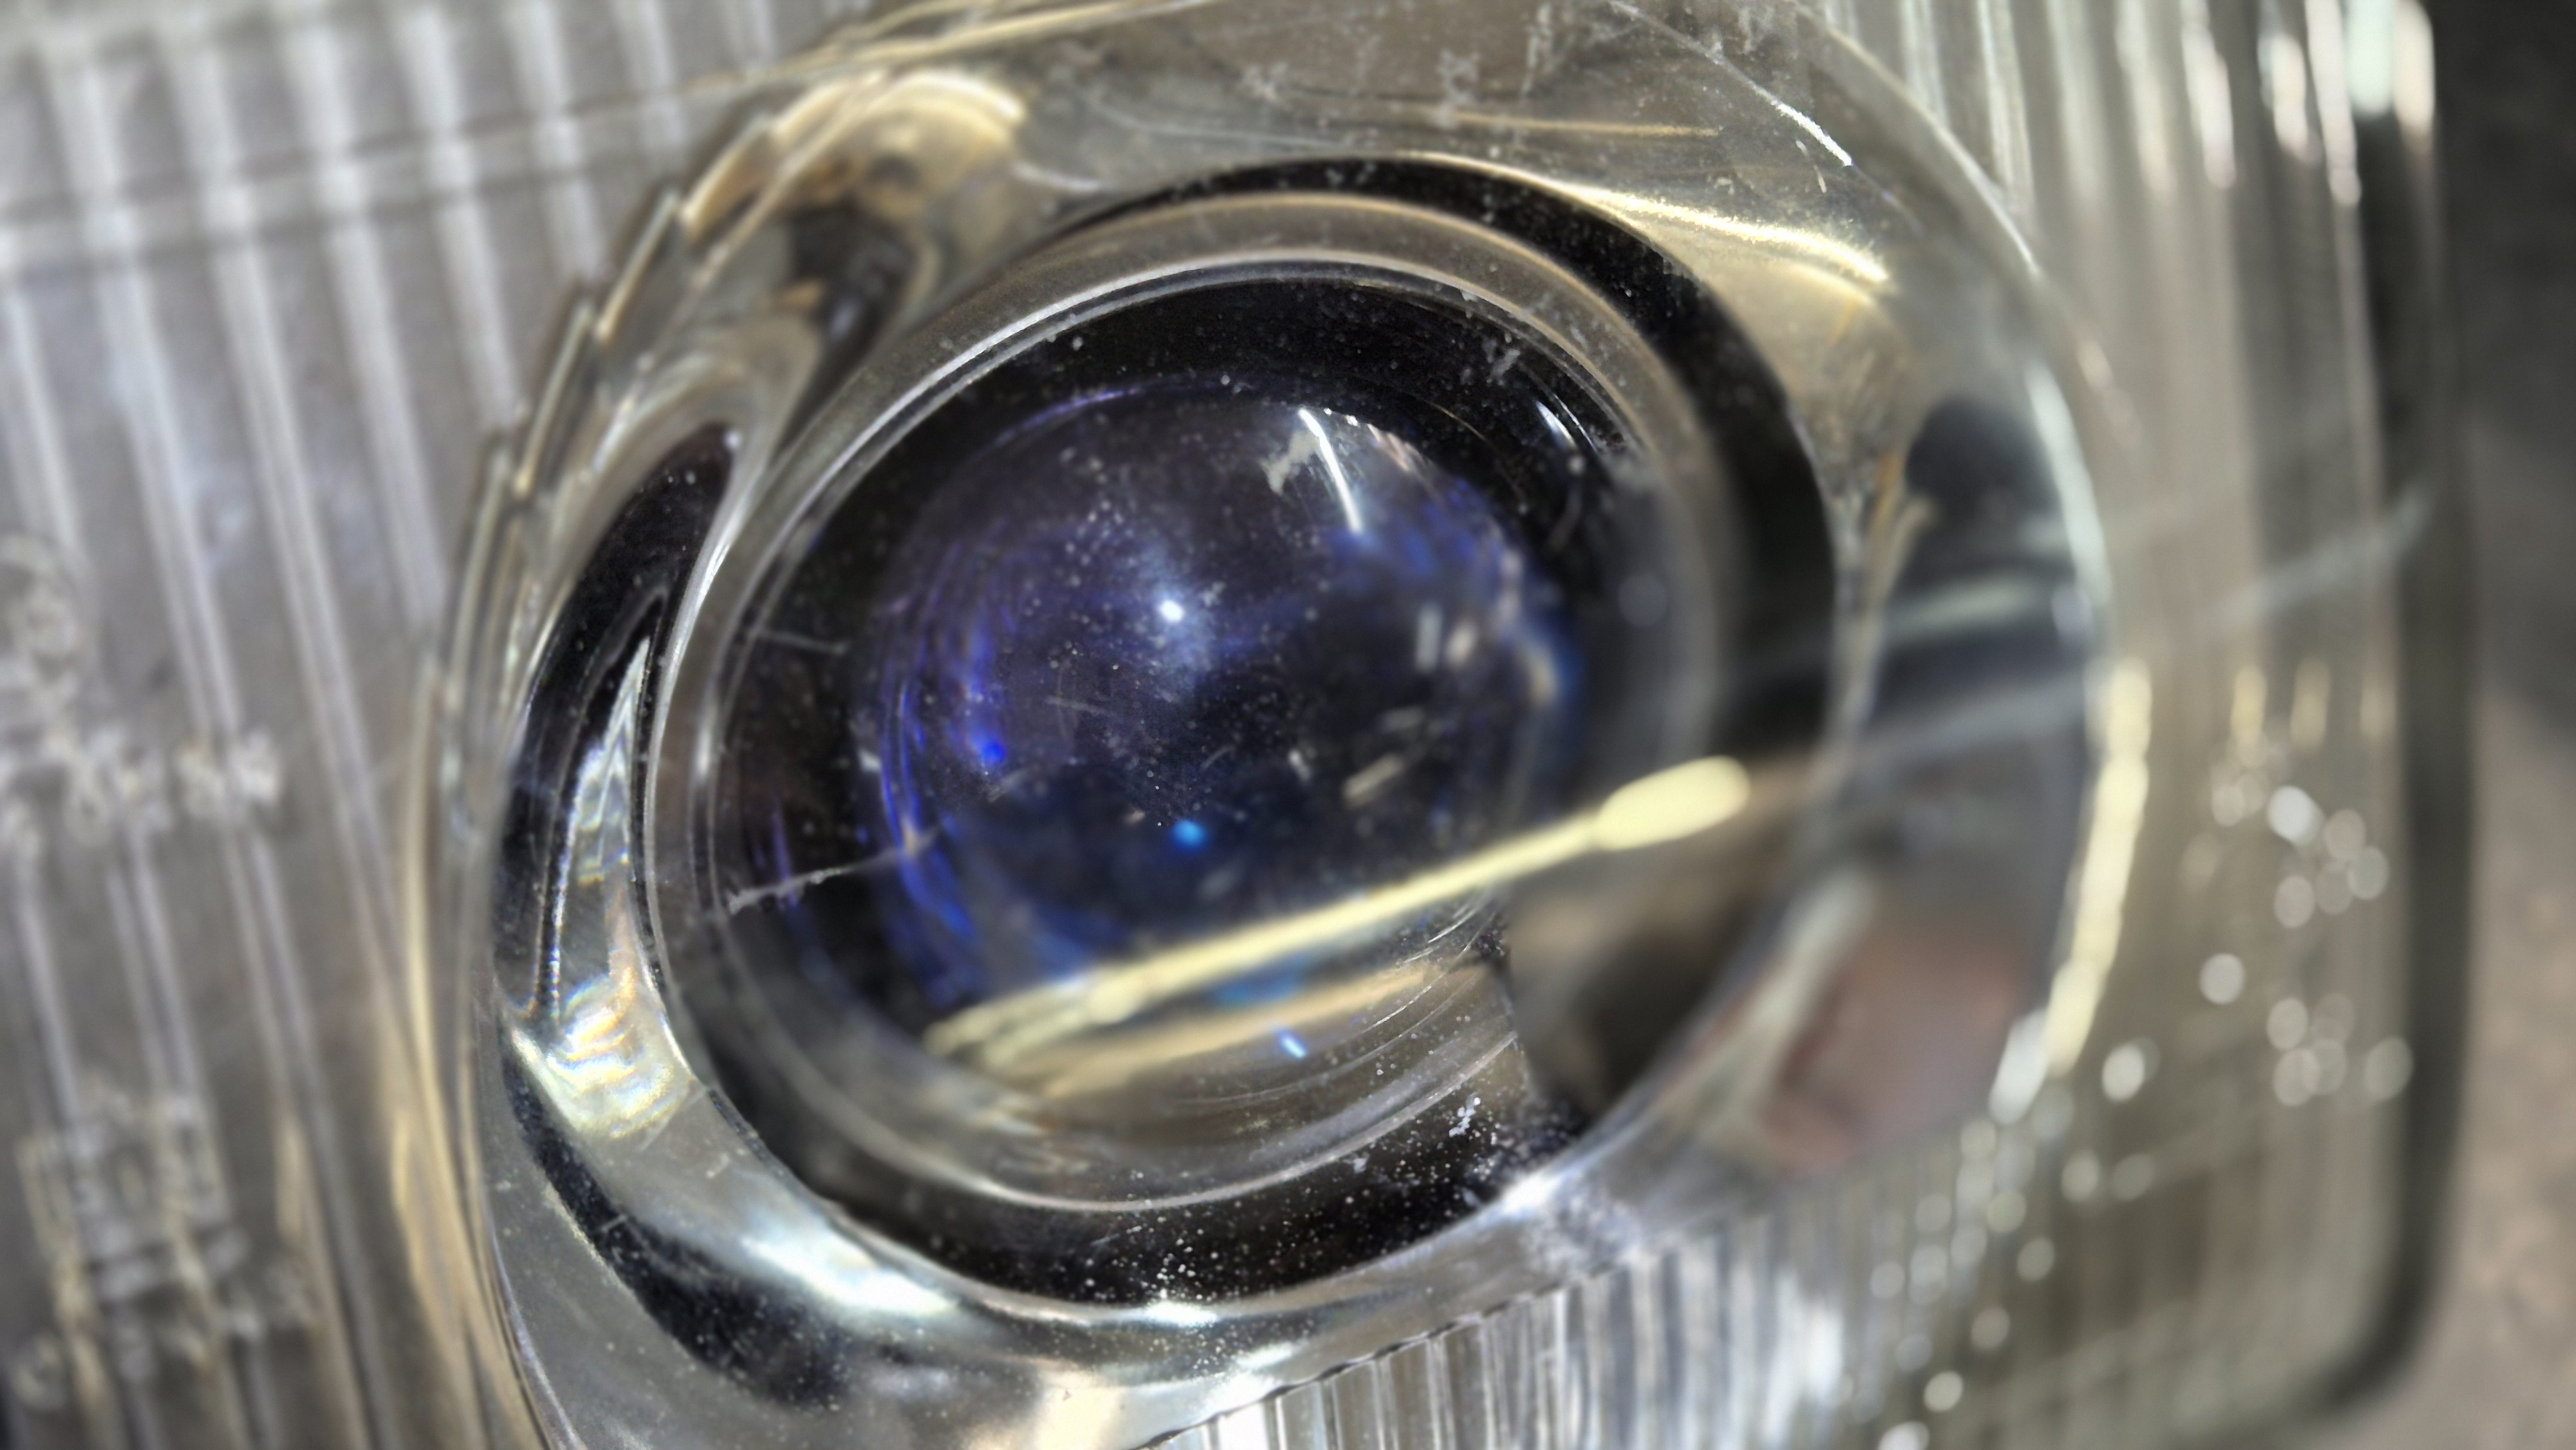
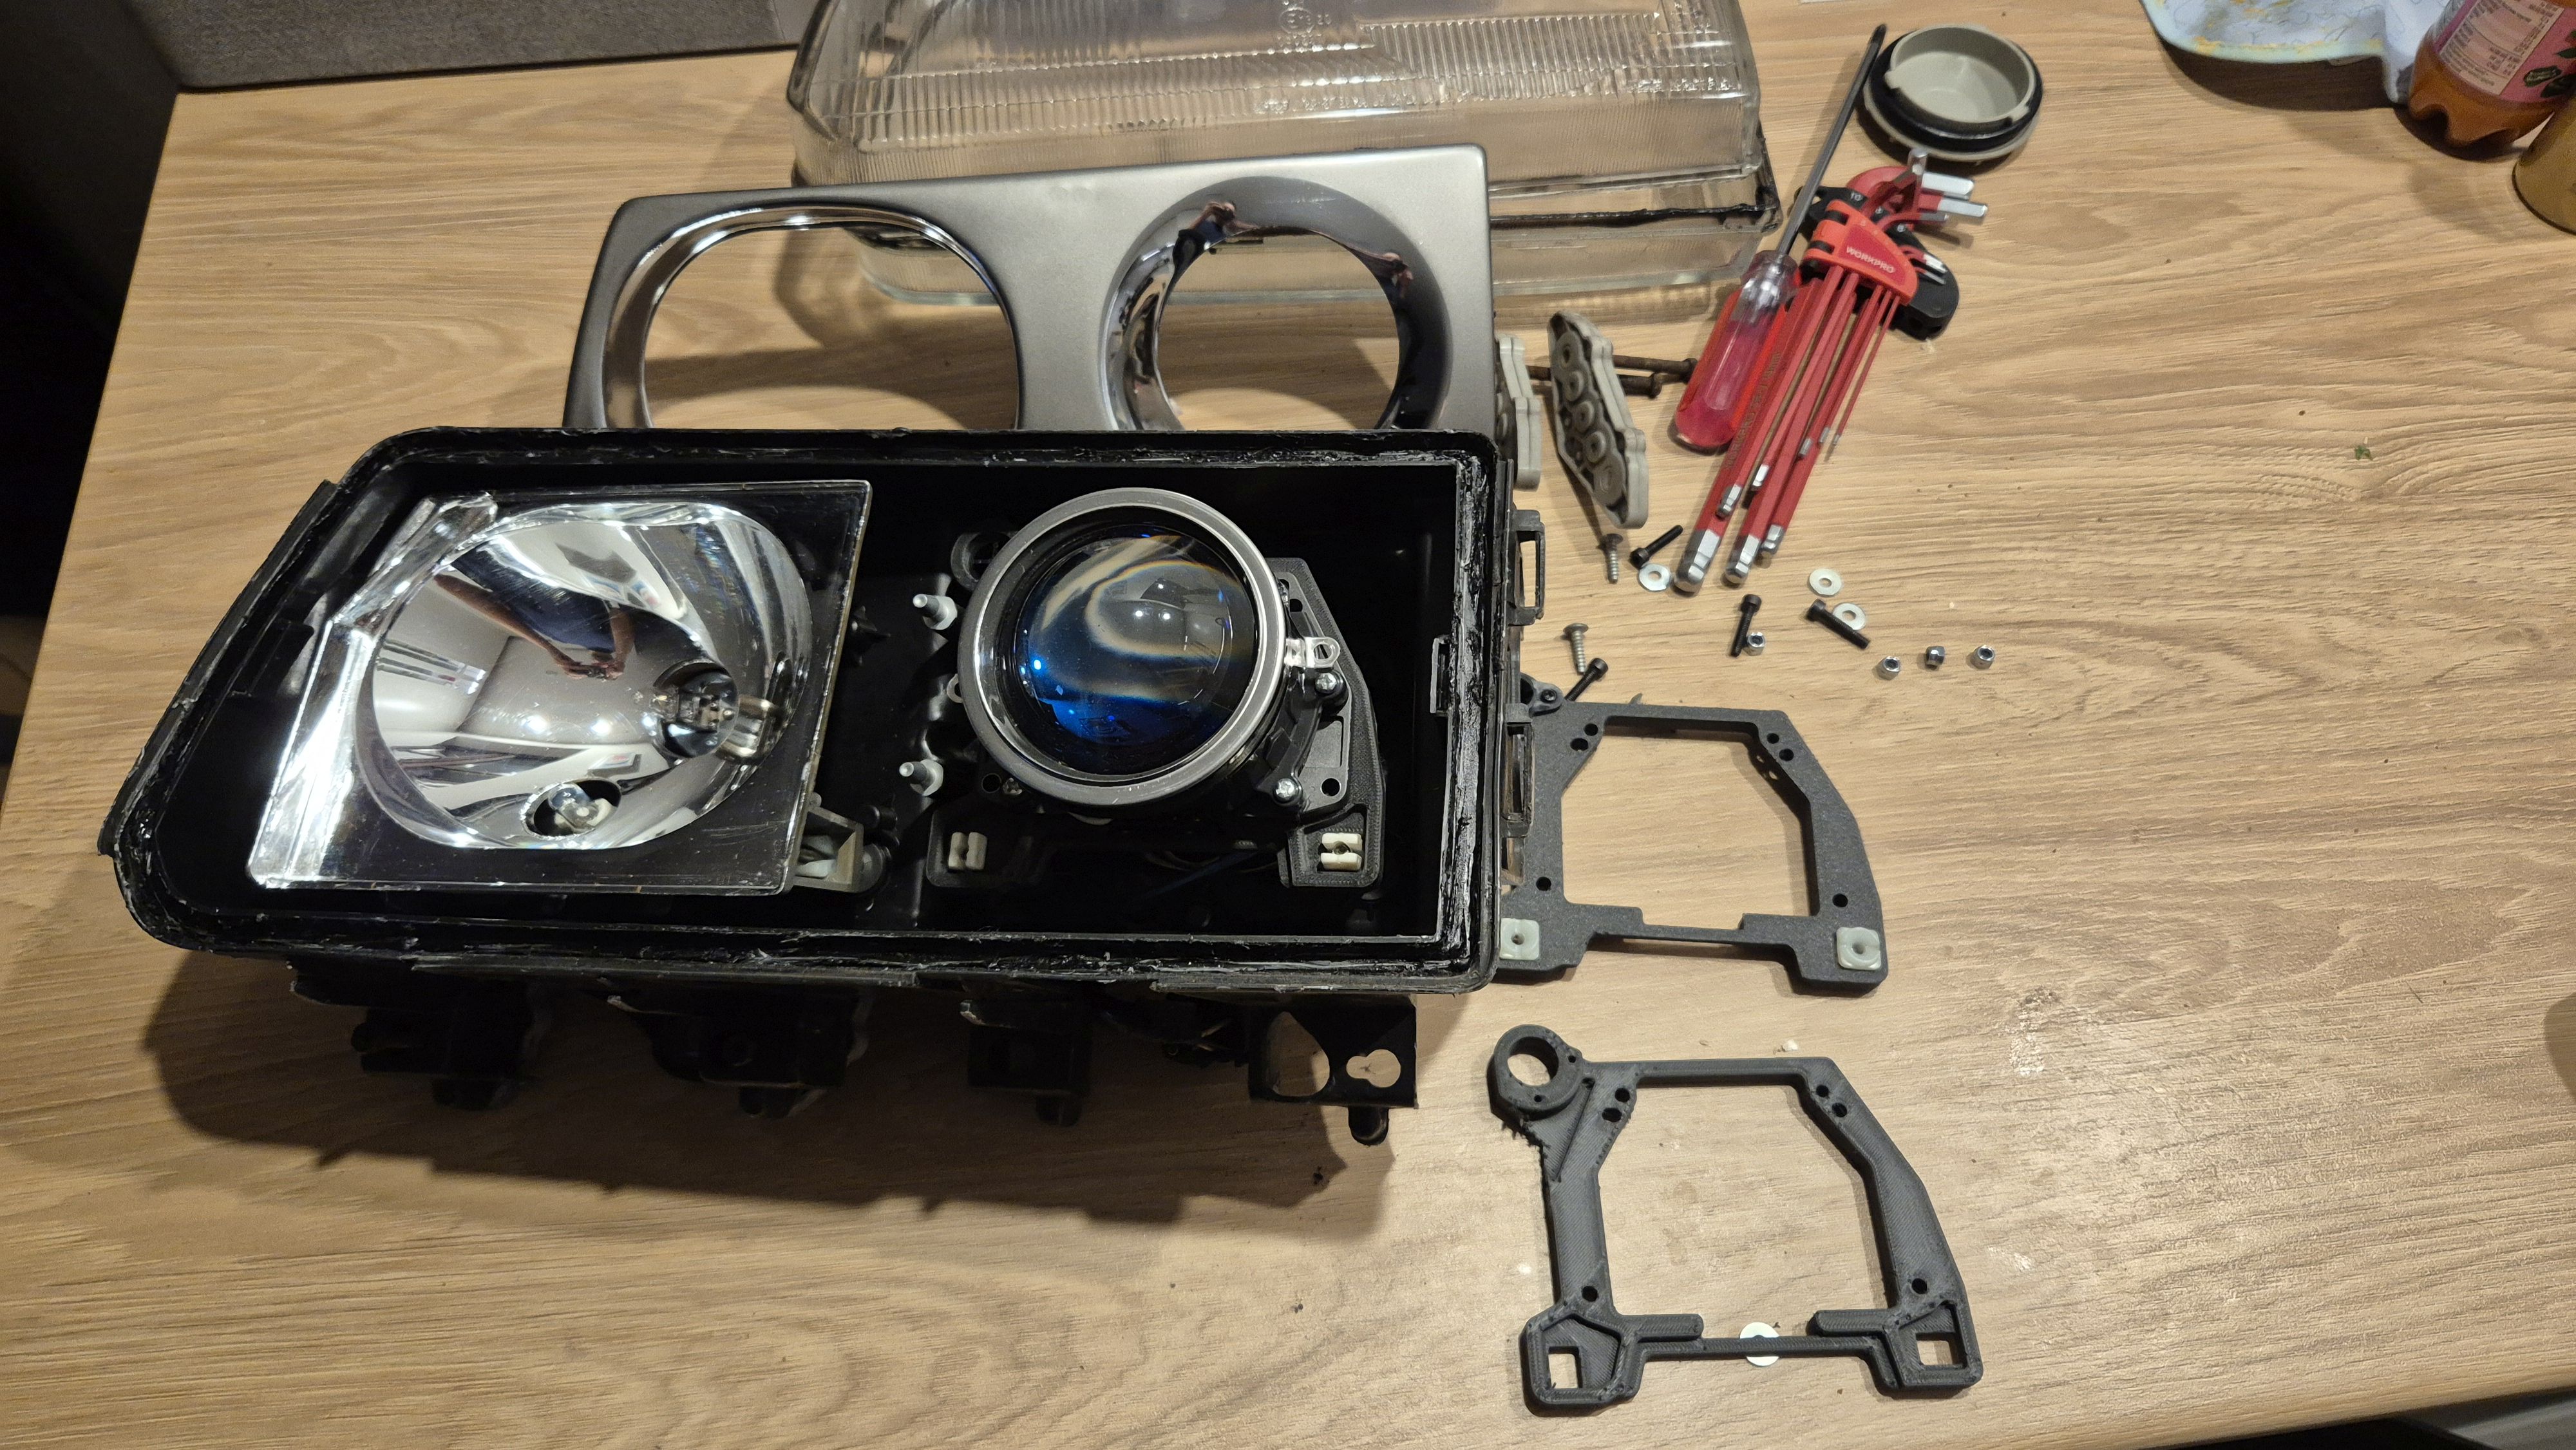
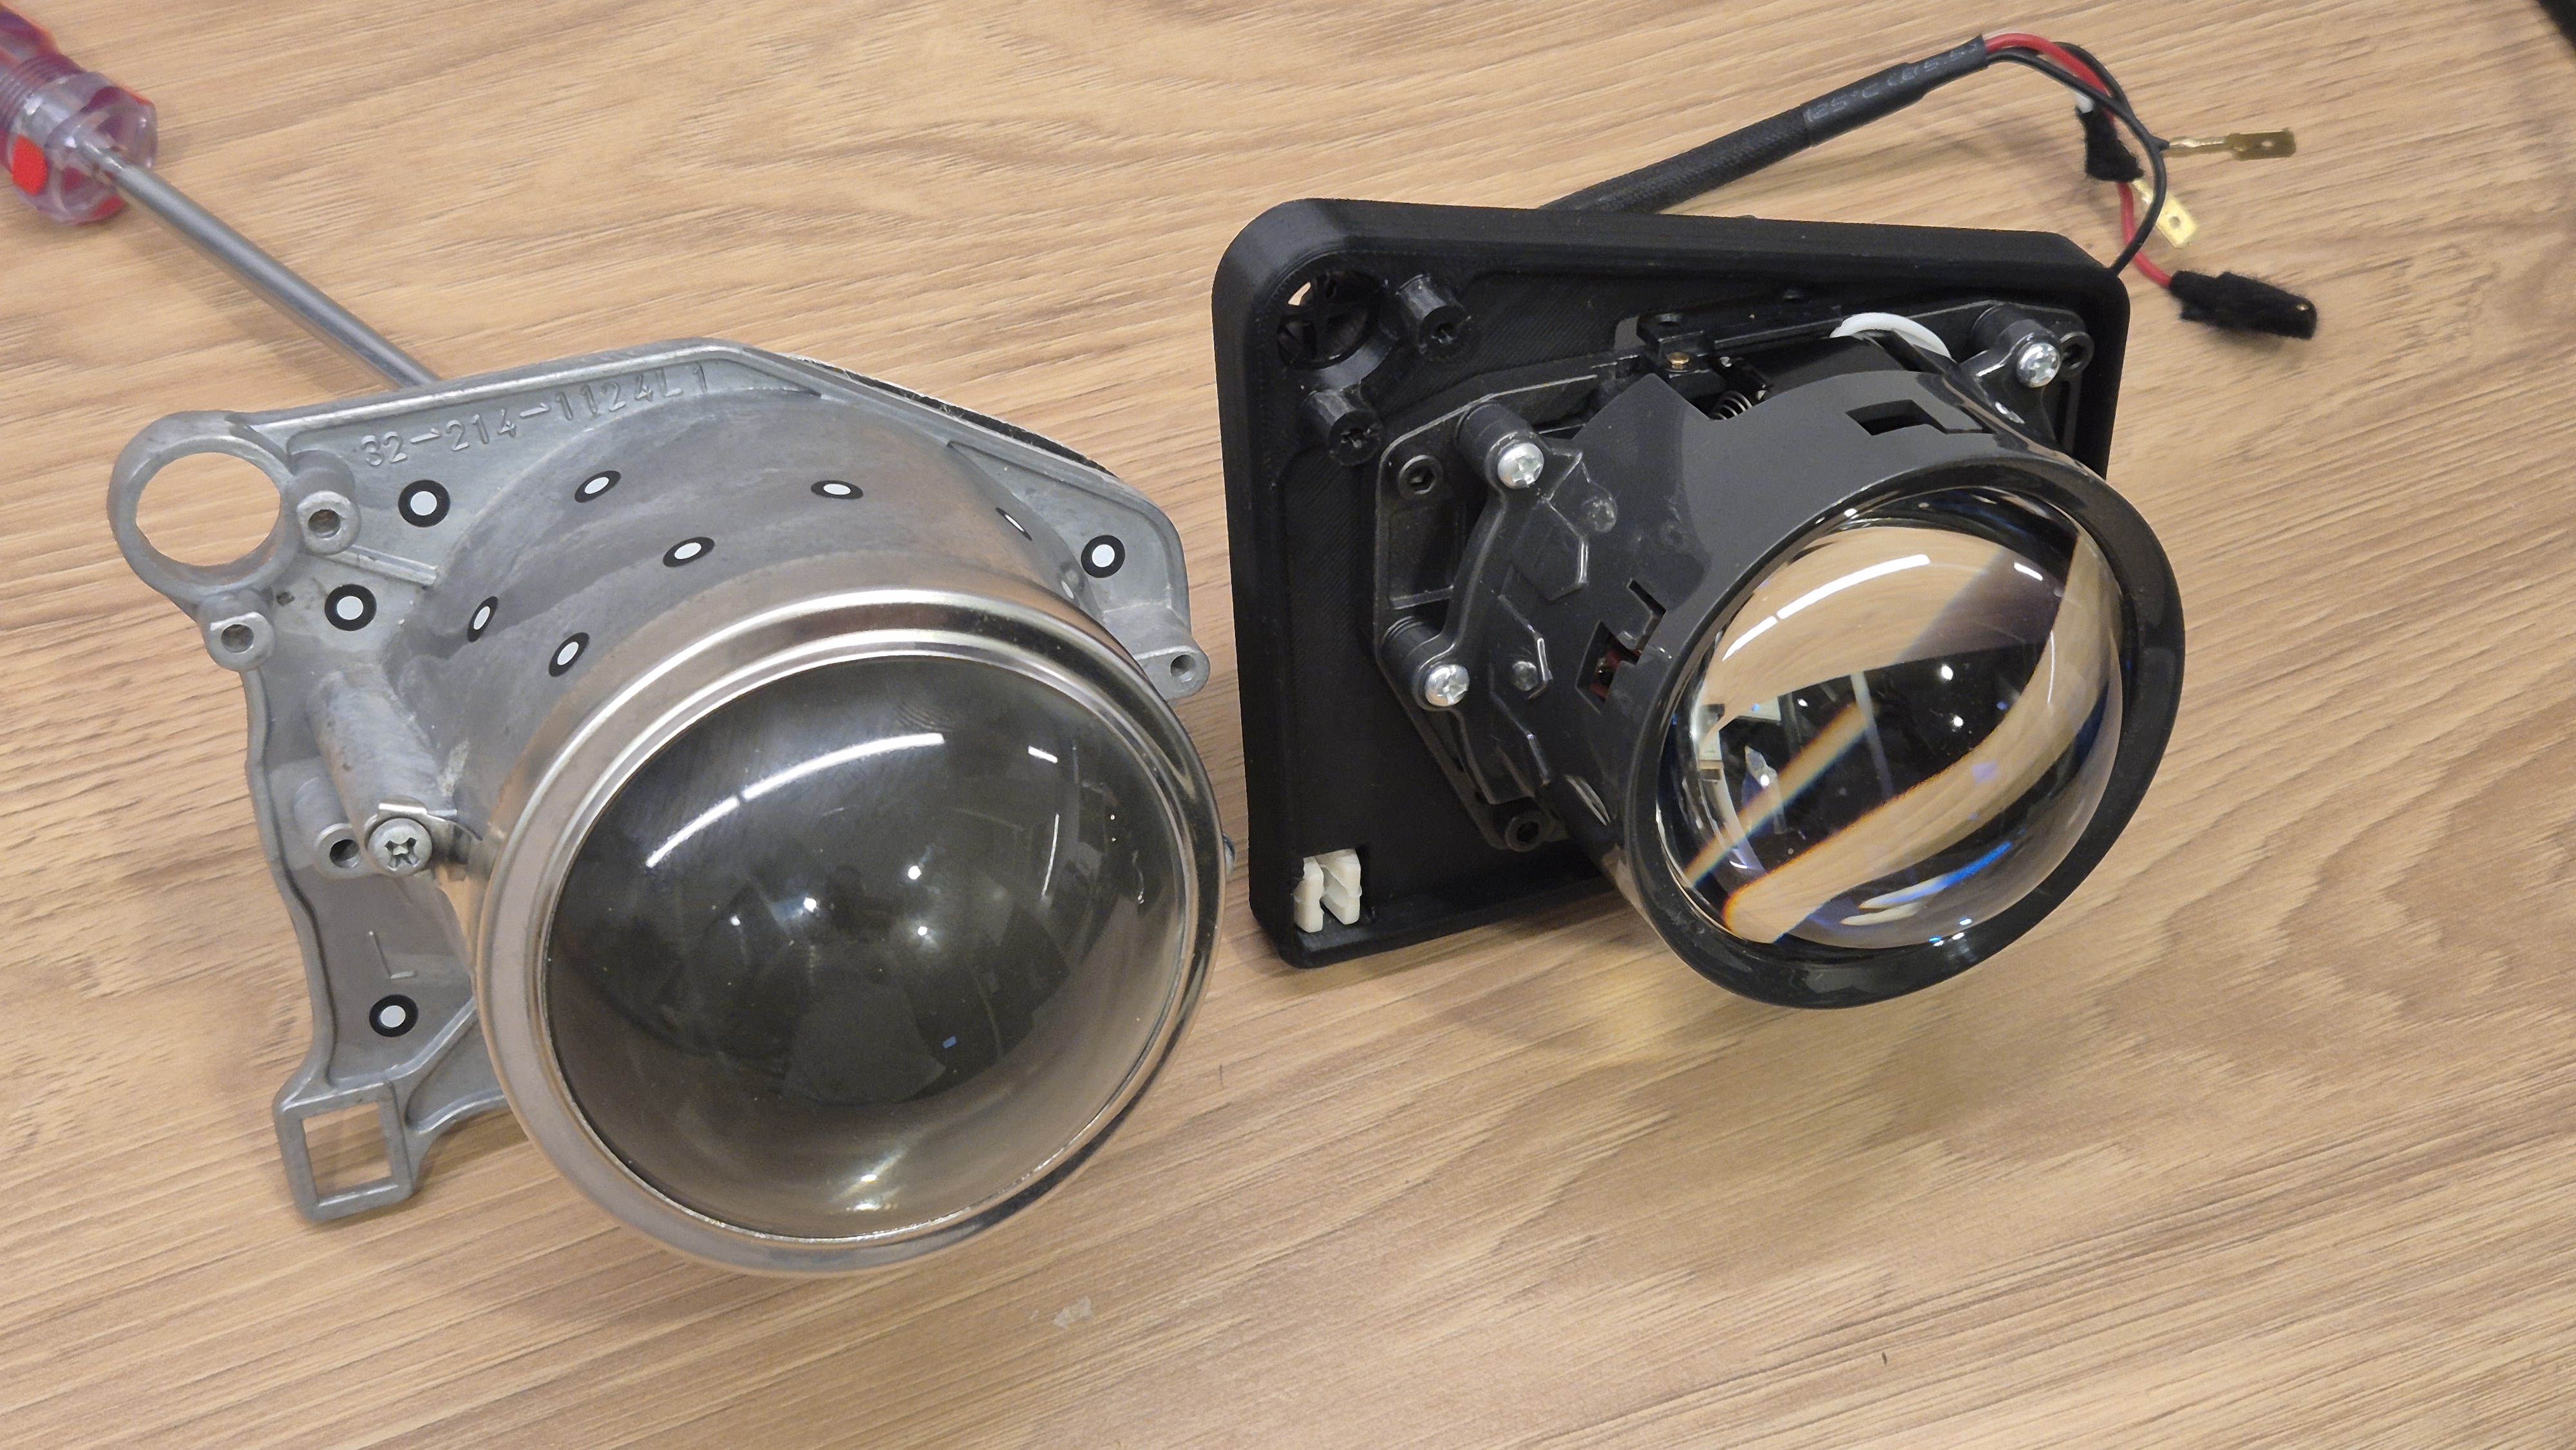
<figure class="post__image">Once everything was apart, I could finally take measurements and compare the original projector assembly with the new bi-LED unit. Seeing them side by side really shows how much lighting technology has changed over the years. The factory projector is huge and heavy, while the modern bi-LED is much more compact but produces dramatically more usable light.<br><img loading="lazy"  src="http://workshop.l300company.pl/media/posts/5/20251219_090902-2.jpg" alt="" width="4000" height="2252" sizes="(min-width: 37.5em) 1600px, 80vw" srcset="http://workshop.l300company.pl/media/posts/5/responsive/20251219_090902-2-xs.jpg 384w ,http://workshop.l300company.pl/media/posts/5/responsive/20251219_090902-2-sm.jpg 600w ,http://workshop.l300company.pl/media/posts/5/responsive/20251219_090902-2-md.jpg 768w ,http://workshop.l300company.pl/media/posts/5/responsive/20251219_090902-2-lg.jpg 1200w ,http://workshop.l300company.pl/media/posts/5/responsive/20251219_090902-2-xl.jpg 1600w"></figure>
<hr data-start="1984" data-end="1987">
<h3 data-section-id="zsxqnu" data-start="1989" data-end="2014">Designing the adapter</h3>
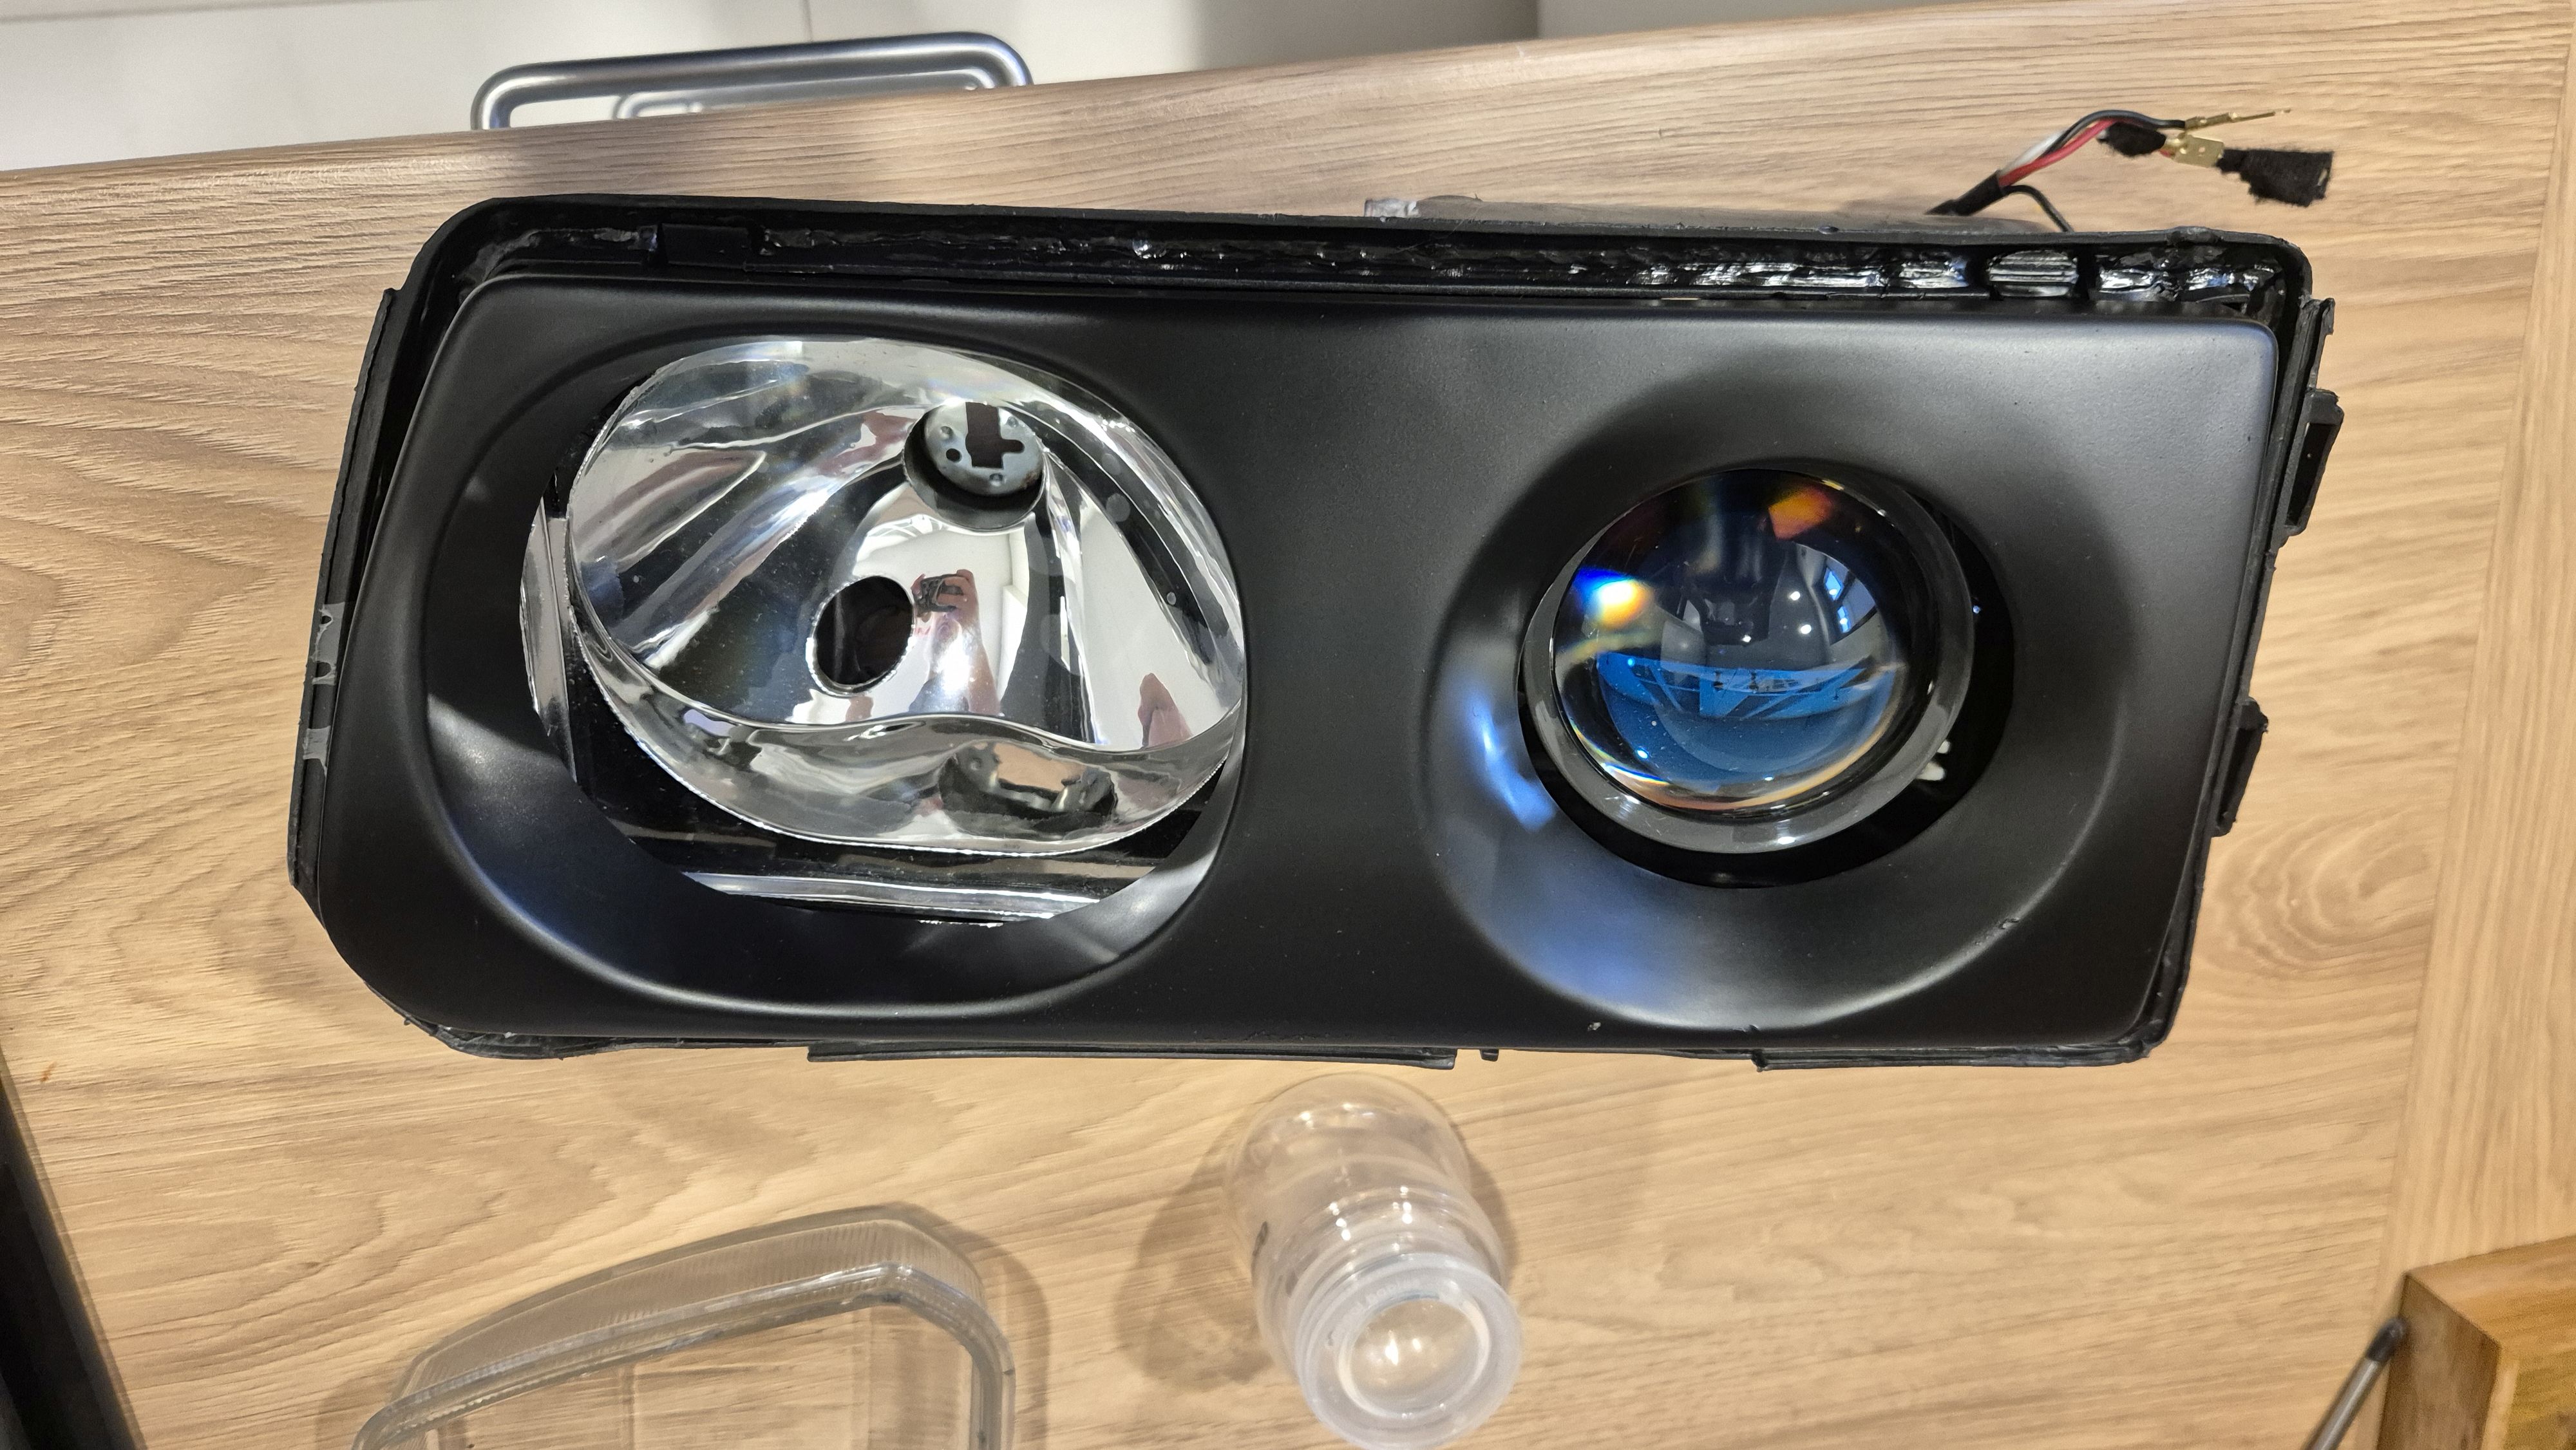
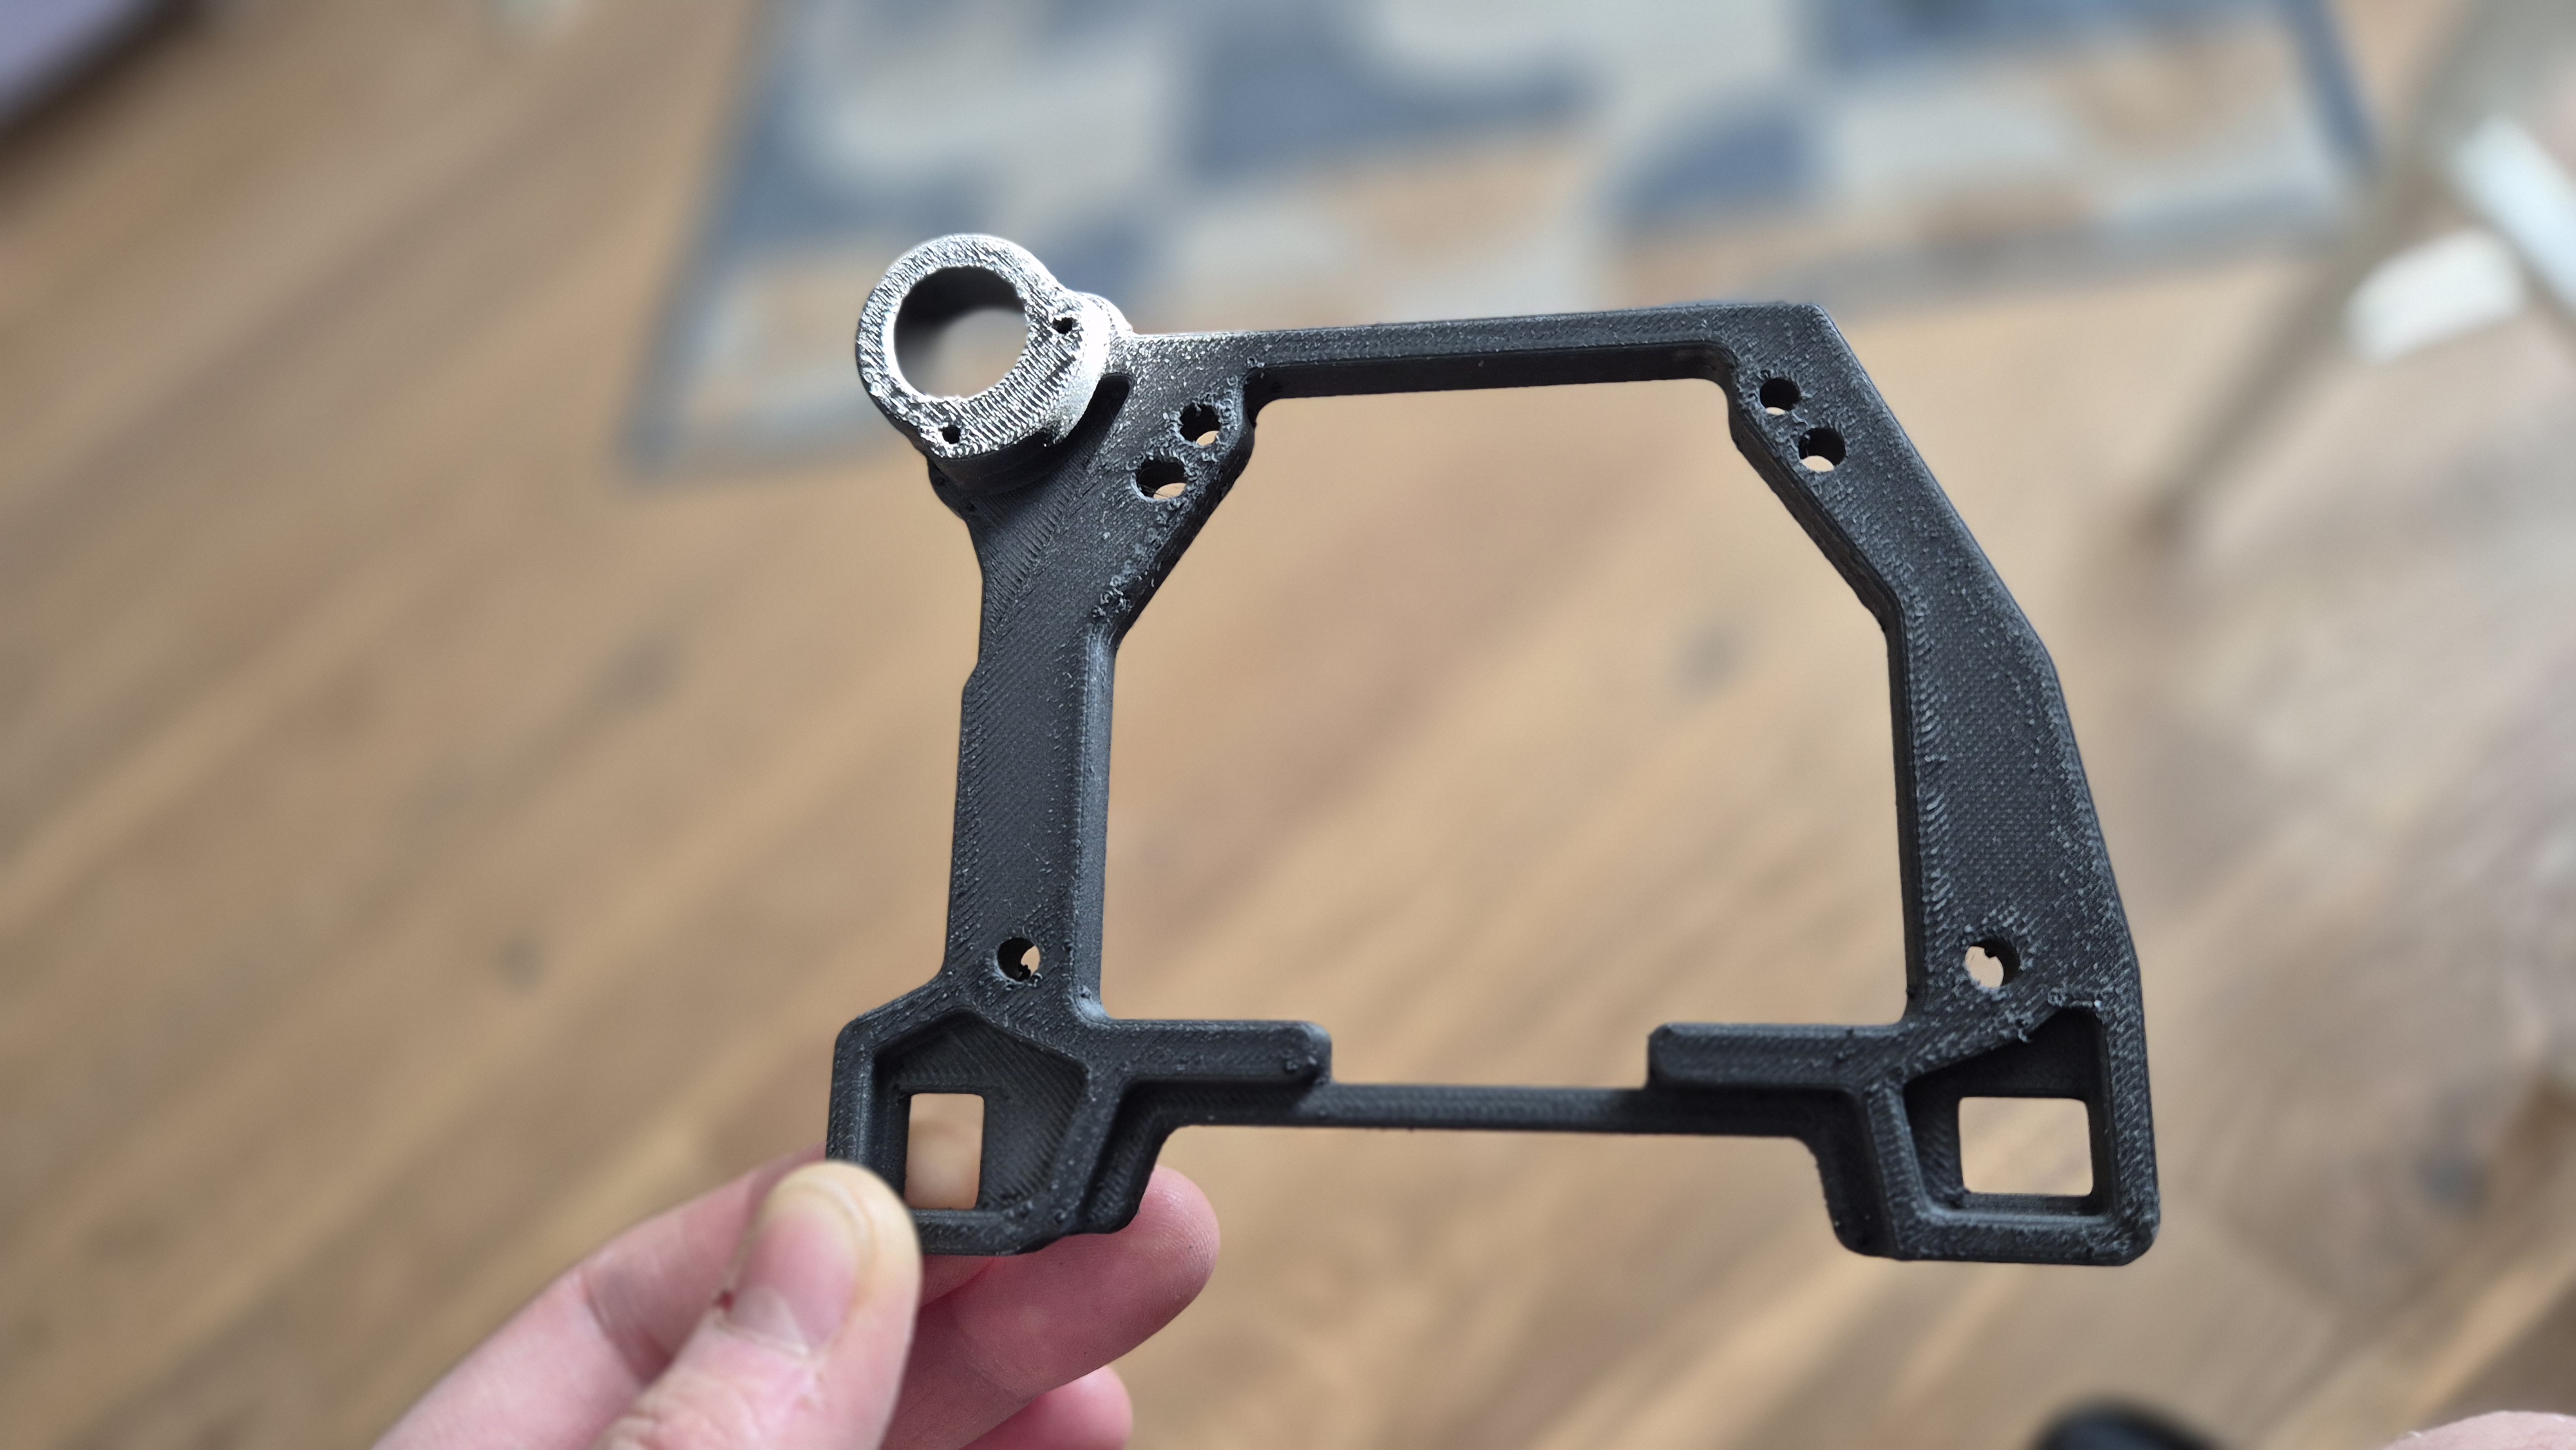
<p data-start="2016" data-end="2282">After measuring all the important dimensions, I designed a custom adapter that mounts directly in place of the factory projector and reflector assembly. This allowed me to install the bi-LED projector without cutting or permanently modifying the headlight housing.</p>
<p data-start="2284" data-end="2578">The adapter itself was 3D printed from PACF and then annealed in the oven after printing to improve its temperature resistance and long-term stability. At this point my wife is already used to seeing random car parts and 3D prints inside the kitchen oven, so nobody even questions it anymore.</p>
<p data-start="2580" data-end="2834">Technically the adapter could also be CNC machined from aluminum, but honestly there’s just no real reason for it. Modern engineering-grade 3D printing materials are more than strong enough for this type of application, both mechanically and thermally.</p>
<p data-start="2836" data-end="3012">The finished part feels properly solid, and because everything bolts into factory mounting points, the whole setup can still be returned back to completely stock at any time.</p>
<figure class="post__image"><img loading="lazy"  src="http://workshop.l300company.pl/media/posts/5/20260111_172638-2.jpg" alt="" width="4000" height="2252" sizes="(min-width: 37.5em) 1600px, 80vw" srcset="http://workshop.l300company.pl/media/posts/5/responsive/20260111_172638-2-xs.jpg 384w ,http://workshop.l300company.pl/media/posts/5/responsive/20260111_172638-2-sm.jpg 600w ,http://workshop.l300company.pl/media/posts/5/responsive/20260111_172638-2-md.jpg 768w ,http://workshop.l300company.pl/media/posts/5/responsive/20260111_172638-2-lg.jpg 1200w ,http://workshop.l300company.pl/media/posts/5/responsive/20260111_172638-2-xl.jpg 1600w"></figure>
<hr data-start="3014" data-end="3017">
<h3 data-section-id="1cwouzu" data-start="3019" data-end="3048">Test fitting and assembly</h3>
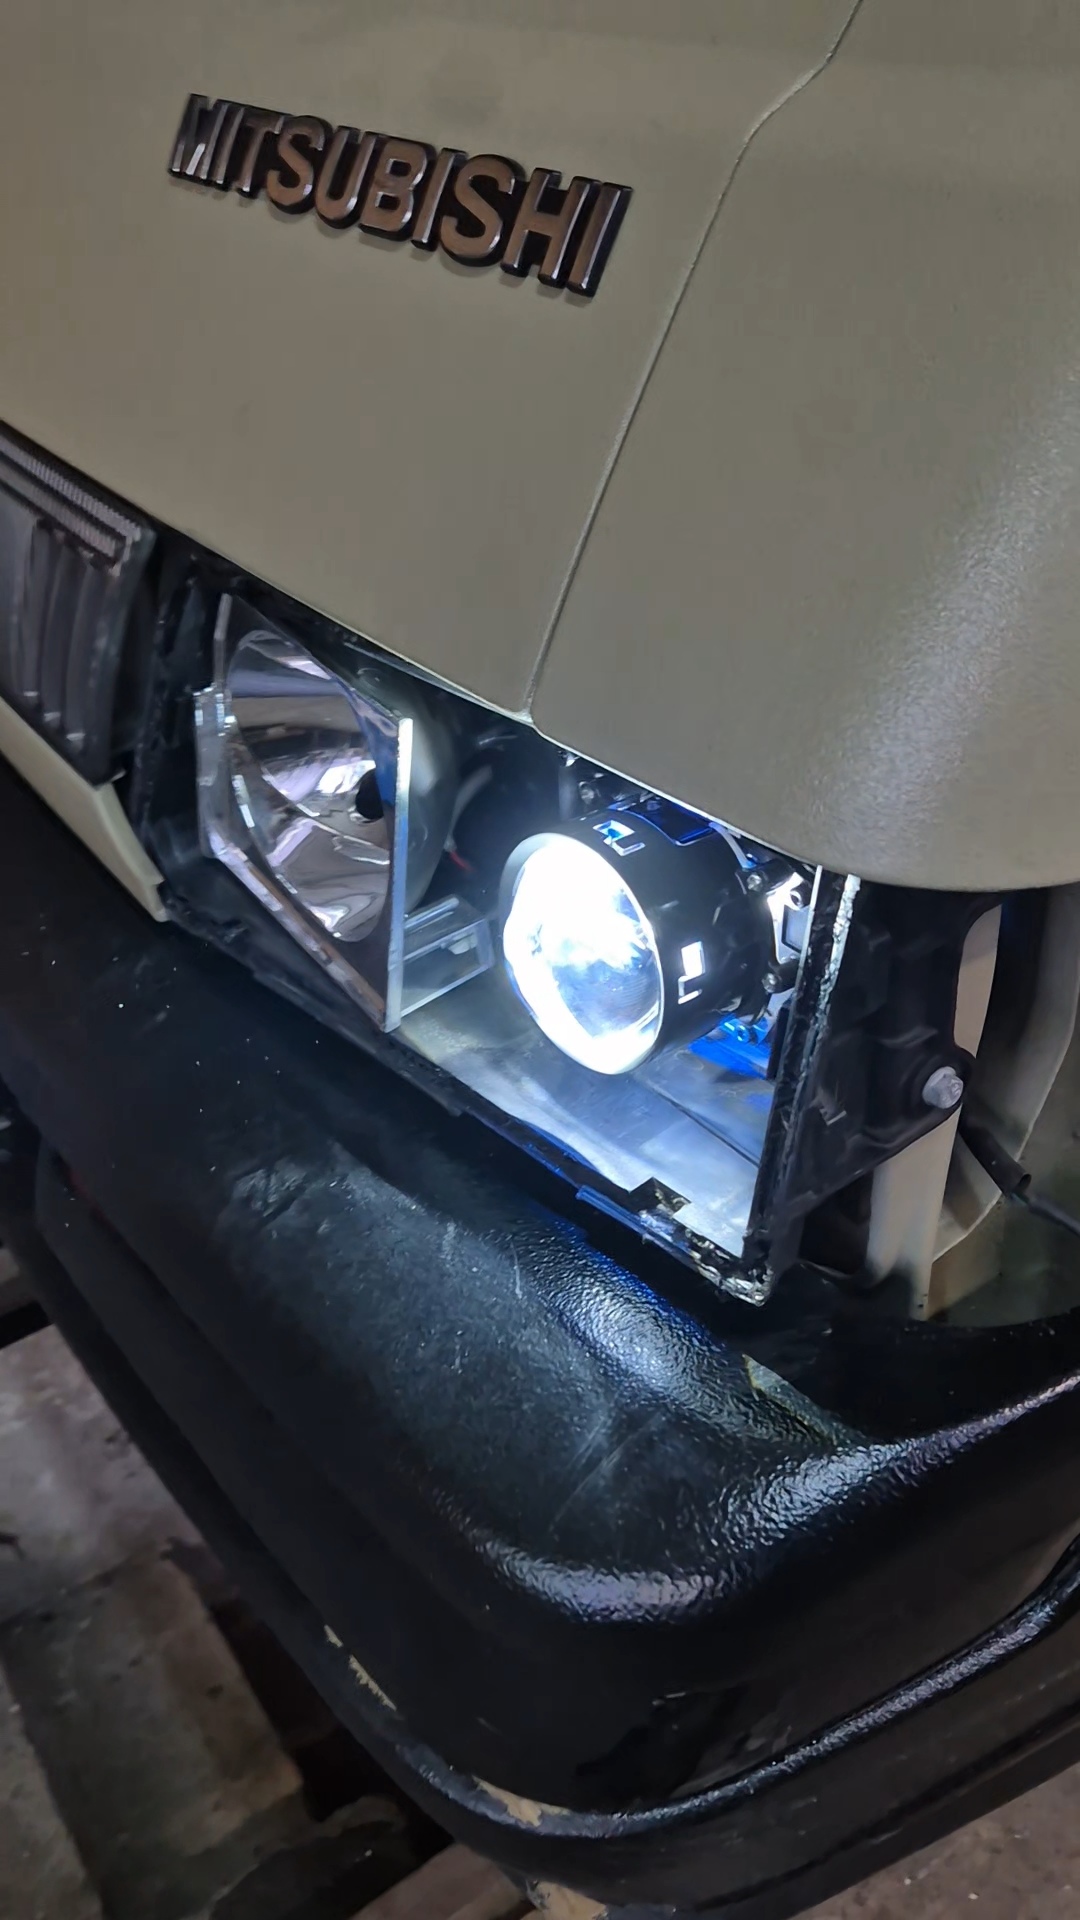
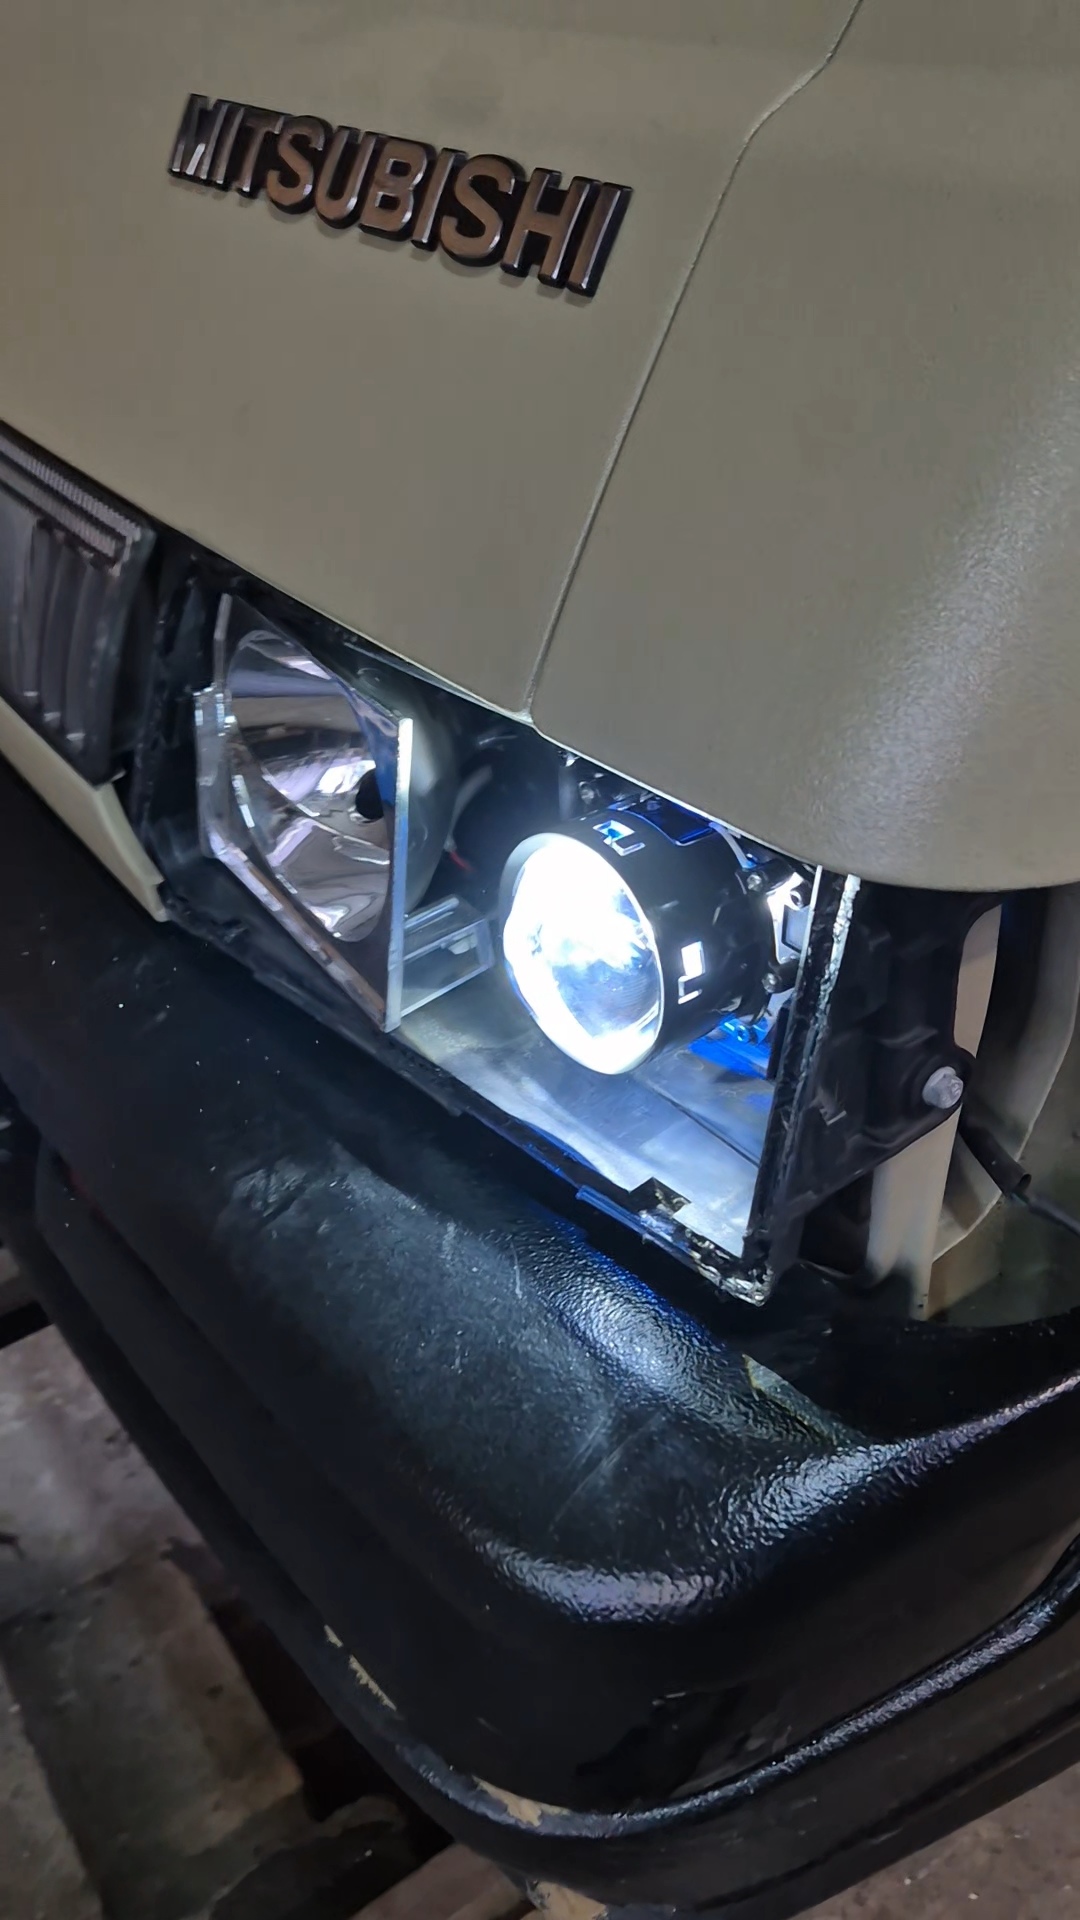
<p data-start="3050" data-end="3235">Before sealing the headlights back together, I spent quite a bit of time test fitting everything and making sure the projector sat perfectly centered behind the original lens opening.</p>
<p data-start="3237" data-end="3455">This part was important because I wanted the final result to look as factory as possible. The projector had to sit in exactly the same position as the original one so the outside appearance stayed clean and OEM-like.</p>
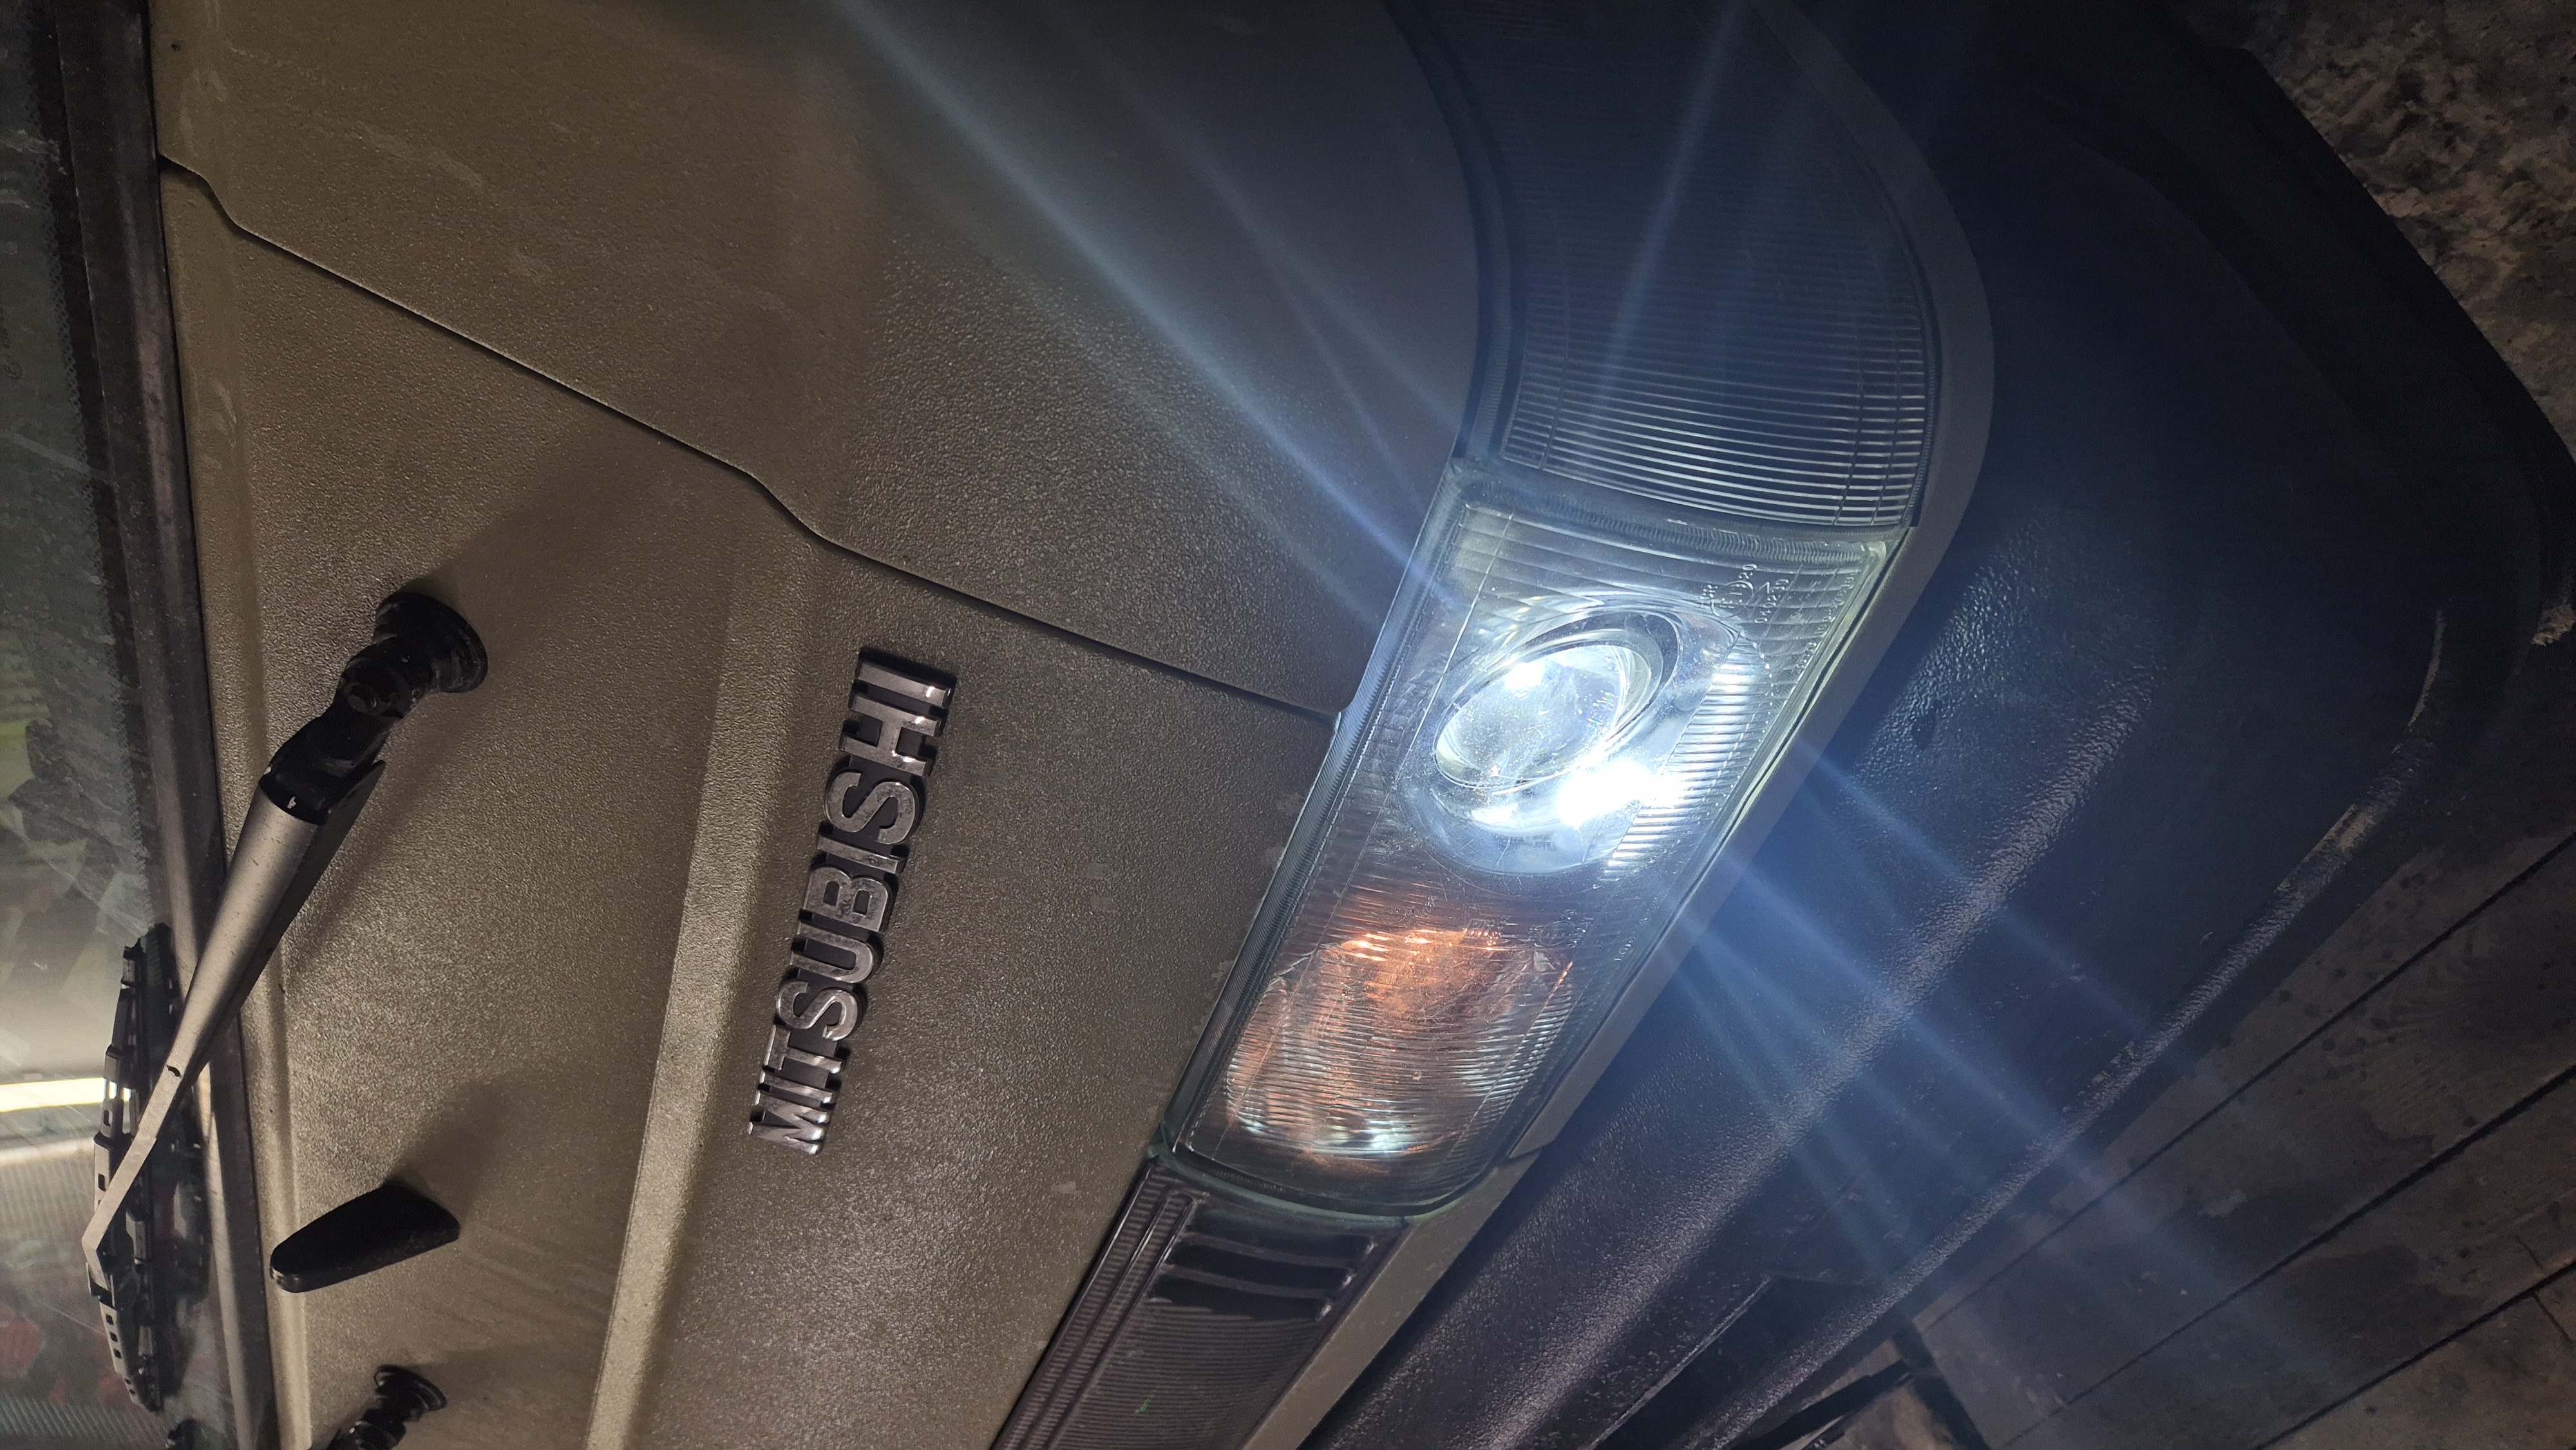
<p data-start="3457" data-end="3603">Once assembled, the headlights honestly look like something Mitsubishi themselves could have made if the L300 stayed in production a bit longer.</p>
<figure class="post__image"><img loading="lazy"  src="http://workshop.l300company.pl/media/posts/5/20251221_130130.jpg" alt="" width="1080" height="1920" sizes="(min-width: 37.5em) 1600px, 80vw" srcset="http://workshop.l300company.pl/media/posts/5/responsive/20251221_130130-xs.jpg 384w ,http://workshop.l300company.pl/media/posts/5/responsive/20251221_130130-sm.jpg 600w ,http://workshop.l300company.pl/media/posts/5/responsive/20251221_130130-md.jpg 768w ,http://workshop.l300company.pl/media/posts/5/responsive/20251221_130130-lg.jpg 1200w ,http://workshop.l300company.pl/media/posts/5/responsive/20251221_130130-xl.jpg 1600w"></figure>
<hr data-start="3605" data-end="3608">
<h3 data-section-id="ai806h" data-start="3610" data-end="3639">Beam pattern and legality</h3>
<p data-start="3641" data-end="3877">It’s worth mentioning that modifications like this are technically not road legal in many countries. Even so, I made sure the beam pattern and cutoff line were adjusted properly because I absolutely hate badly aimed headlights myself.</p>
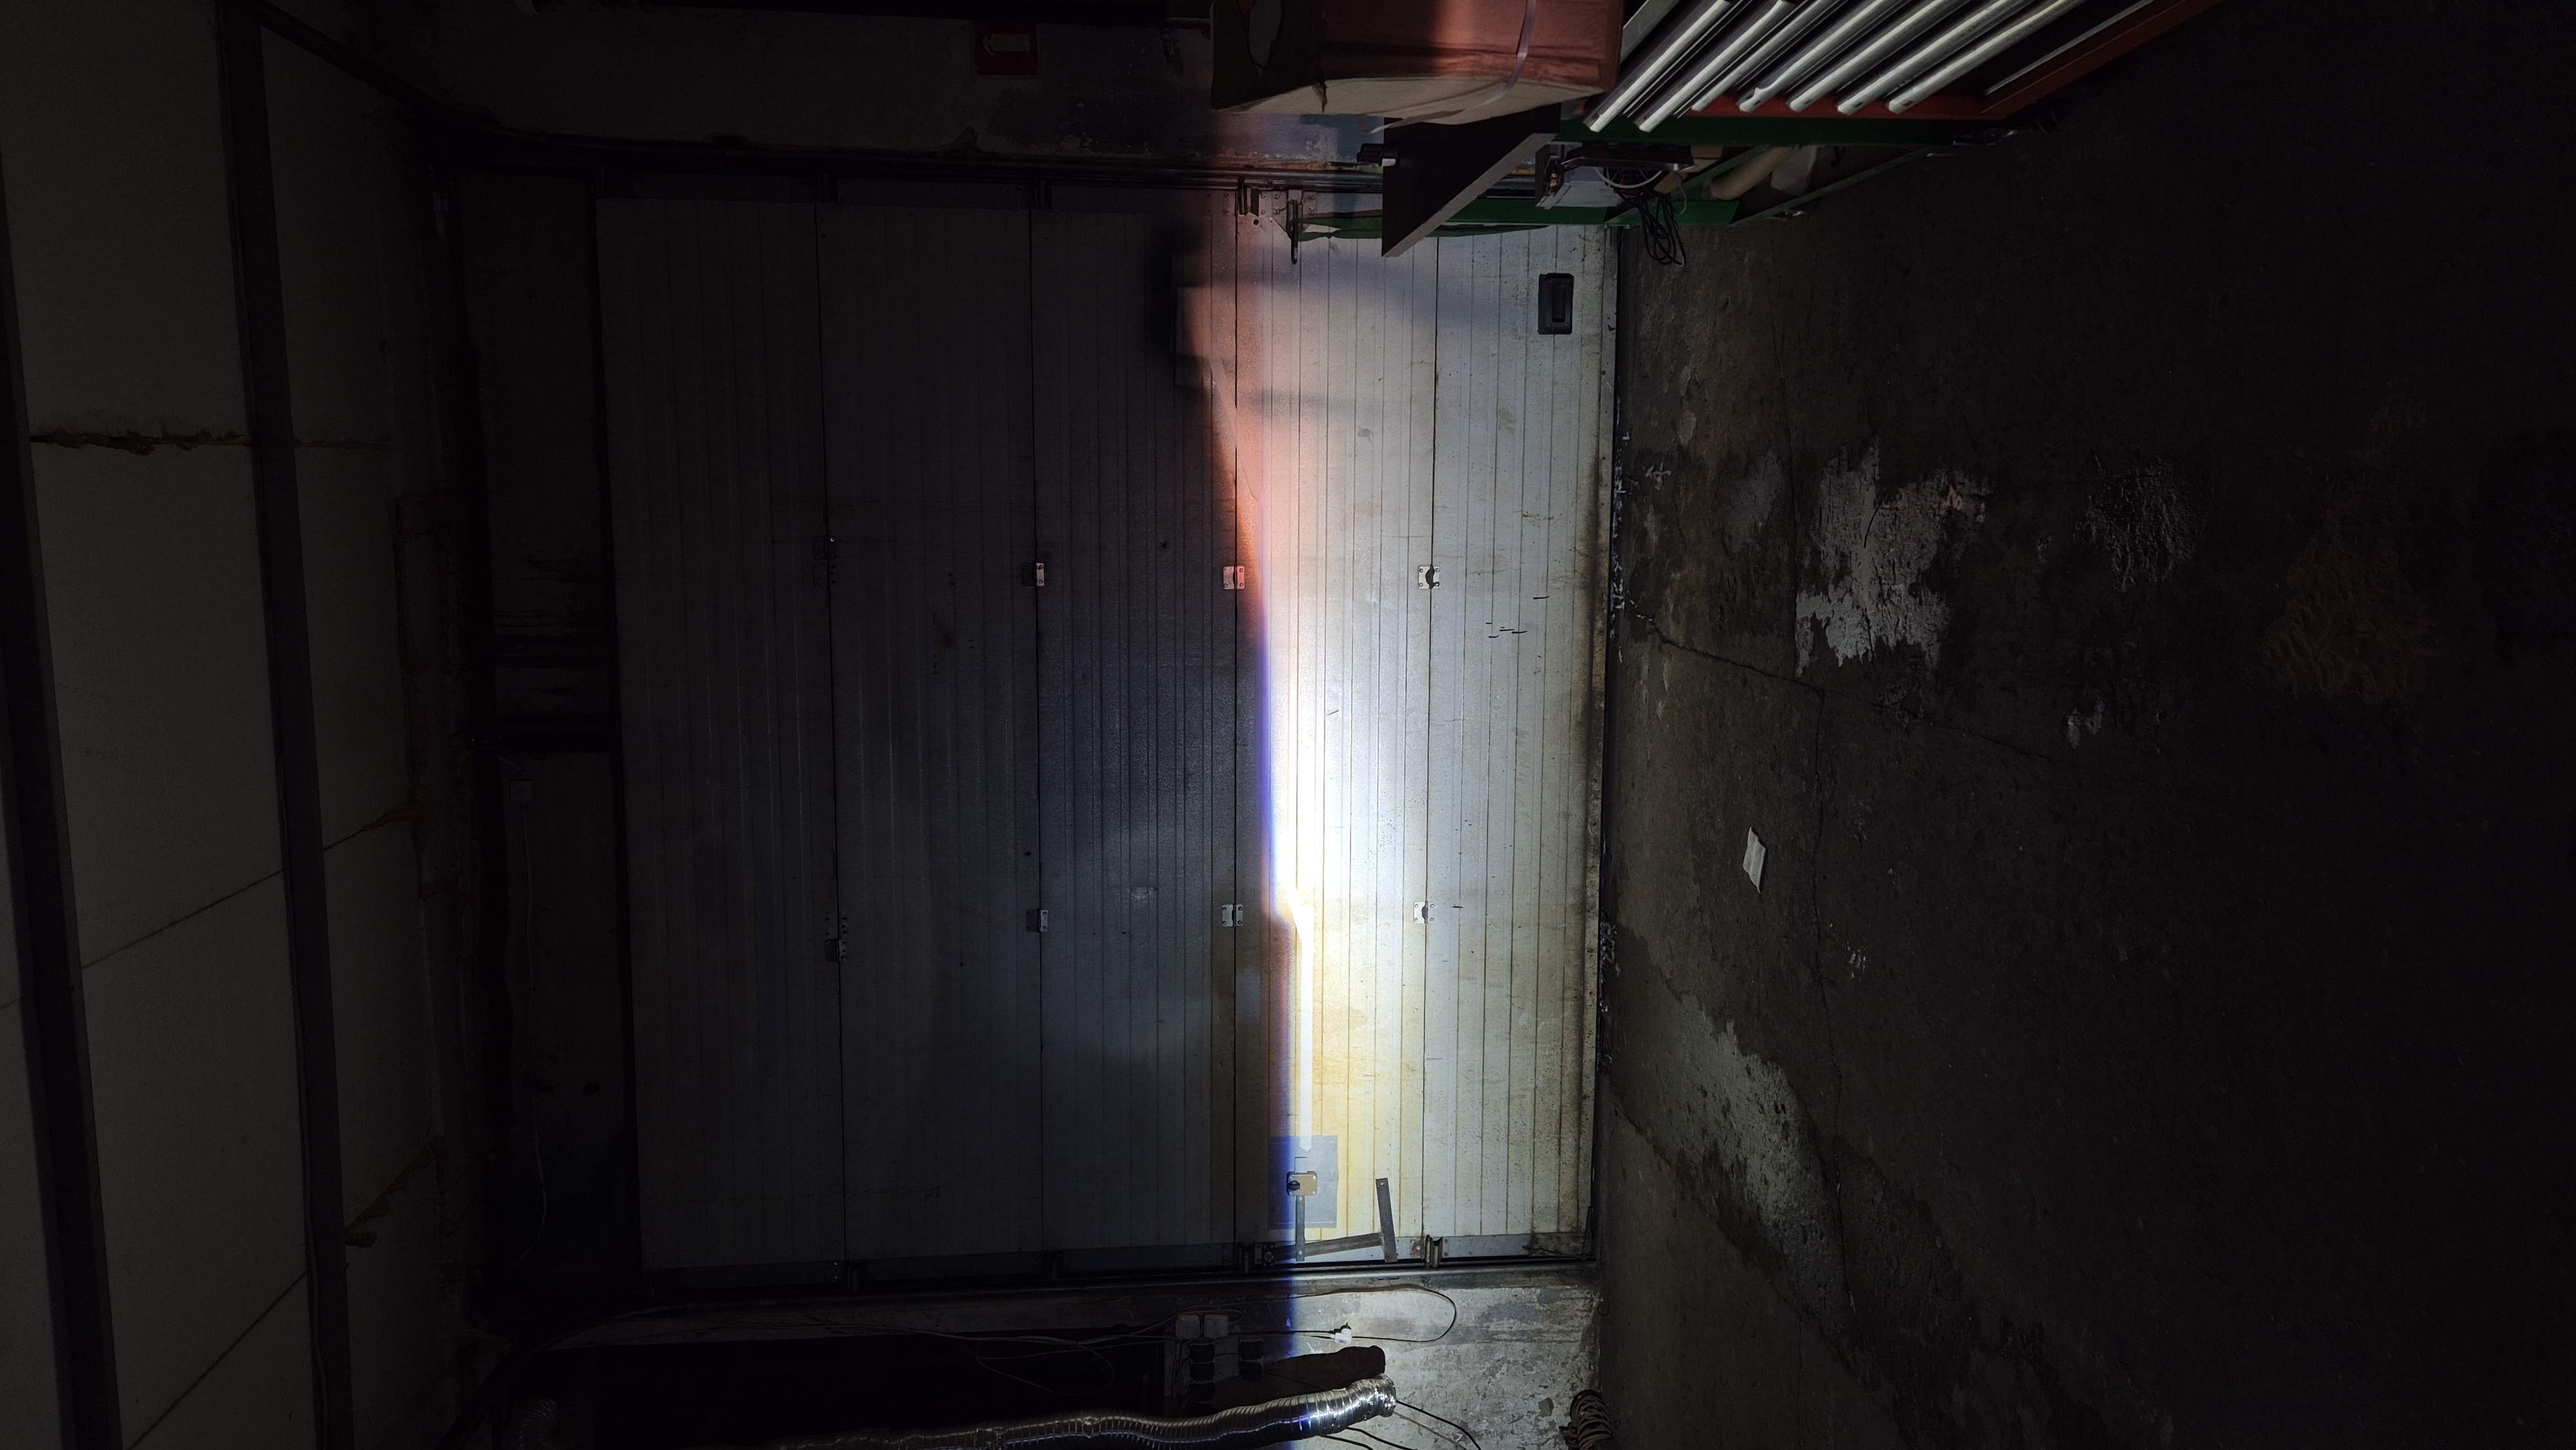
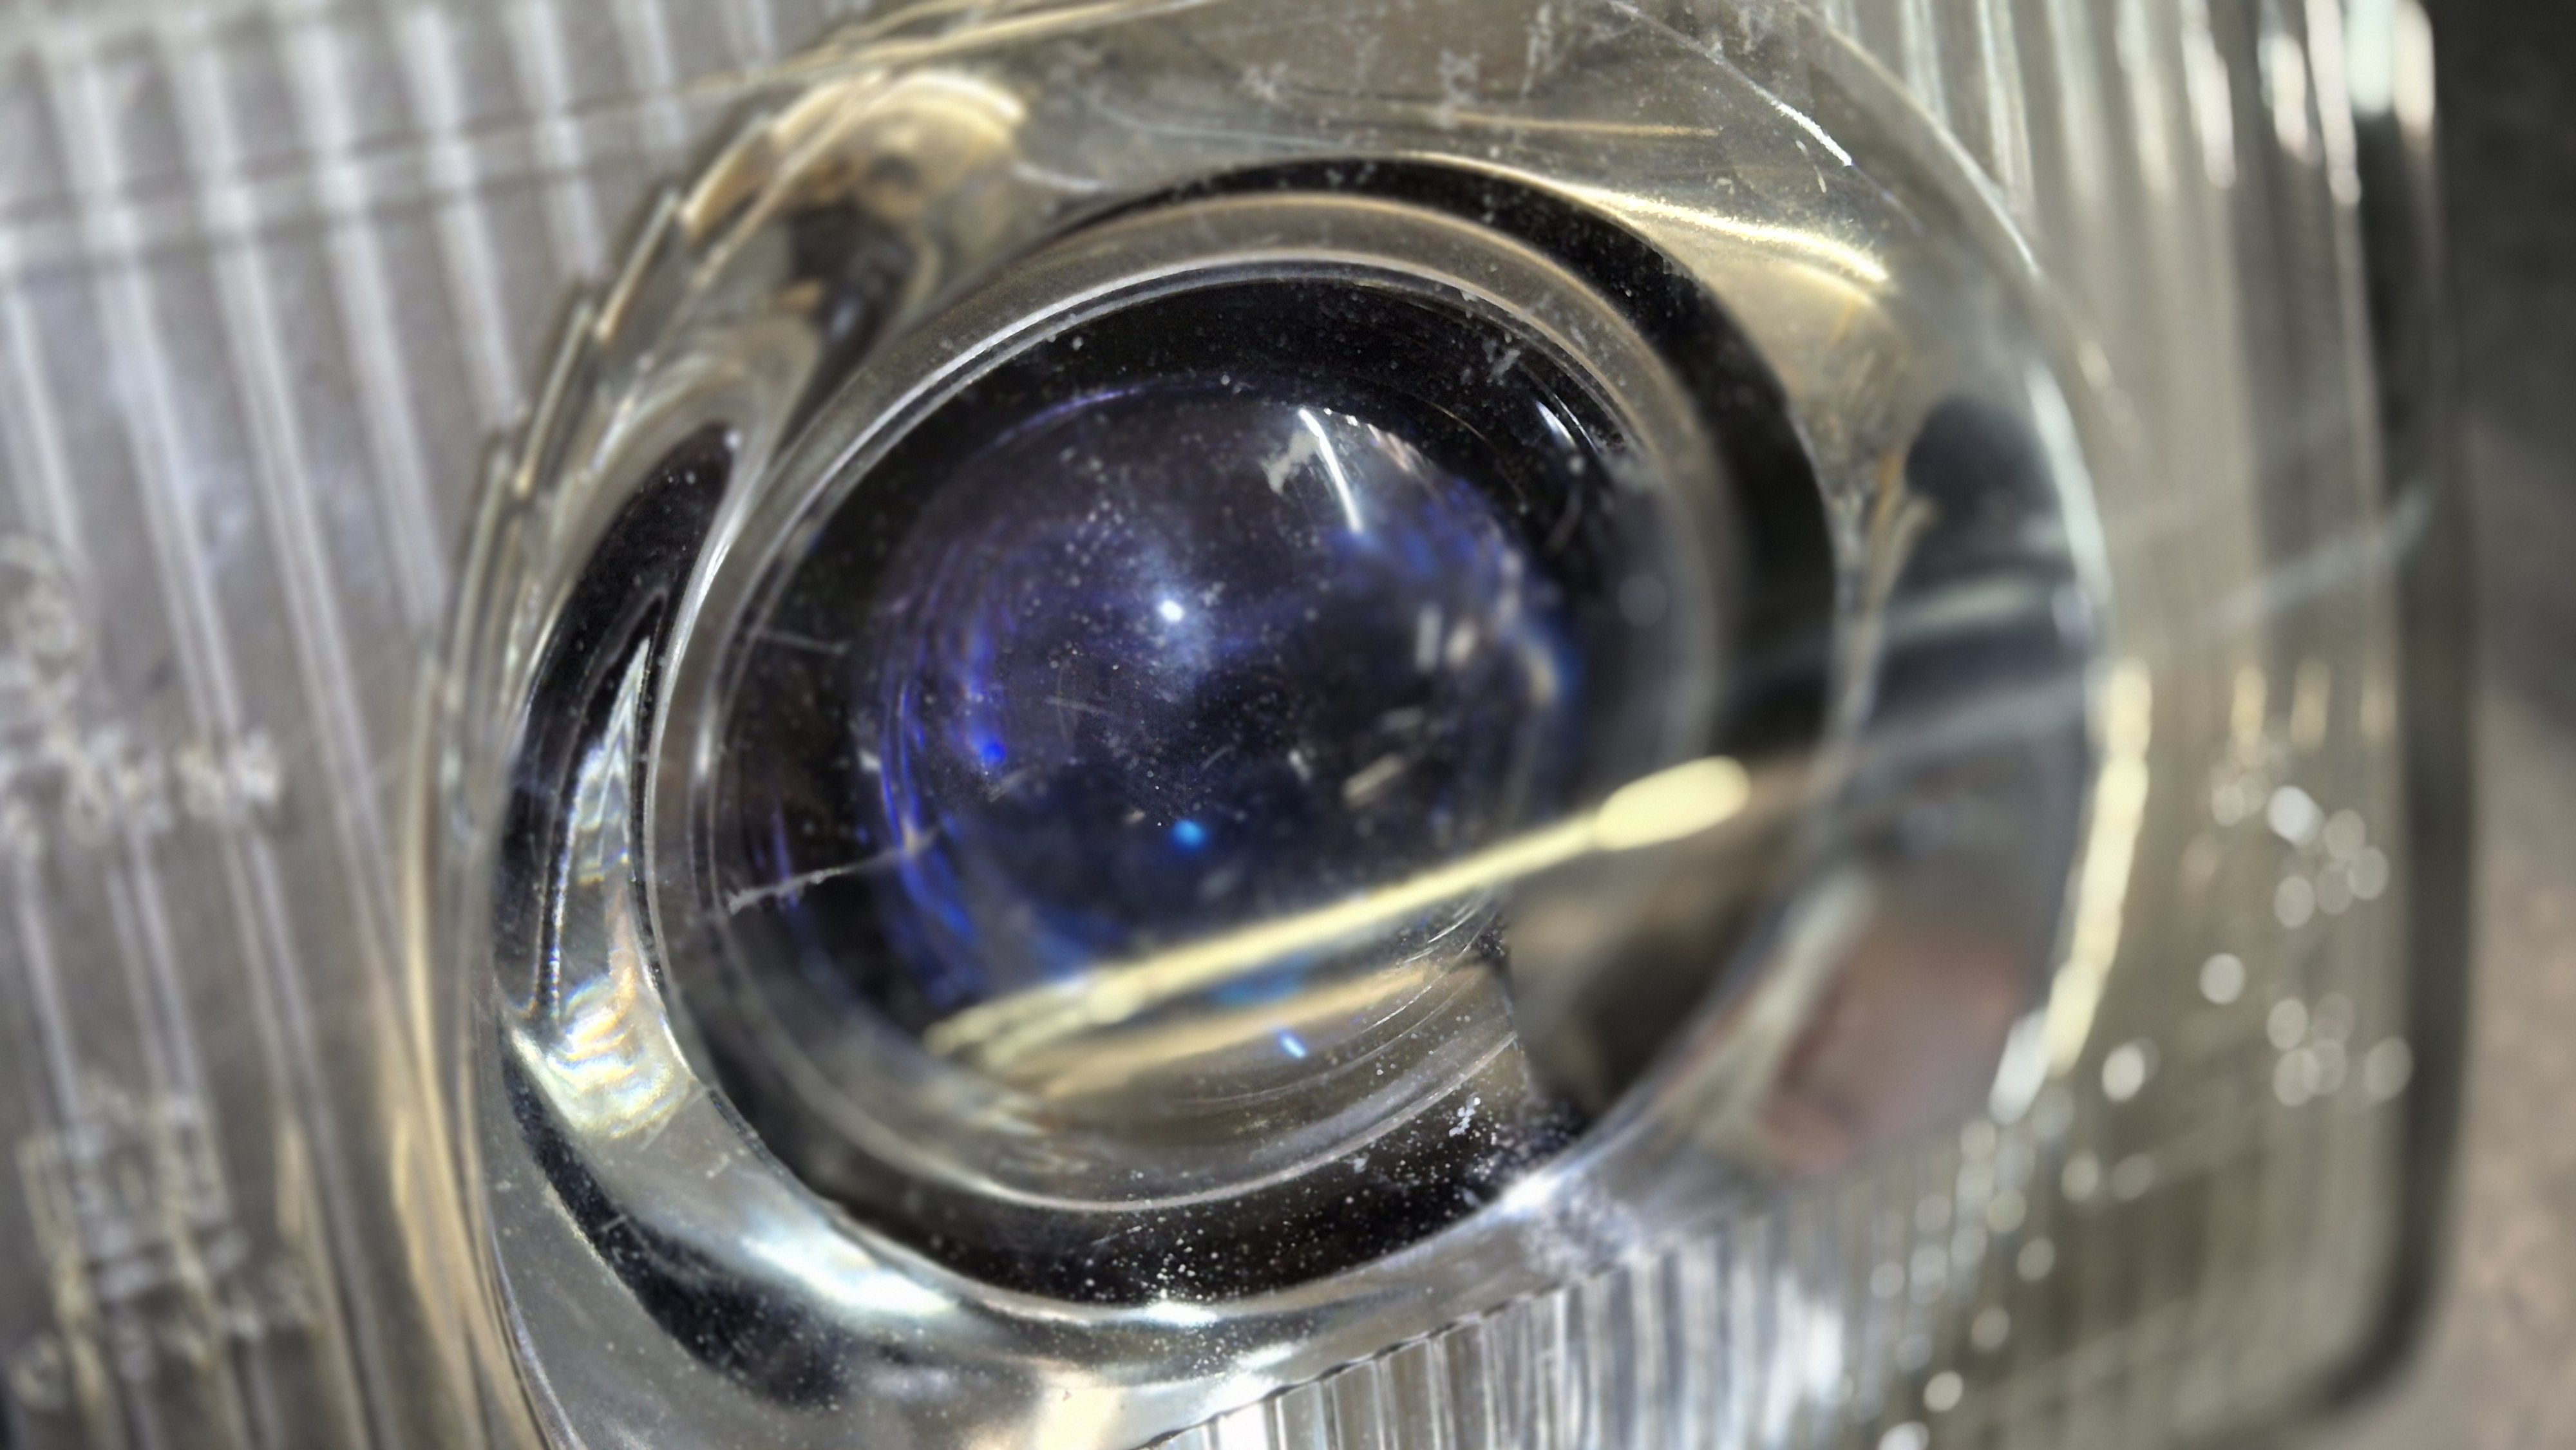
<p data-start="3879" data-end="4003">The cutoff is sharp, clean and sits slightly lower than before the conversion, so the lights don’t blind oncoming traffic.</p>
<p data-start="4005" data-end="4236">Looking at the beam pattern against a wall, you can immediately see the difference compared to the original setup. The light distribution is much wider, brighter and more controlled instead of just throwing weak light everywhere.</p>
<figure class="post__image"><img loading="lazy"  src="http://workshop.l300company.pl/media/posts/5/20260104_174000.jpg" alt="" width="2252" height="4000" sizes="(min-width: 37.5em) 1600px, 80vw" srcset="http://workshop.l300company.pl/media/posts/5/responsive/20260104_174000-xs.jpg 384w ,http://workshop.l300company.pl/media/posts/5/responsive/20260104_174000-sm.jpg 600w ,http://workshop.l300company.pl/media/posts/5/responsive/20260104_174000-md.jpg 768w ,http://workshop.l300company.pl/media/posts/5/responsive/20260104_174000-lg.jpg 1200w ,http://workshop.l300company.pl/media/posts/5/responsive/20260104_174000-xl.jpg 1600w"></figure>
<hr data-start="4238" data-end="4241">
<h3 data-section-id="17yegqs" data-start="4243" data-end="4270">Side-by-side comparison</h3>
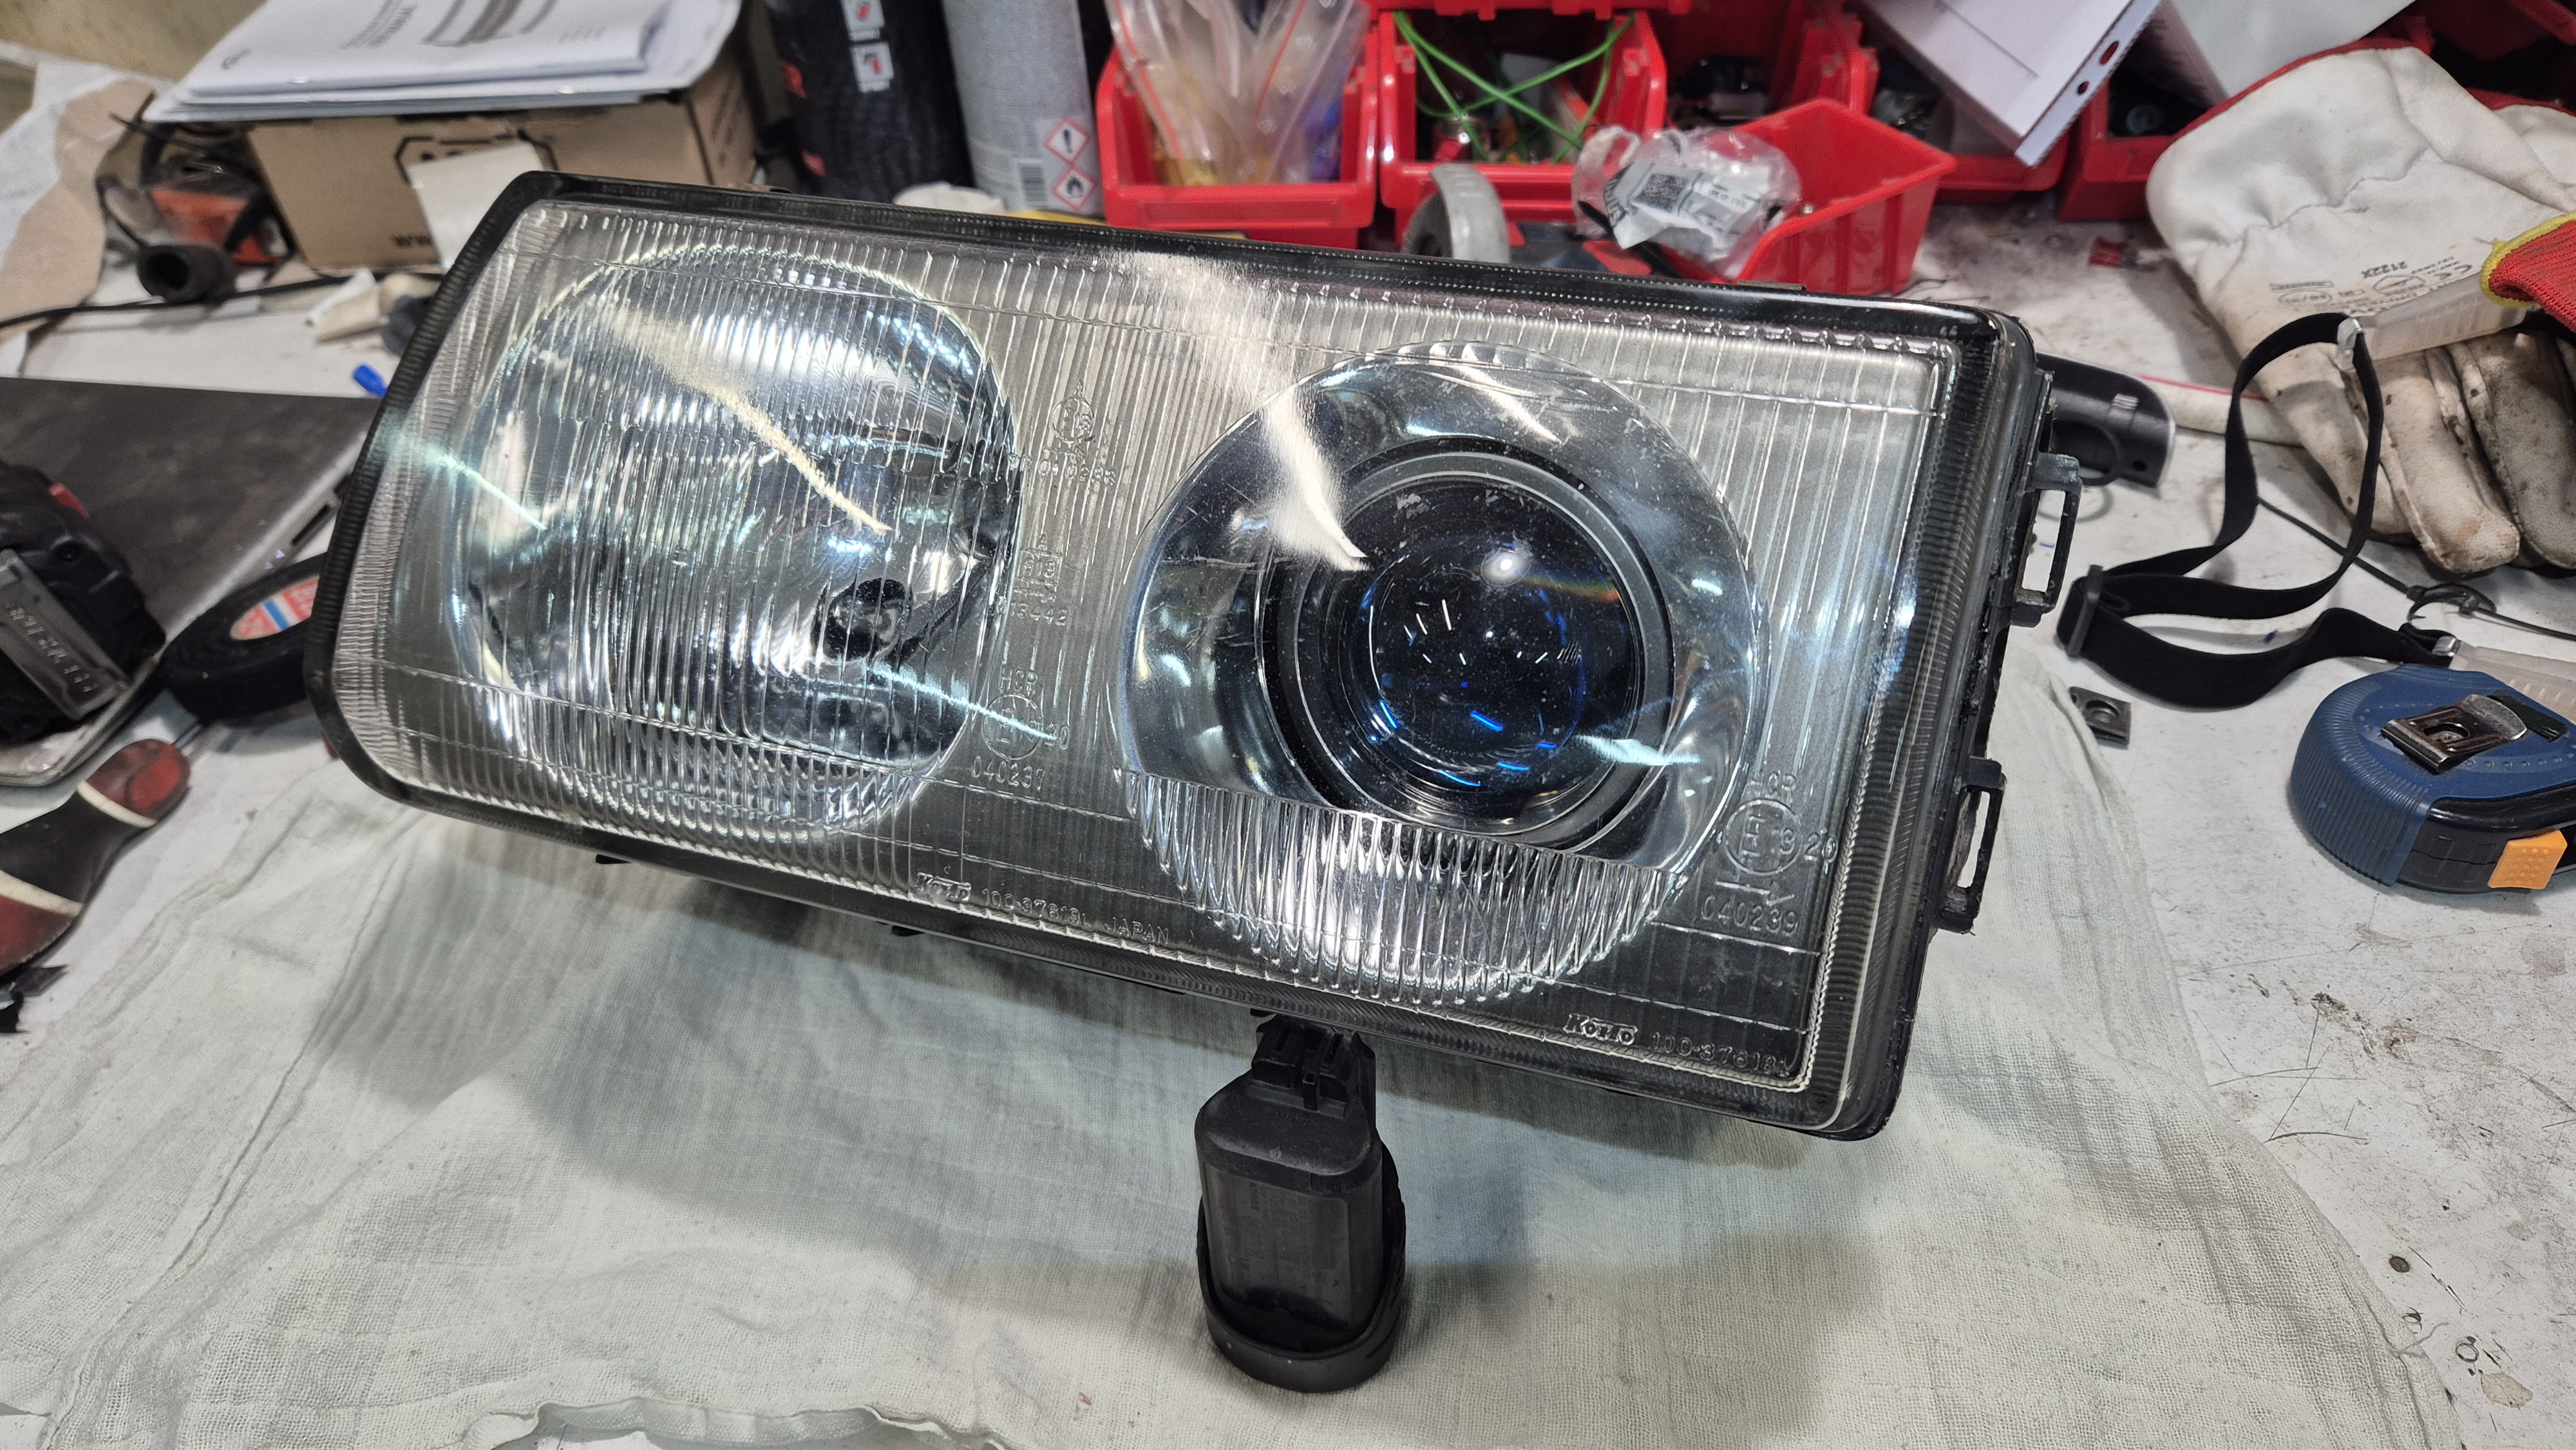
<p data-start="4272" data-end="4416">At one point I actually tested the difference side by side. I left one headlight completely stock and converted only the other side to bi-LED.</p>
<p data-start="4418" data-end="4669">The comparison was honestly ridiculous. Next to the bi-LED projector, the original headlight looked more like a parking light than a proper low beam. The photos still don’t fully capture it, but in real life the difference is almost hard to believe.</p>
<p data-start="4671" data-end="4898">The amount of light on the road is on a completely different level. The beam spread is smooth and even, visibility at night improved massively, and at the same time the sharp cutoff keeps the light exactly where it should be.</p>
<hr data-start="4900" data-end="4903">
<h3 data-section-id="1hek2gj" data-start="786" data-end="818">Parts used</h3>
<ul data-start="987" data-end="1224">
<li data-section-id="1o2hjiv" data-start="987" data-end="1019">OEM headlights MB831282 and MB831281</li>
<li data-section-id="1953edm" data-start="1157" data-end="1224">3.0" Bi-LED projectors</li>
<li data-section-id="1953edm" data-start="1157" data-end="1224"><a href="https://l300company.pl/retrofits-upgrades/71-headlight-bi-led-adapter-plate.html">custom designed adapter plate available in our shop</a></li>
</ul>
<hr data-start="4900" data-end="4903">
<h3 data-section-id="1a2exvq" data-start="4905" data-end="4925">Driving at night</h3>
<p data-start="4927" data-end="5097">The biggest difference is noticeable on dark roads outside the city. You spot obstacles, animals or pedestrians much earlier, and night driving becomes way less tiring.</p>
<p data-start="5099" data-end="5287">On snowy roads especially, the wider and more even beam pattern makes a huge difference because you can actually see the edges of the road properly instead of driving into a dark tunnel.</p>
<p data-start="5289" data-end="5464">Personally, I think upgrades like this genuinely improve safety in older vehicles, especially cars designed back when lighting technology was nowhere near today’s standards.</p>
<p data-start="5466" data-end="5662" data-is-last-node="" data-is-only-node="">It’s just a shame that, at least where I live, regulations still don’t really allow modifications like this — even when they’re done properly and responsibly.</p>
<figure class="post__image"><img loading="lazy"  src="http://workshop.l300company.pl/media/posts/5/20260104_185756.jpg" alt="" width="4000" height="2252" sizes="(min-width: 37.5em) 1600px, 80vw" srcset="http://workshop.l300company.pl/media/posts/5/responsive/20260104_185756-xs.jpg 384w ,http://workshop.l300company.pl/media/posts/5/responsive/20260104_185756-sm.jpg 600w ,http://workshop.l300company.pl/media/posts/5/responsive/20260104_185756-md.jpg 768w ,http://workshop.l300company.pl/media/posts/5/responsive/20260104_185756-lg.jpg 1200w ,http://workshop.l300company.pl/media/posts/5/responsive/20260104_185756-xl.jpg 1600w"></figure>
<div class="gallery-wrapper"><div class="gallery"  data-is-empty="false" data-translation="Add images" data-columns="3">
<figure class="gallery__item"><a href="http://workshop.l300company.pl/media/posts/5/gallery/20251222_090631.jpg" data-size="4000x2252"><img loading="lazy" src="http://workshop.l300company.pl/media/posts/5/gallery/20251222_090631-thumbnail.jpg" alt="" width="768" height="432"></a></figure>
<figure class="gallery__item"><a href="http://workshop.l300company.pl/media/posts/5/gallery/20251222_090610.jpg" data-size="4000x2252"><img loading="lazy" src="http://workshop.l300company.pl/media/posts/5/gallery/20251222_090610-thumbnail.jpg" alt="" width="768" height="432"></a></figure>
<figure class="gallery__item"><a href="http://workshop.l300company.pl/media/posts/5/gallery/20260111_172638.jpg" data-size="4000x2252"><img loading="lazy" src="http://workshop.l300company.pl/media/posts/5/gallery/20260111_172638-thumbnail.jpg" alt="" width="768" height="432"></a></figure>
<figure class="gallery__item"><a href="http://workshop.l300company.pl/media/posts/5/gallery/20251219_091019.jpg" data-size="4000x2252"><img loading="lazy" src="http://workshop.l300company.pl/media/posts/5/gallery/20251219_091019-thumbnail.jpg" alt="" width="768" height="432"></a></figure>
<figure class="gallery__item"><a href="http://workshop.l300company.pl/media/posts/5/gallery/20260104_181538.jpg" data-size="4000x2252"><img loading="lazy" src="http://workshop.l300company.pl/media/posts/5/gallery/20260104_181538-thumbnail.jpg" alt="" width="768" height="432"></a></figure>
<figure class="gallery__item"><a href="http://workshop.l300company.pl/media/posts/5/gallery/20260104_181730.jpg" data-size="4000x2252"><img loading="lazy" src="http://workshop.l300company.pl/media/posts/5/gallery/20260104_181730-thumbnail.jpg" alt="" width="768" height="432"></a></figure>
<figure class="gallery__item"><a href="http://workshop.l300company.pl/media/posts/5/gallery/20260104_185453.jpg" data-size="4000x2252"><img loading="lazy" src="http://workshop.l300company.pl/media/posts/5/gallery/20260104_185453-thumbnail.jpg" alt="" width="768" height="432"></a></figure>
<figure class="gallery__item"><a href="http://workshop.l300company.pl/media/posts/5/gallery/20260109_102607.jpg" data-size="4000x2252"><img loading="lazy" src="http://workshop.l300company.pl/media/posts/5/gallery/20260109_102607-thumbnail.jpg" alt="" width="768" height="432"></a></figure>
<figure class="gallery__item"><a href="http://workshop.l300company.pl/media/posts/5/gallery/20260109_105801.jpg" data-size="4000x2252"><img loading="lazy" src="http://workshop.l300company.pl/media/posts/5/gallery/20260109_105801-thumbnail.jpg" alt="" width="768" height="432"></a></figure>
<figure class="gallery__item"><a href="http://workshop.l300company.pl/media/posts/5/gallery/20260111_140047.jpg" data-size="4000x2252"><img loading="lazy" src="http://workshop.l300company.pl/media/posts/5/gallery/20260111_140047-thumbnail.jpg" alt="" width="768" height="432"></a></figure>
<figure class="gallery__item"><a href="http://workshop.l300company.pl/media/posts/5/gallery/20251219_090902.jpg" data-size="4000x2252"><img loading="lazy" src="http://workshop.l300company.pl/media/posts/5/gallery/20251219_090902-thumbnail.jpg" alt="" width="768" height="432"></a></figure>
<figure class="gallery__item"><a href="http://workshop.l300company.pl/media/posts/5/gallery/20251221_130130.jpg" data-size="1080x1920"><img loading="lazy" src="http://workshop.l300company.pl/media/posts/5/gallery/20251221_130130-thumbnail.jpg" alt="" width="768" height="1365"></a></figure>
<figure class="gallery__item"><a href="http://workshop.l300company.pl/media/posts/5/gallery/20251221_235756.jpg" data-size="4000x2252"><img loading="lazy" src="http://workshop.l300company.pl/media/posts/5/gallery/20251221_235756-thumbnail.jpg" alt="" width="768" height="432"></a></figure>
<figure class="gallery__item"><a href="http://workshop.l300company.pl/media/posts/5/gallery/20260104_165624.jpg" data-size="4000x2252"><img loading="lazy" src="http://workshop.l300company.pl/media/posts/5/gallery/20260104_165624-thumbnail.jpg" alt="" width="768" height="432"></a></figure>
<figure class="gallery__item"><a href="http://workshop.l300company.pl/media/posts/5/gallery/20260104_165627.jpg" data-size="4000x2252"><img loading="lazy" src="http://workshop.l300company.pl/media/posts/5/gallery/20260104_165627-thumbnail.jpg" alt="" width="768" height="432"></a></figure>
<figure class="gallery__item"><a href="http://workshop.l300company.pl/media/posts/5/gallery/20260104_171155.jpg" data-size="4000x2252"><img loading="lazy" src="http://workshop.l300company.pl/media/posts/5/gallery/20260104_171155-thumbnail.jpg" alt="" width="768" height="432"></a></figure>
<figure class="gallery__item"><a href="http://workshop.l300company.pl/media/posts/5/gallery/20260104_173211.jpg" data-size="4000x2252"><img loading="lazy" src="http://workshop.l300company.pl/media/posts/5/gallery/20260104_173211-thumbnail.jpg" alt="" width="768" height="432"></a></figure>
</div></div>
<p data-start="5466" data-end="5662" data-is-last-node="" data-is-only-node=""> </p>
<p data-start="5466" data-end="5662" data-is-last-node="" data-is-only-node=""> </p>
            ]]>
        </content>
    </entry>
    <entry>
        <title>Modern Audio Upgrade in a Classic Mitsubishi L300</title>
        <author>
            <name>Piotr</name>
        </author>
        <link href="http://workshop.l300company.pl/modern-audio-upgrade-in-a-classic-mitsubishi-l300.html"/>
        <id>http://workshop.l300company.pl/modern-audio-upgrade-in-a-classic-mitsubishi-l300.html</id>
        <media:content url="http://workshop.l300company.pl/media/posts/4/481126693_23991139990486013_6031974210281006067_n-2.jpg" medium="image" />
            <category term="interior"/>
            <category term="electrical"/>

        <updated>2026-04-23T23:06:39+02:00</updated>
            <summary>
                <![CDATA[
                        <img src="http://workshop.l300company.pl/media/posts/4/481126693_23991139990486013_6031974210281006067_n-2.jpg" alt="" />
                    The original audio system in the L300 is exactly what you would expect from a vehicle of its age. It&hellip;
                ]]>
            </summary>
        <content type="html">
            <![CDATA[
                    <p><img src="http://workshop.l300company.pl/media/posts/4/481126693_23991139990486013_6031974210281006067_n-2.jpg" class="type:primaryImage" alt="" /></p>
                <div class="xdj266r x14z9mp xat24cr x1lziwak x1vvkbs x126k92a">
<div dir="auto">
<p data-start="77" data-end="374">The original audio system in the L300 is exactly what you would expect from a vehicle of its age. It worked fine back then, but today it simply doesn’t meet modern expectations. The small speakers placed low in the dashboard play straight into your knees, which makes the sound unclear and flat.</p>
<p data-start="376" data-end="484">Some versions also had rear speakers, but even those are far from what we consider good sound quality today.</p>
<p data-start="486" data-end="582">So during the rebuild of the car, I decided to completely upgrade the audio system from scratch.</p>
<hr data-start="1454" data-end="1457"></div>
</div>
<h3 data-section-id="15pp87n" data-start="589" data-end="625">If you want to copy this setup, the full parts list is included near the end of the article.</h3>
<hr data-start="1454" data-end="1457">
<h3 data-section-id="15pp87n" data-start="589" data-end="625">New idea – speakers in the doors</h3>
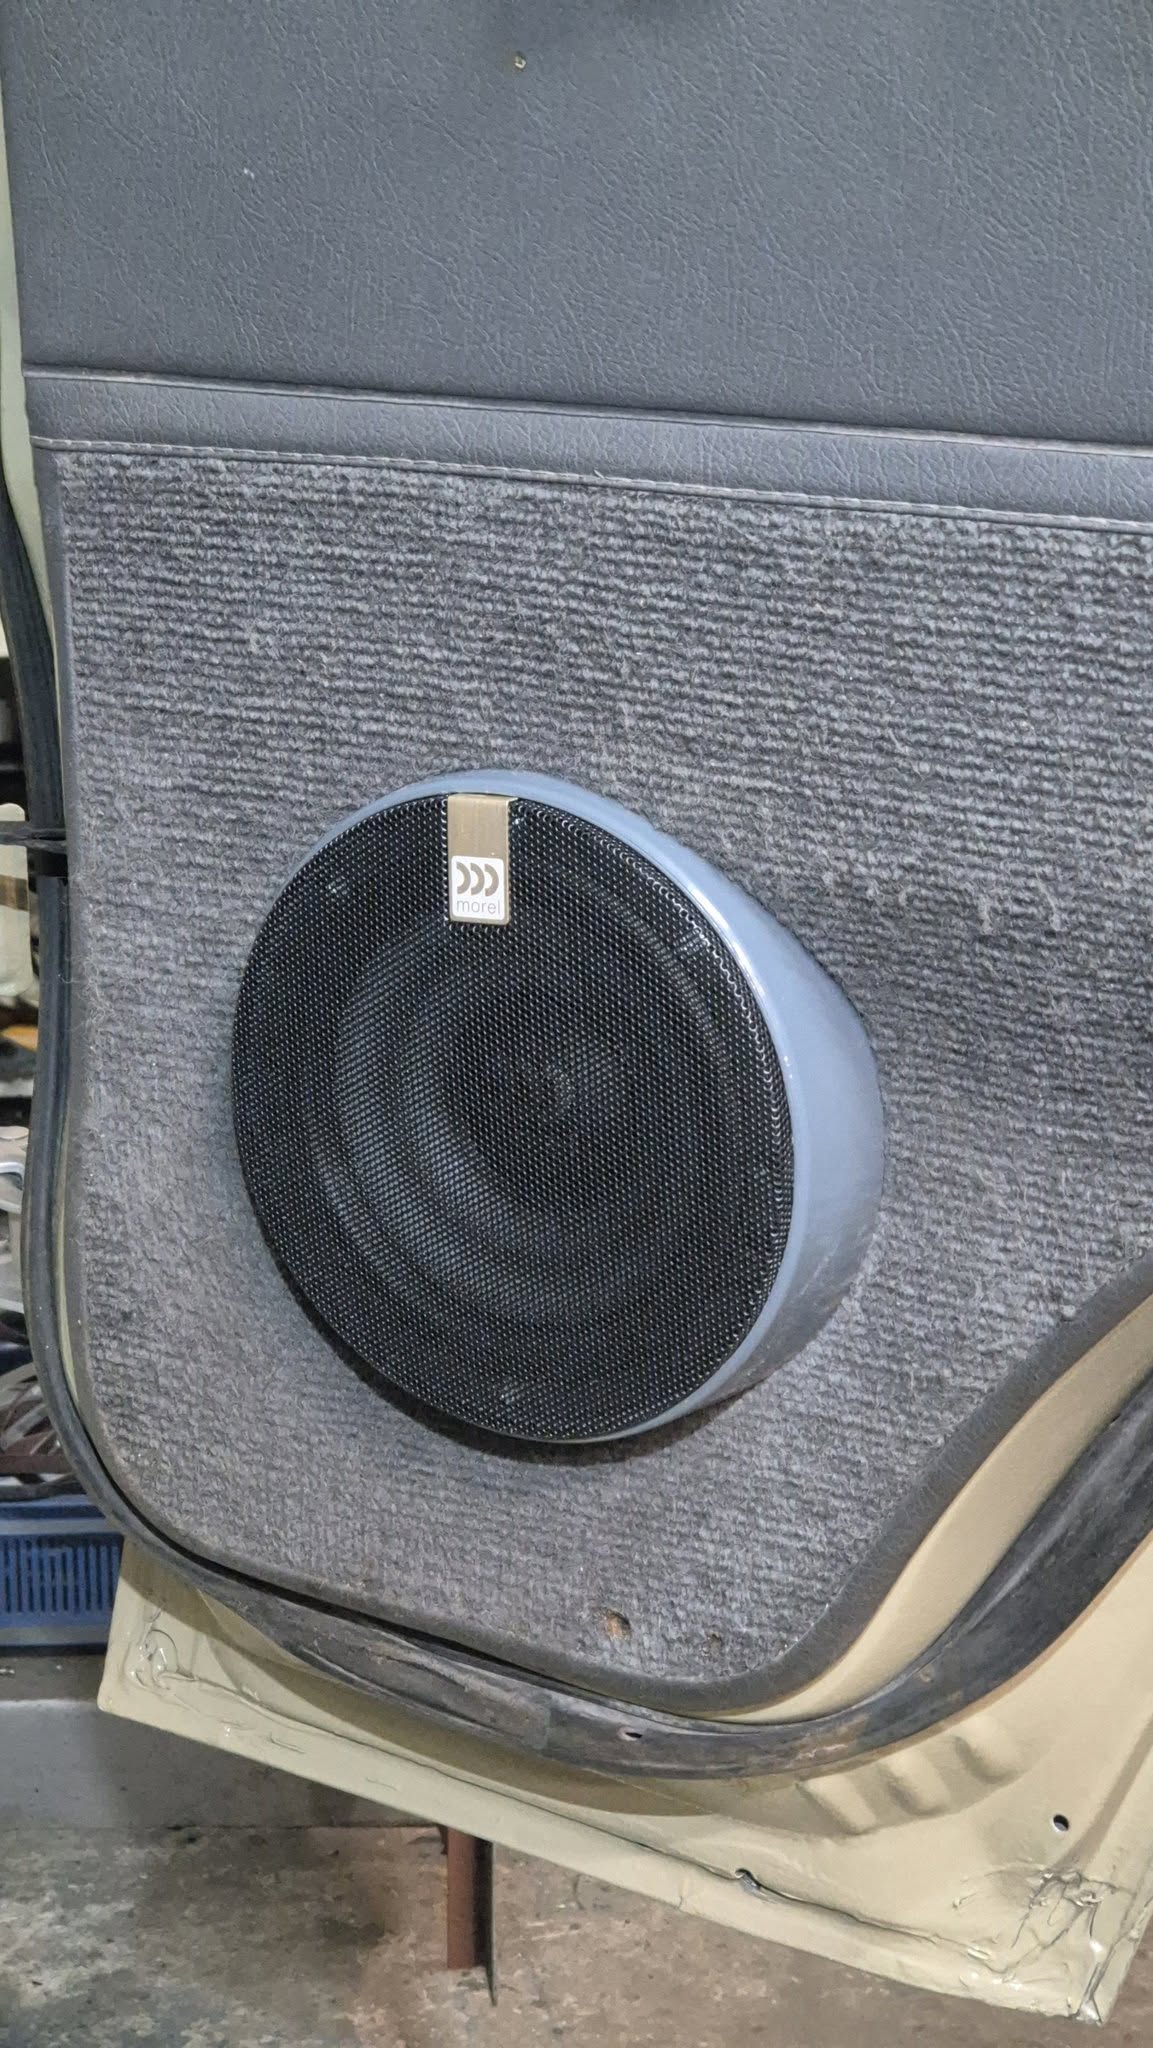
<p data-start="627" data-end="763">The first step was to move the main speakers into the doors. This improves sound quality and creates a much better listening experience.</p>
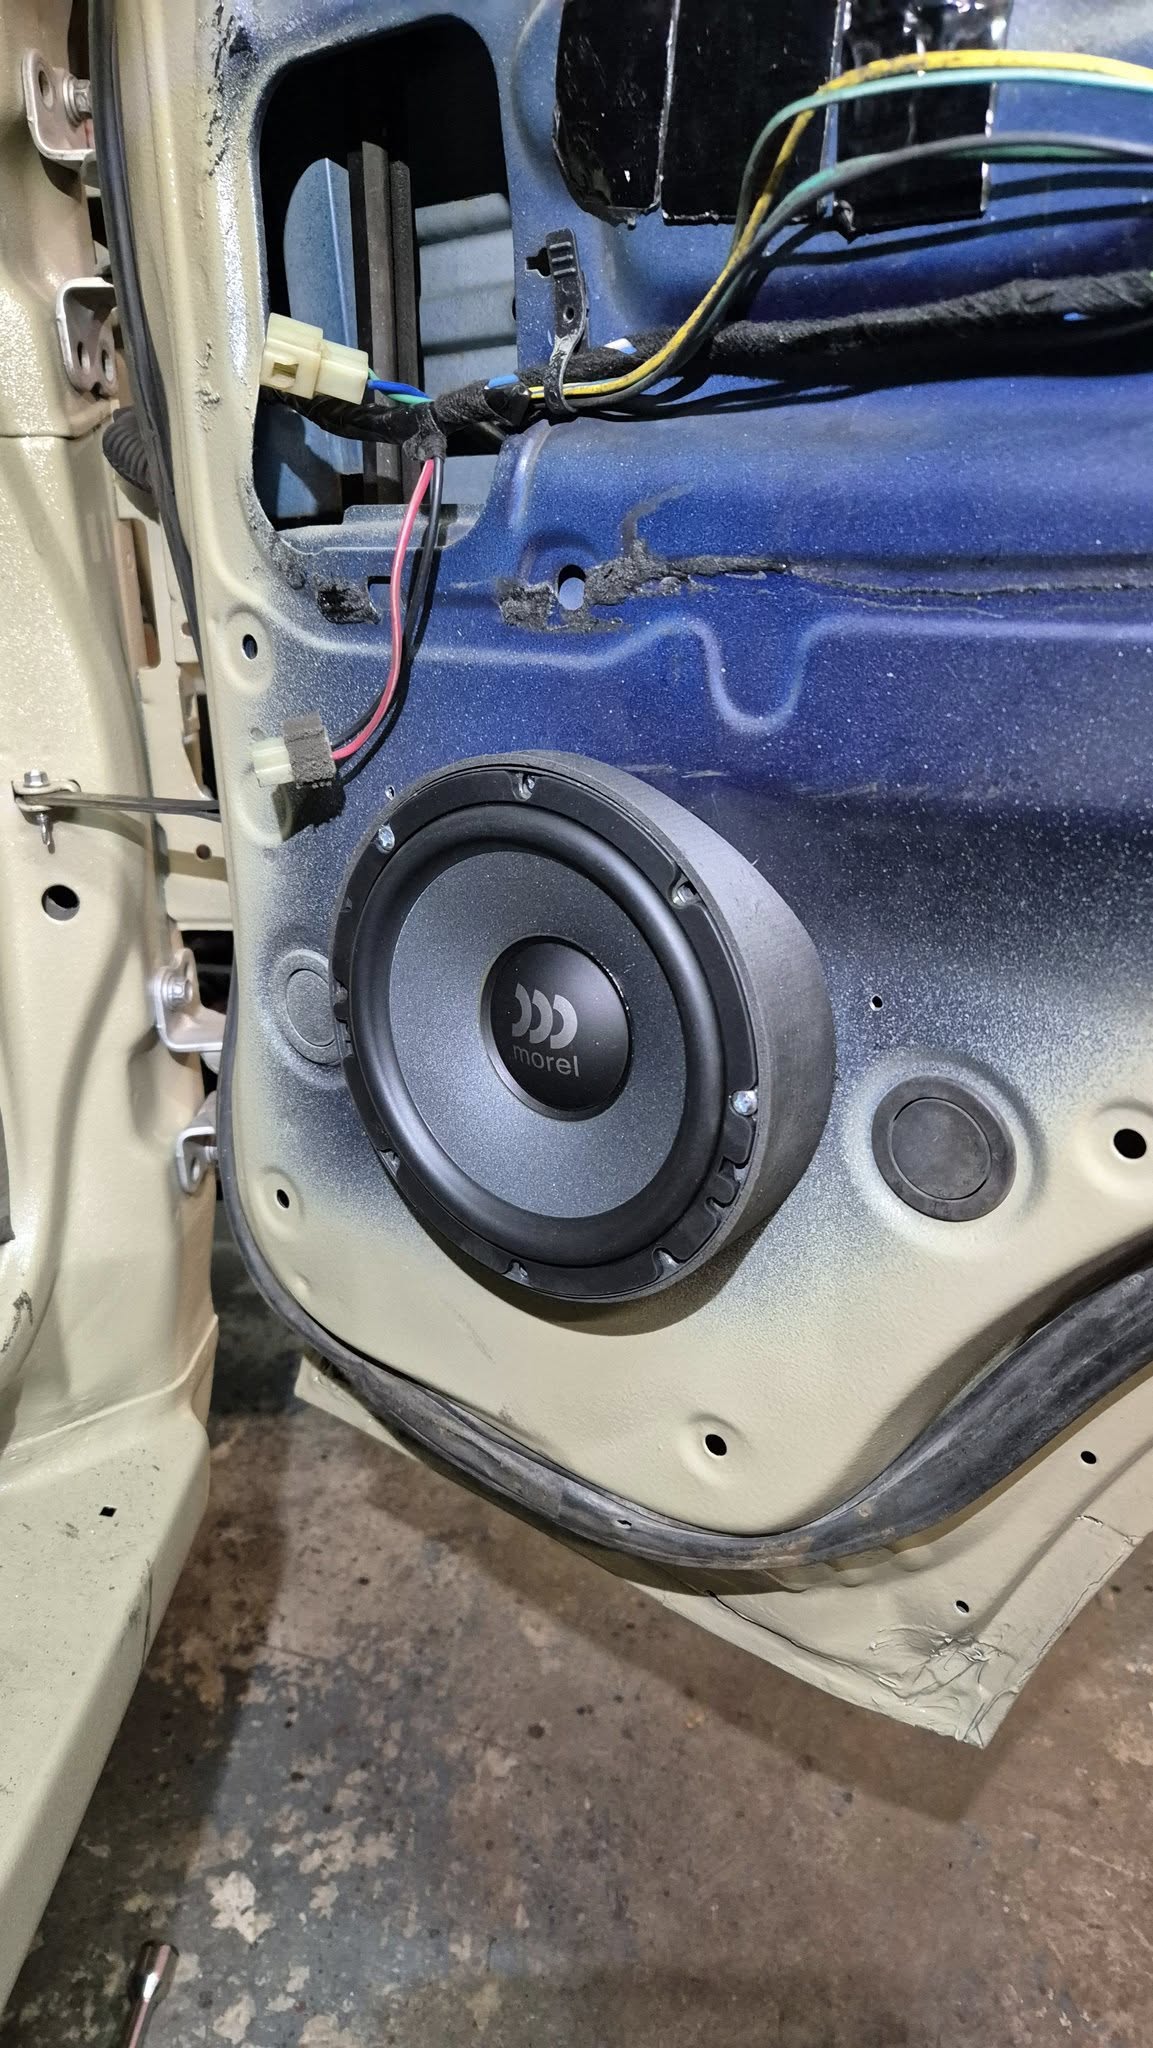
<p data-start="765" data-end="895">I chose 165 mm speakers from <span class="hover:entity-accent entity-underline inline cursor-pointer align-baseline"><span class="whitespace-normal">Morel</span></span> — specifically the <strong data-start="851" data-end="876">Morel Ultra Tempo 602</strong> set for the front.</p>
<p data-start="897" data-end="917">This setup includes:</p>
<ul data-start="918" data-end="1042">
<li data-section-id="1q9oiei" data-start="918" data-end="950">woofers mounted in the doors</li>
<li data-section-id="1lc3j6n" data-start="951" data-end="997">separate tweeters mounted on the A-pillars</li>
<li data-section-id="1jbbmhq" data-start="998" data-end="1042">crossovers installed under the dashboard</li>
</ul>
<p data-start="1044" data-end="1140">This configuration allows much better sound staging and clarity compared to the original layout.</p>
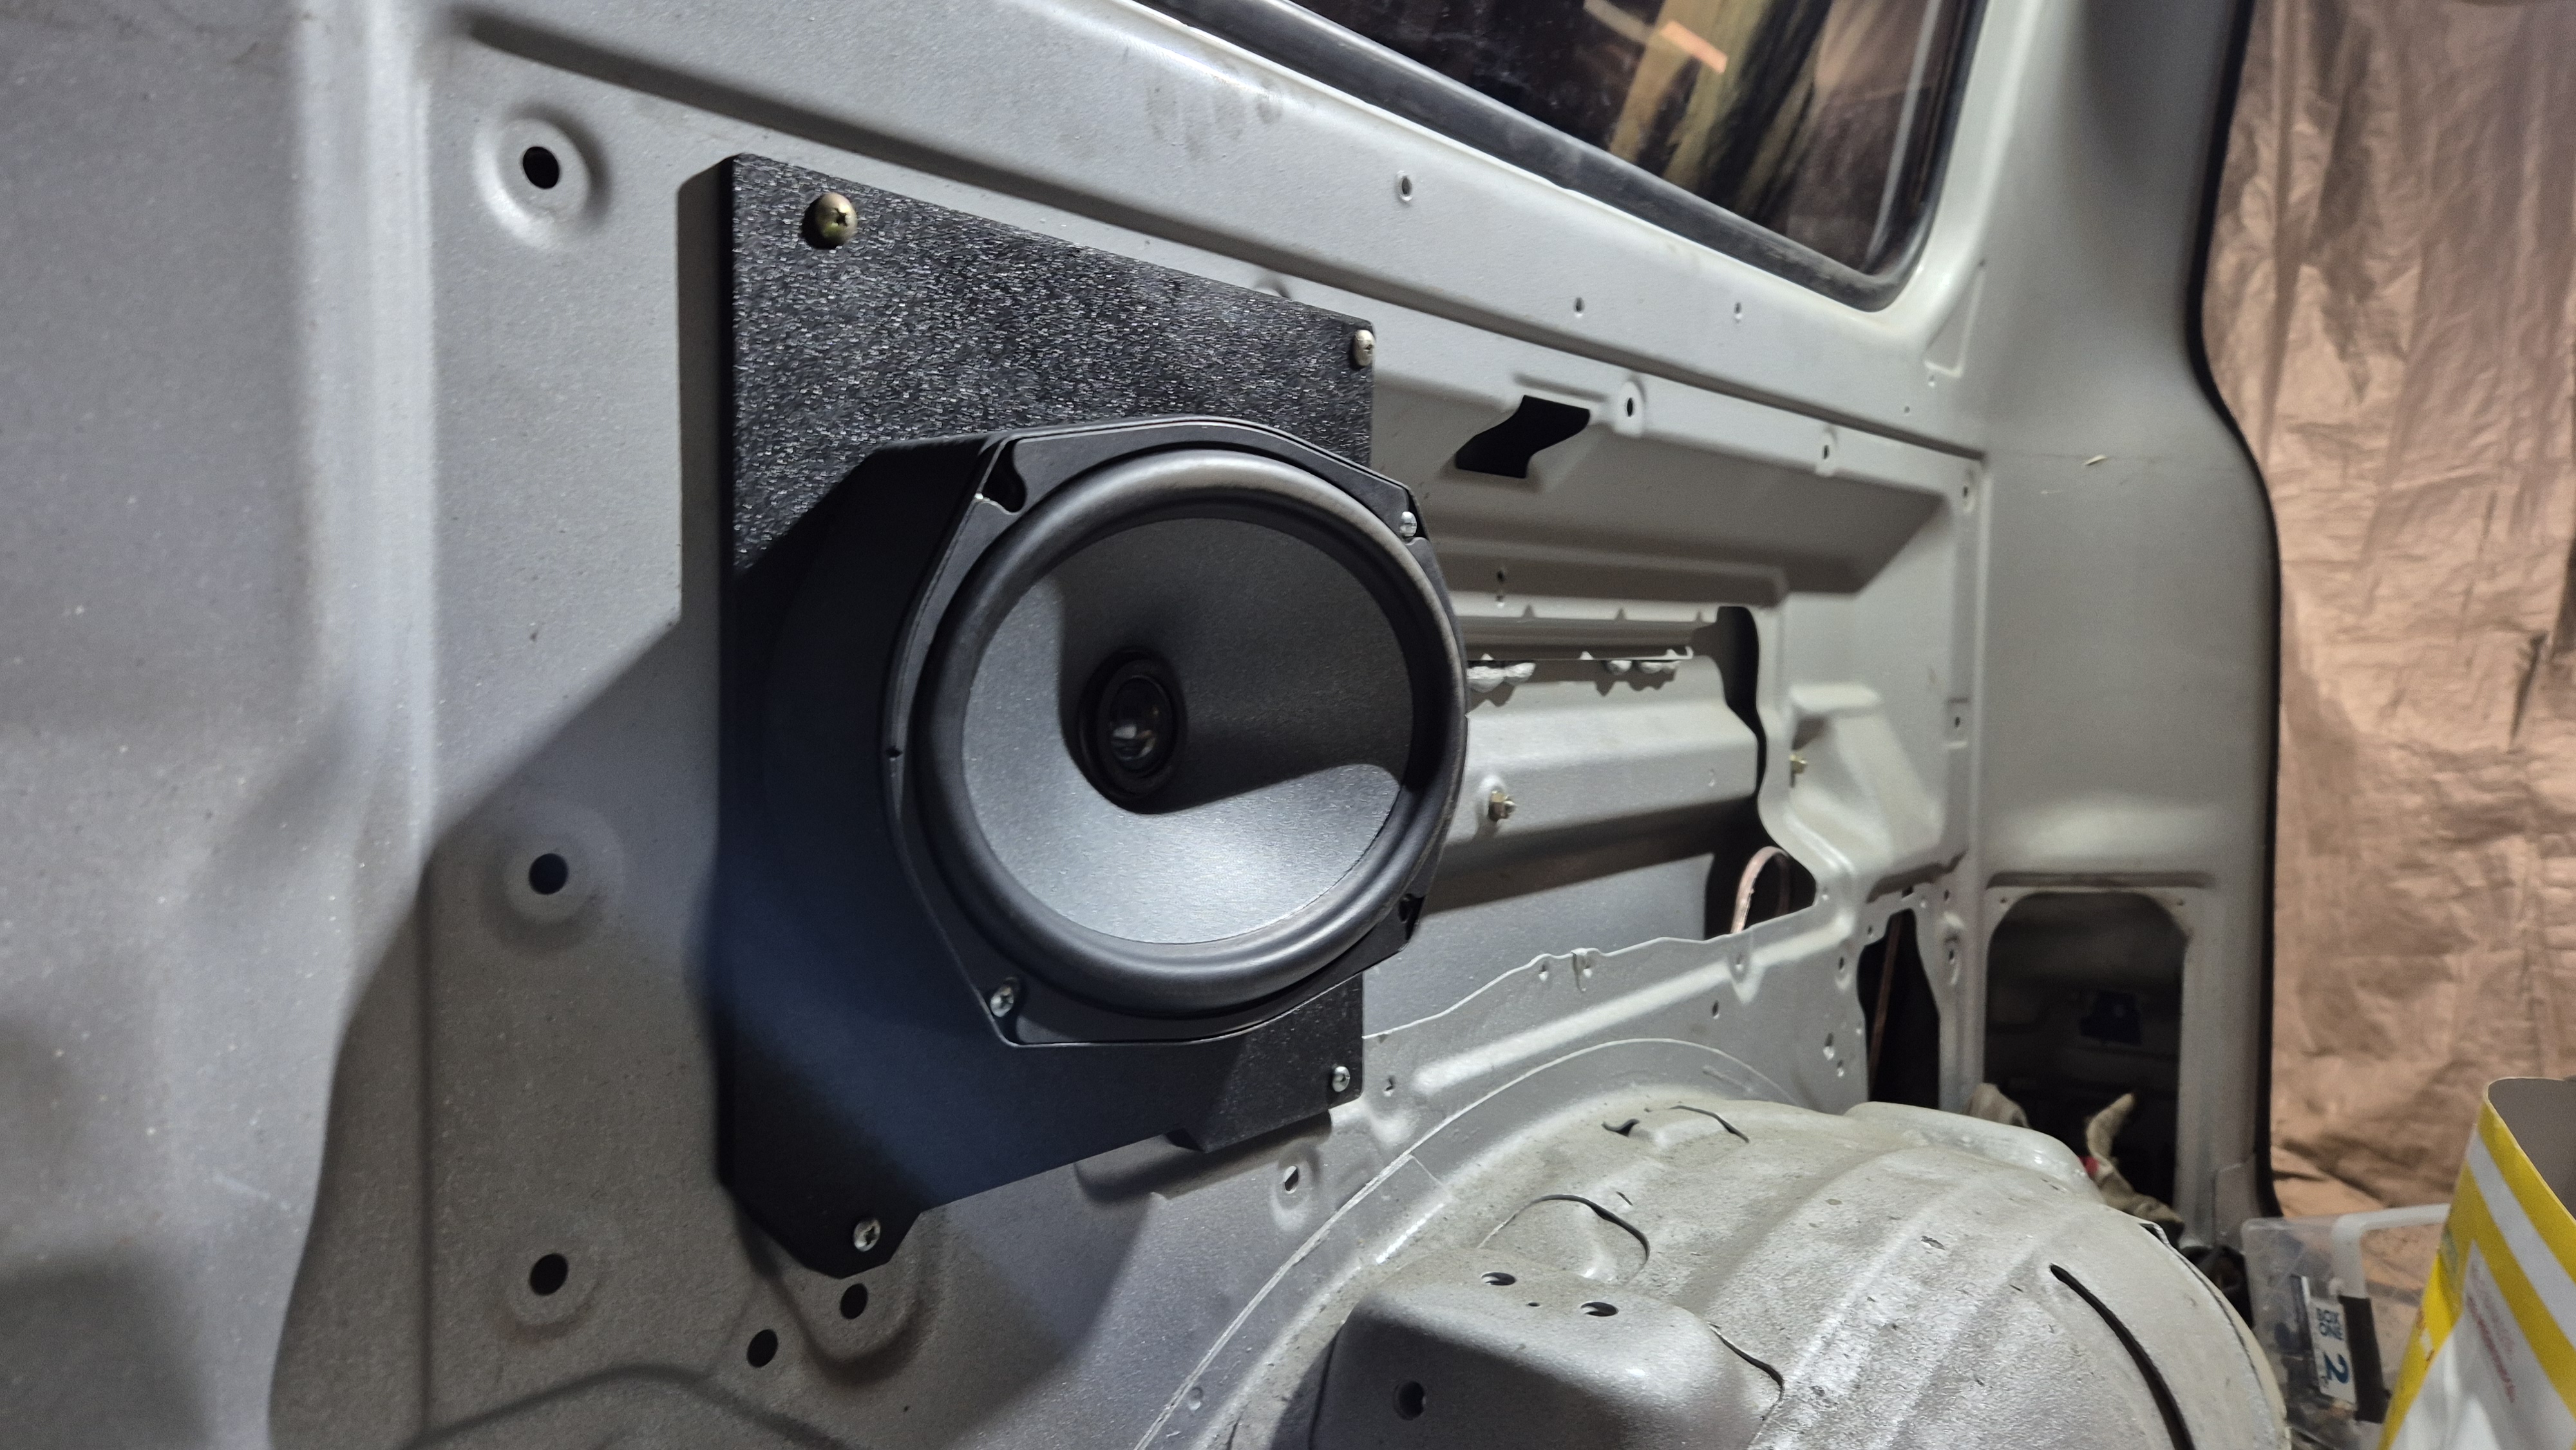
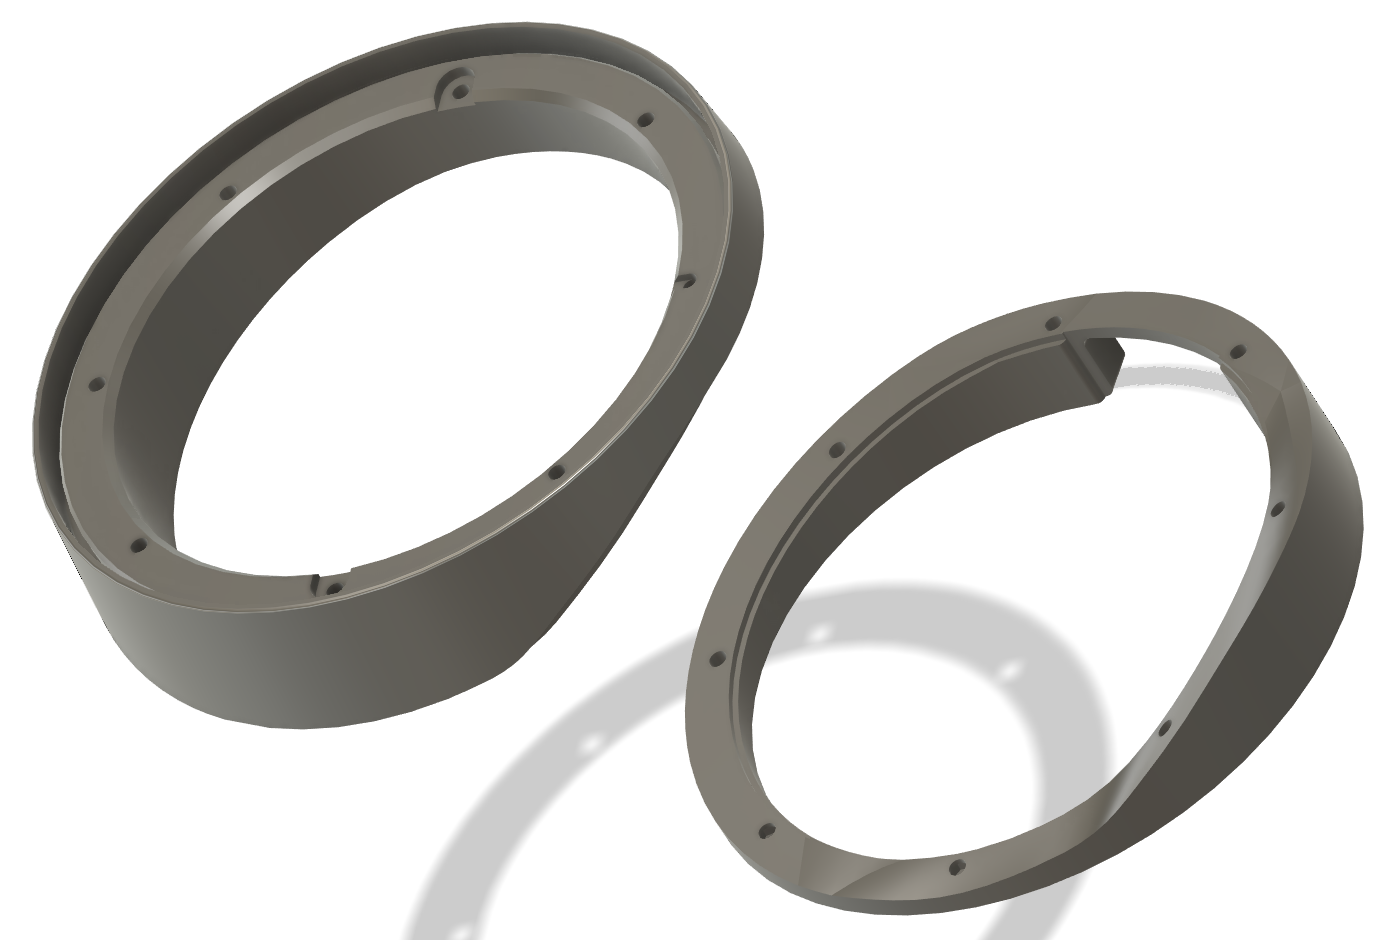
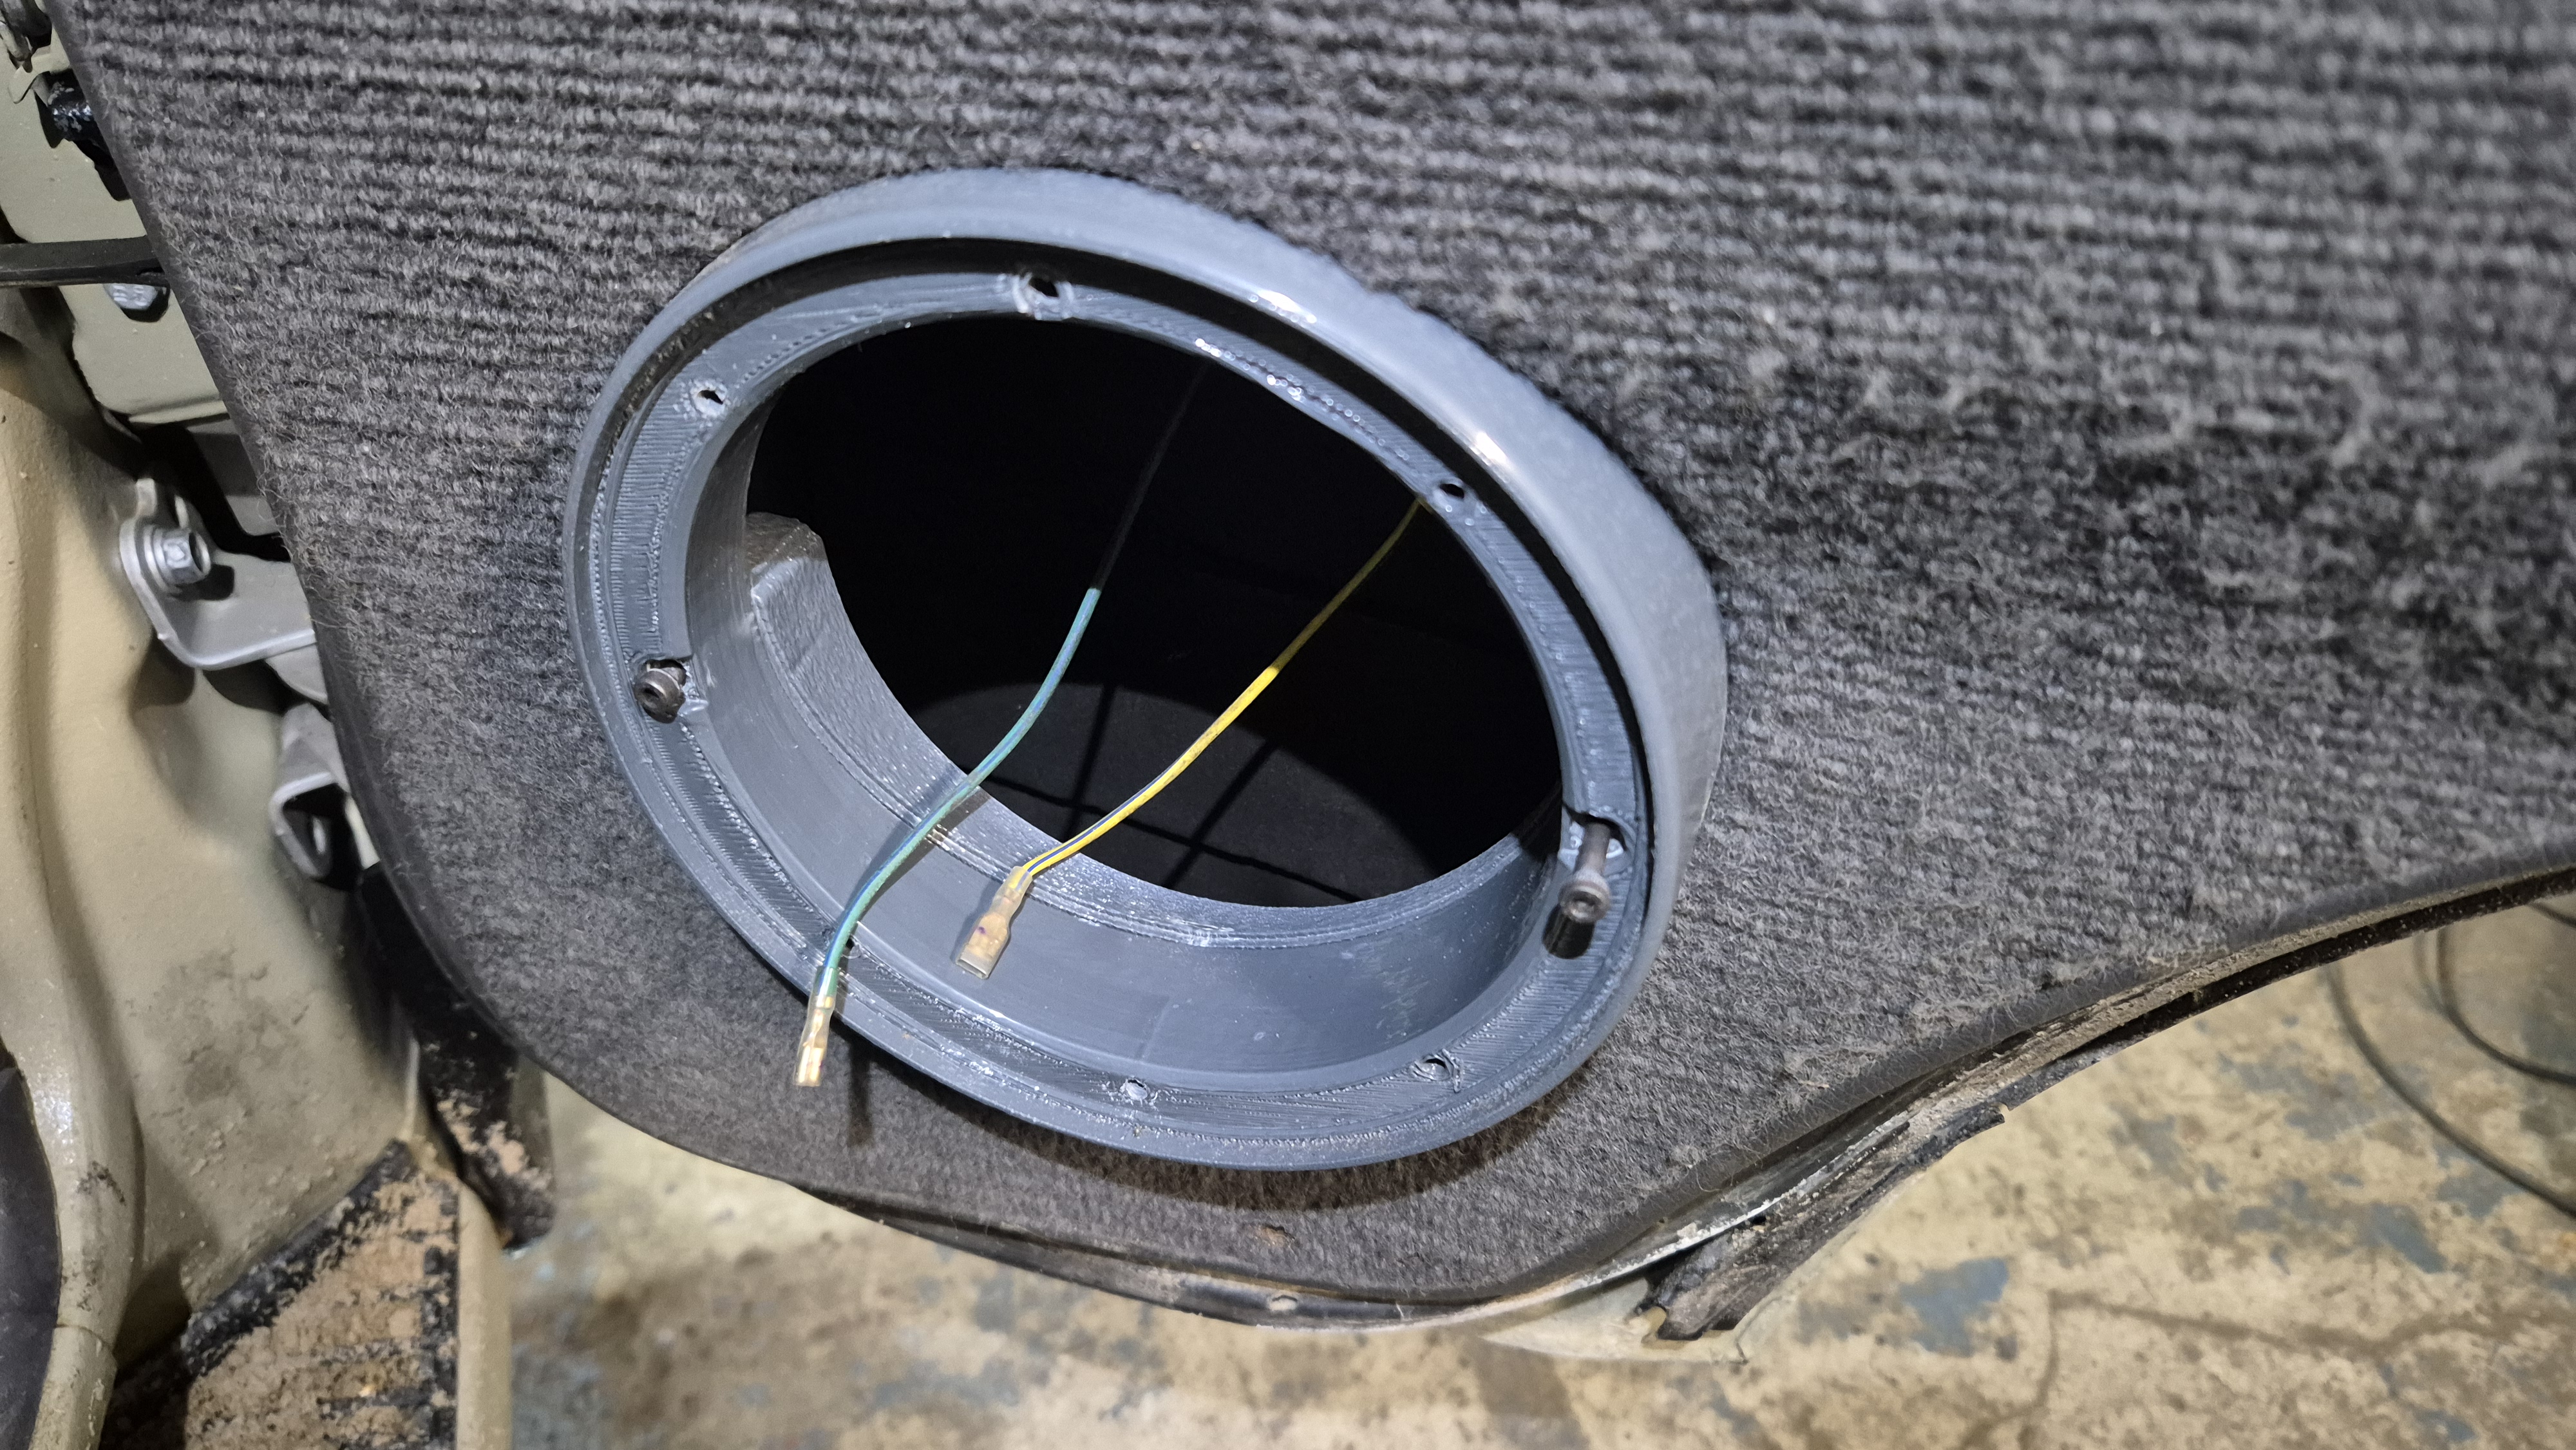
<p data-start="1142" data-end="1270">However, installing them was not simple. The door shape in the L300 is very irregular, so standard mounting adapters do not fit.</p>
<figure class="post__image"><img loading="lazy"  src="http://workshop.l300company.pl/media/posts/4/481126693_23991139990486013_6031974210281006067_n.jpg" alt="" width="1153" height="2048" sizes="(min-width: 37.5em) 1600px, 80vw" srcset="http://workshop.l300company.pl/media/posts/4/responsive/481126693_23991139990486013_6031974210281006067_n-xs.jpg 384w ,http://workshop.l300company.pl/media/posts/4/responsive/481126693_23991139990486013_6031974210281006067_n-sm.jpg 600w ,http://workshop.l300company.pl/media/posts/4/responsive/481126693_23991139990486013_6031974210281006067_n-md.jpg 768w ,http://workshop.l300company.pl/media/posts/4/responsive/481126693_23991139990486013_6031974210281006067_n-lg.jpg 1200w ,http://workshop.l300company.pl/media/posts/4/responsive/481126693_23991139990486013_6031974210281006067_n-xl.jpg 1600w"></figure>
<hr data-start="1454" data-end="1457">
<h3 data-section-id="1tdssw4" data-start="1277" data-end="1306">3D scan and custom design</h3>
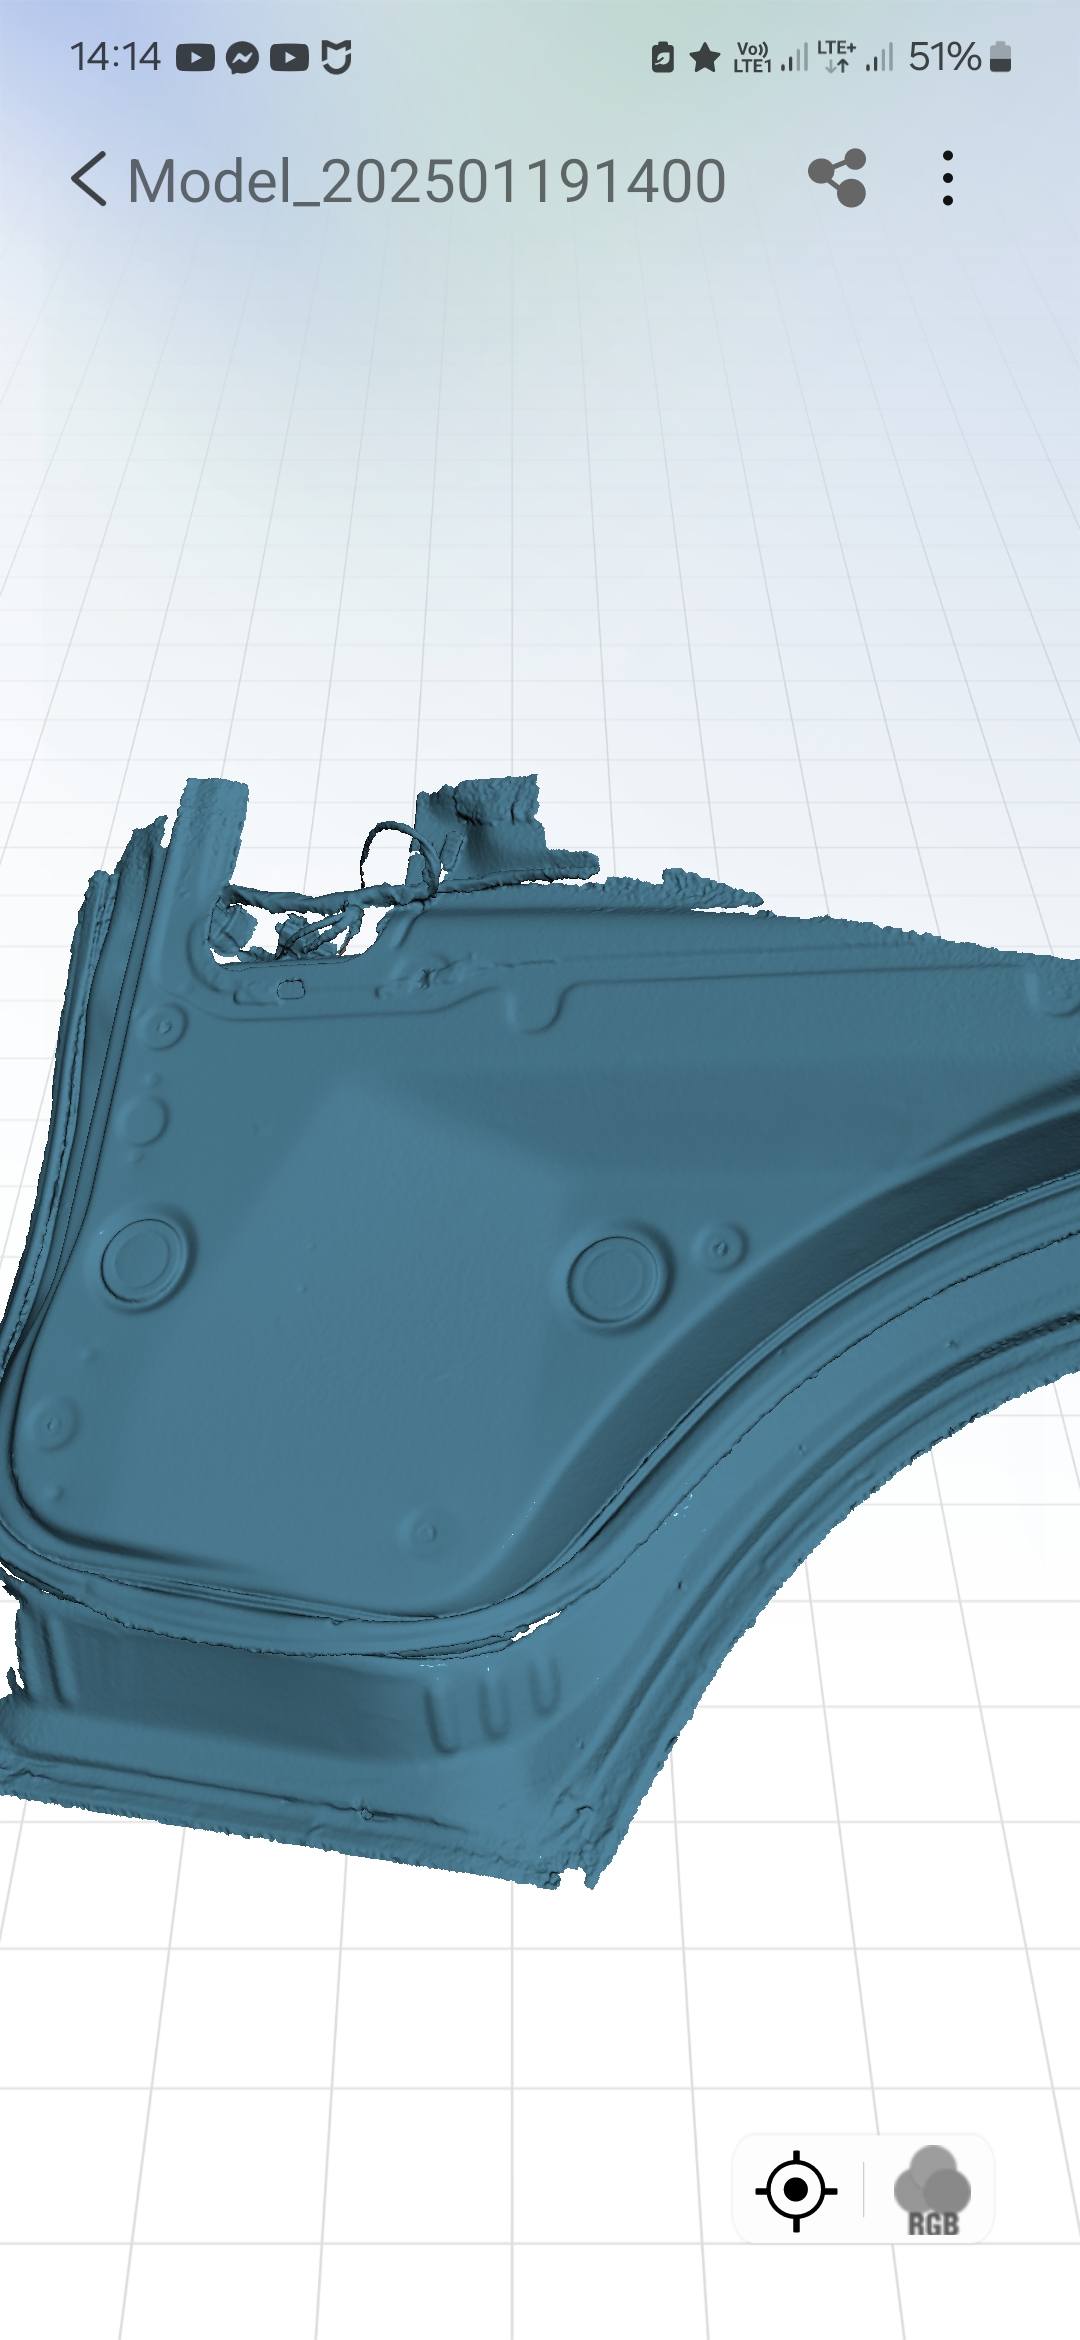
<p data-start="1308" data-end="1443">Instead of making compromises, I decided to do it properly. I made a 3D scan of the door and used it to design custom speaker adapters.</p>
<p data-start="1445" data-end="1463">The adapters were:</p>
<ul data-start="1464" data-end="1585">
<li data-section-id="1oditzl" data-start="1464" data-end="1489">designed from scratch</li>
<li data-section-id="1ra1ro8" data-start="1490" data-end="1511">3D printed in ABS</li>
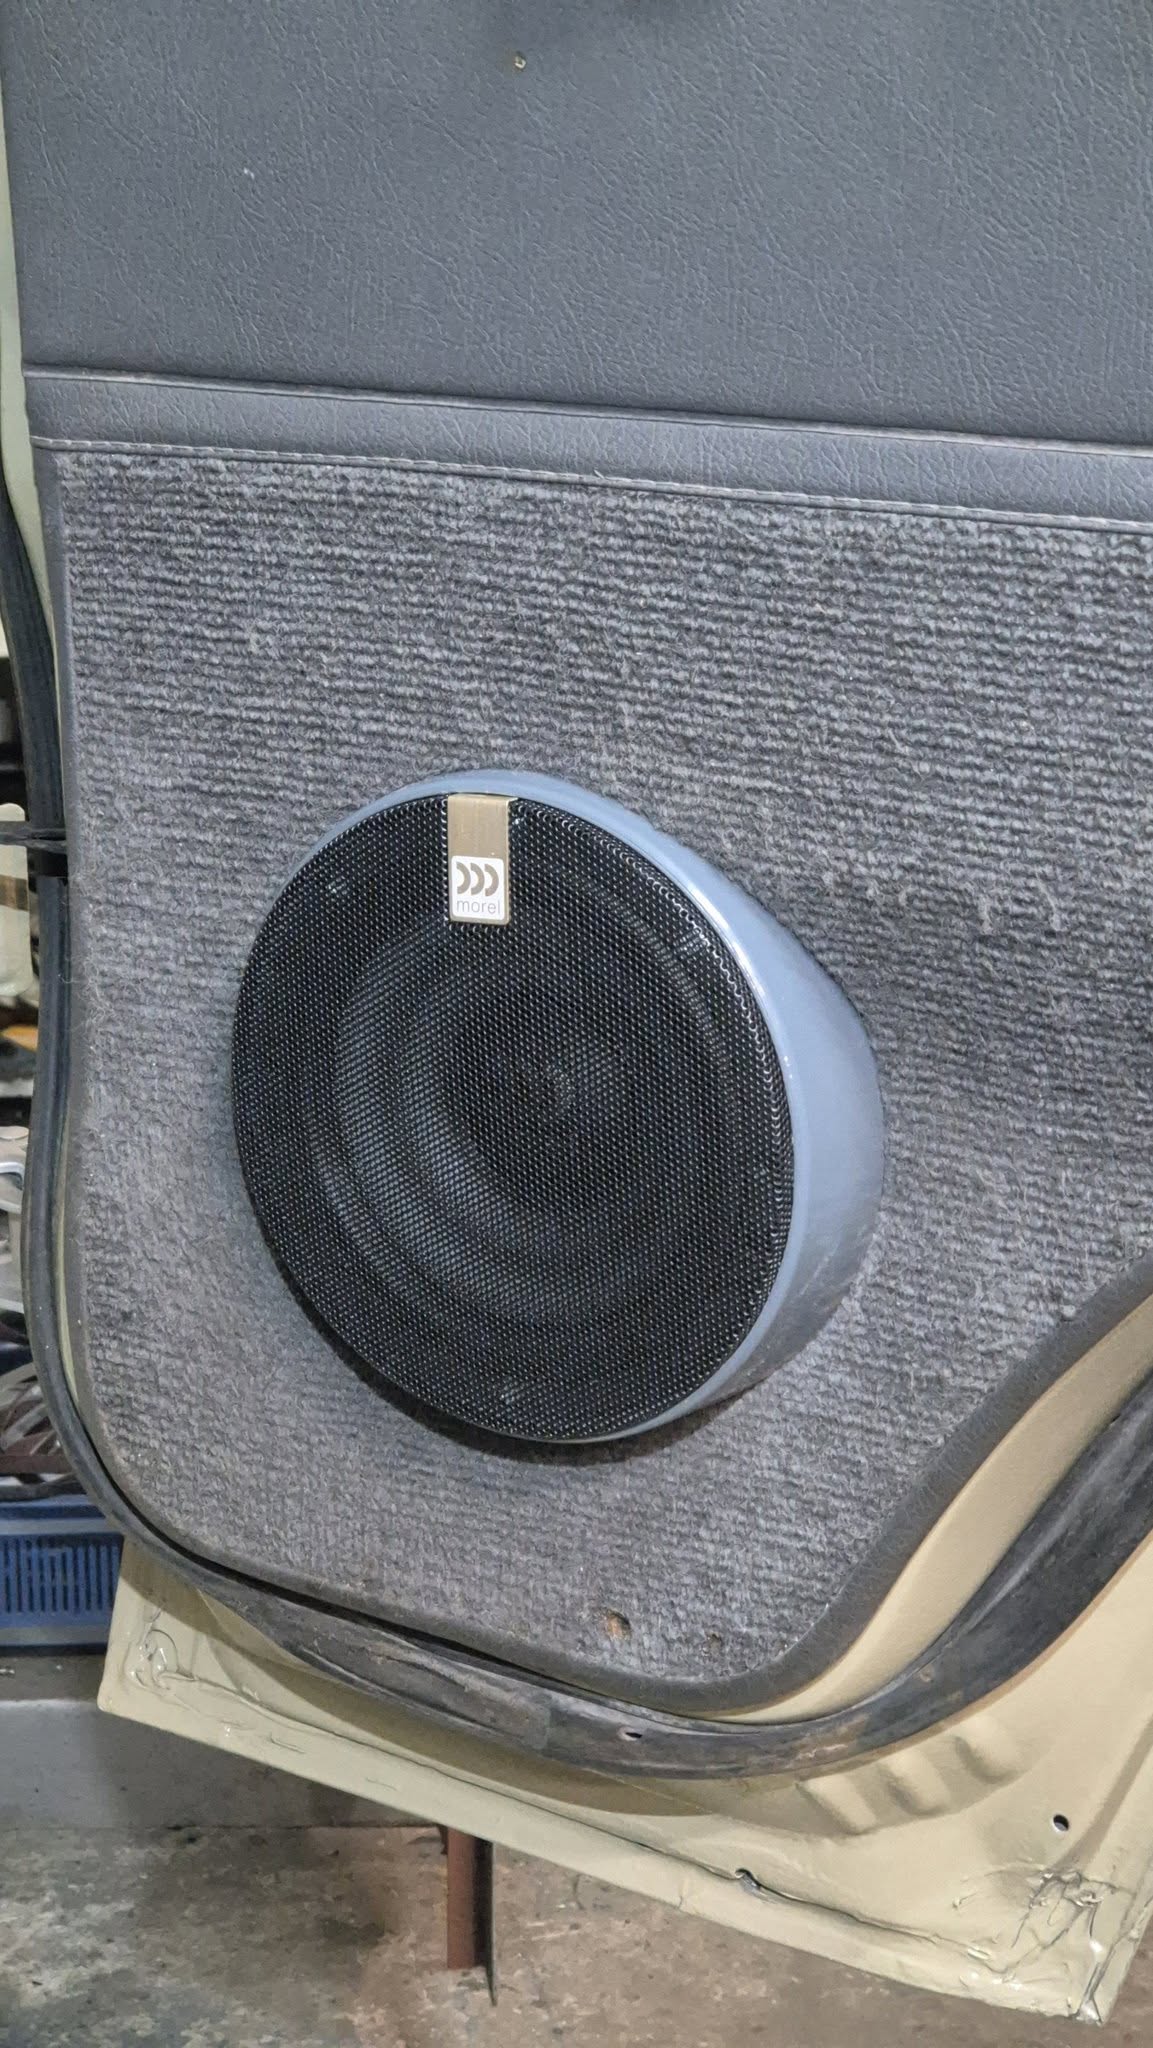
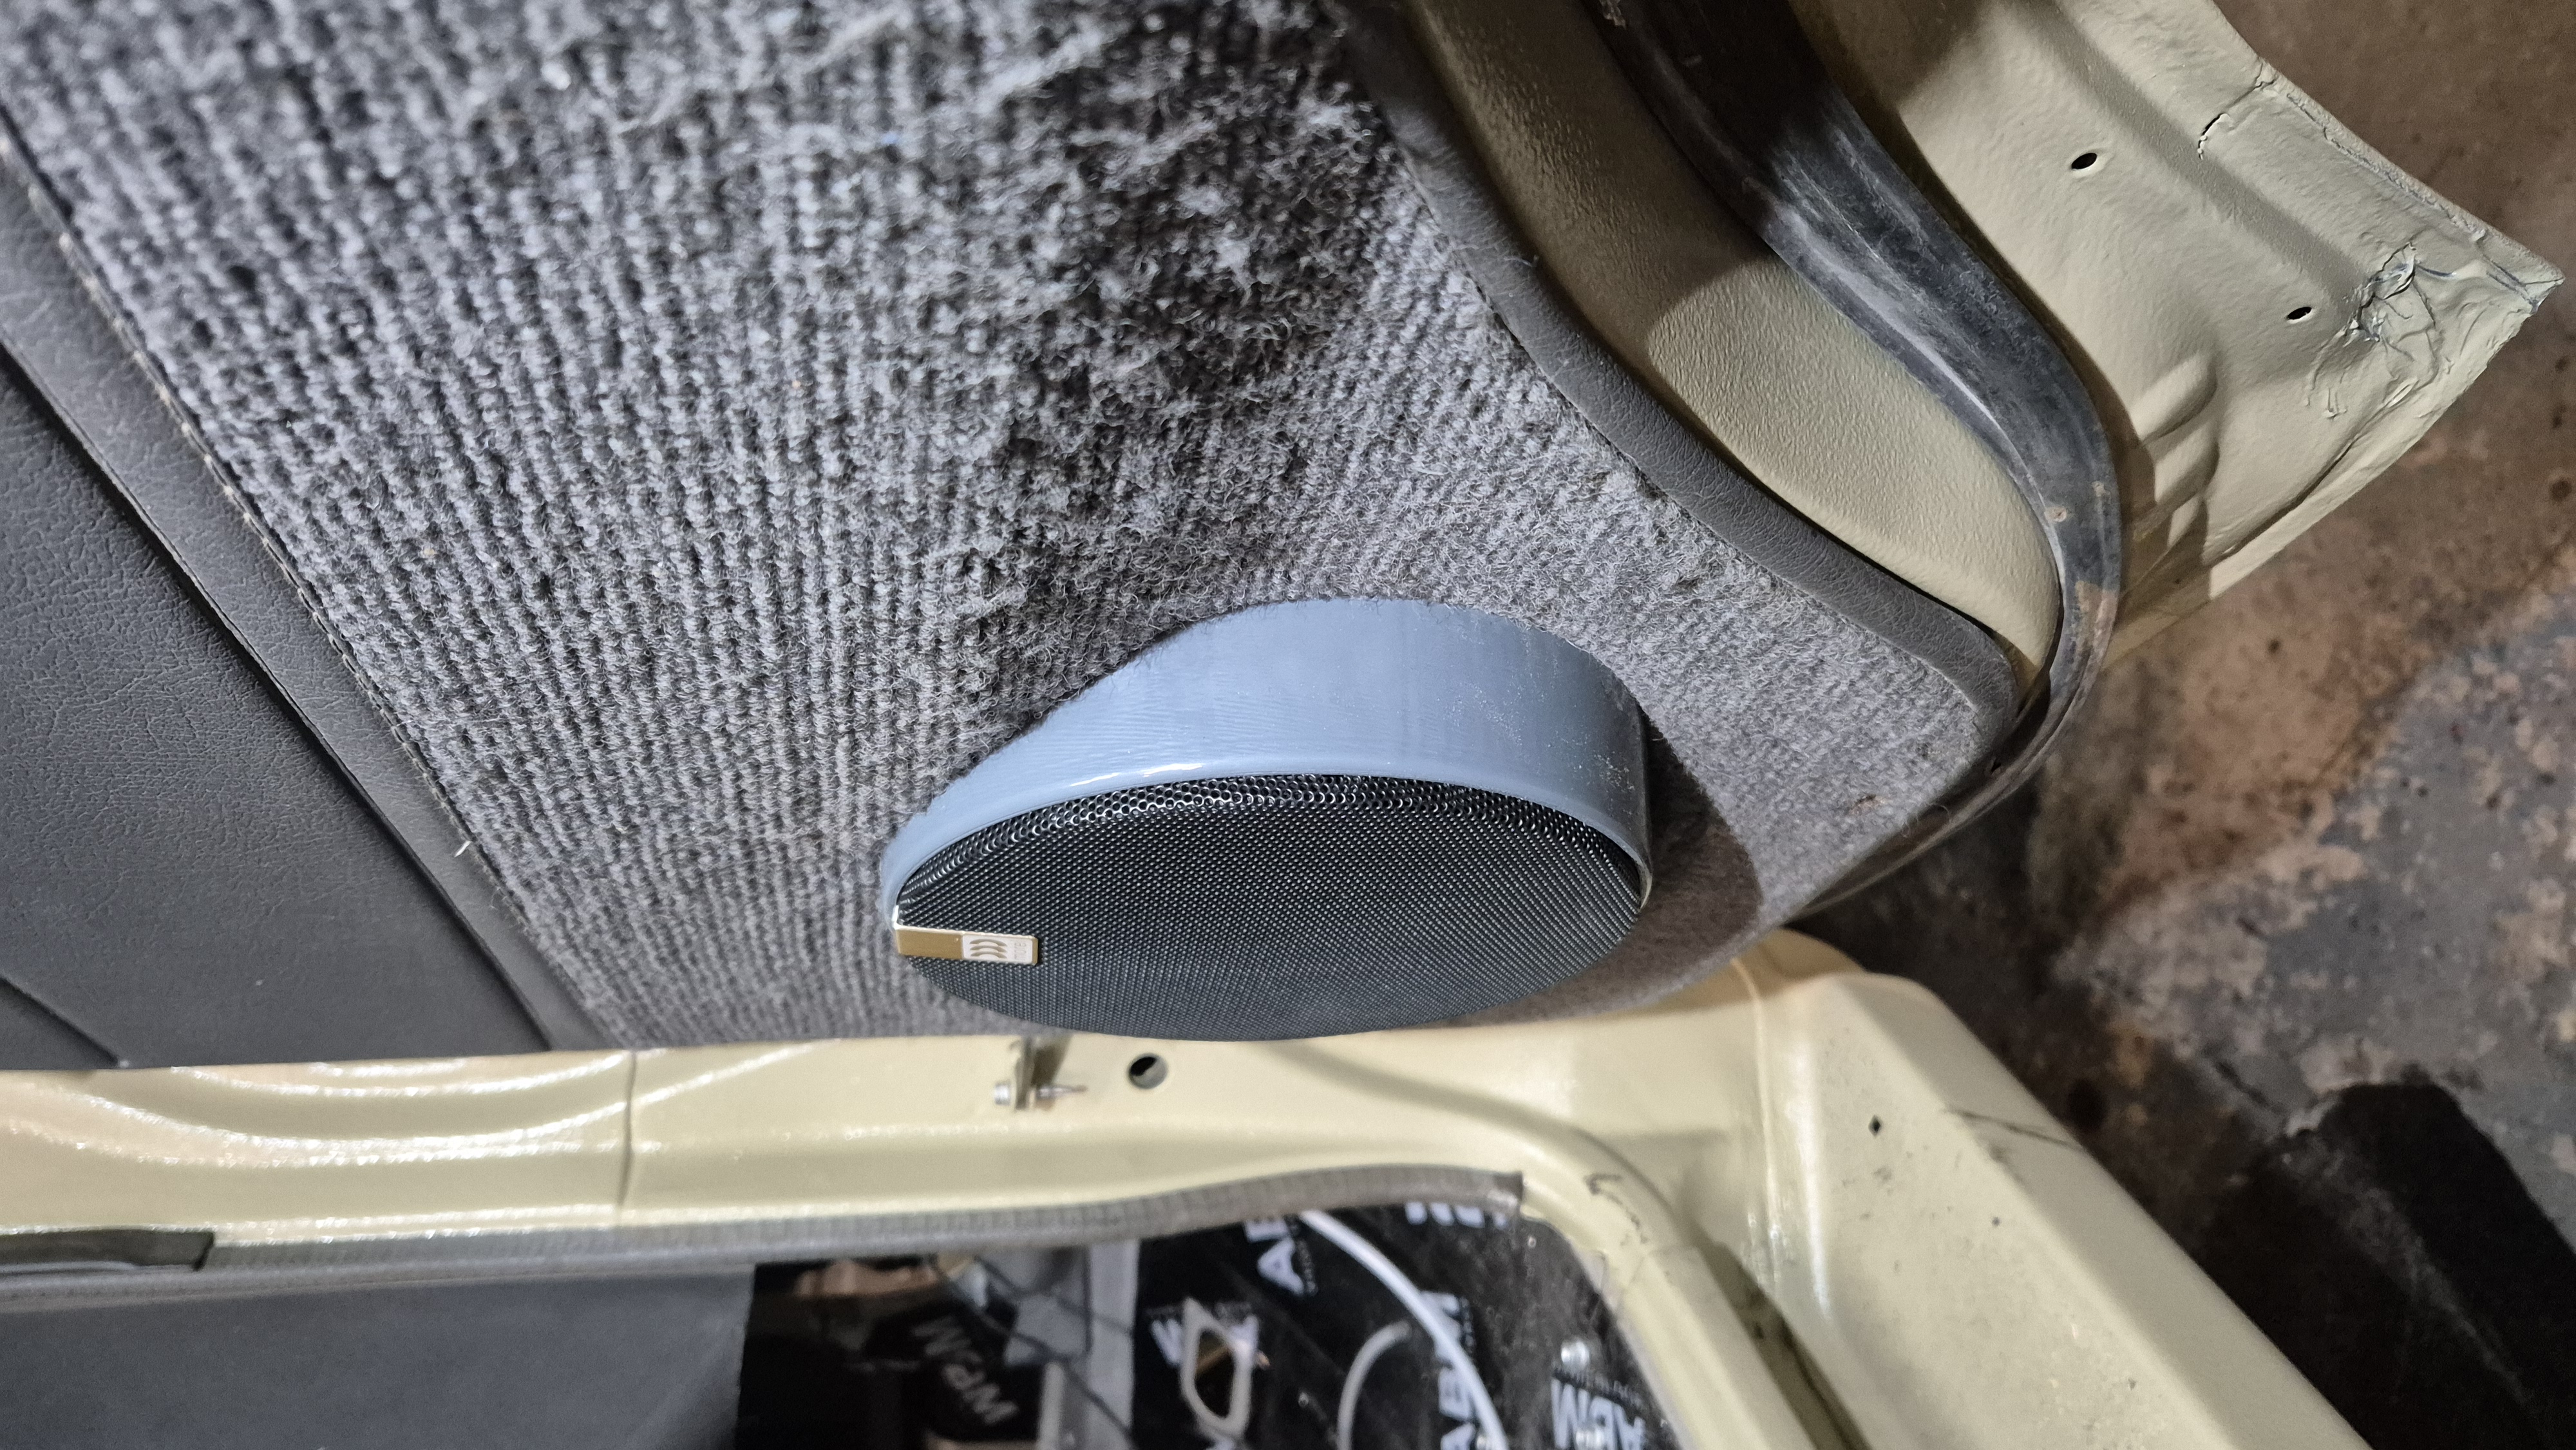
<li data-section-id="14ifi3" data-start="1512" data-end="1553">matched in grey color to the interior</li>
<li data-section-id="1ksbzt0" data-start="1554" data-end="1585">smoothed with acetone vapor</li>
</ul>
<p data-start="1587" data-end="1736">The result looks like a factory part. And what’s most important – it fits perfectly. It’s always impressive how accurate 3D scan and printing can be.</p>
<figure class="post__image"><img loading="lazy"  src="http://workshop.l300company.pl/media/posts/4/516730812_24952479671018702_5770769146661097937_n-2.jpg" alt="" width="1080" height="2340" sizes="(min-width: 37.5em) 1600px, 80vw" srcset="http://workshop.l300company.pl/media/posts/4/responsive/516730812_24952479671018702_5770769146661097937_n-2-xs.jpg 384w ,http://workshop.l300company.pl/media/posts/4/responsive/516730812_24952479671018702_5770769146661097937_n-2-sm.jpg 600w ,http://workshop.l300company.pl/media/posts/4/responsive/516730812_24952479671018702_5770769146661097937_n-2-md.jpg 768w ,http://workshop.l300company.pl/media/posts/4/responsive/516730812_24952479671018702_5770769146661097937_n-2-lg.jpg 1200w ,http://workshop.l300company.pl/media/posts/4/responsive/516730812_24952479671018702_5770769146661097937_n-2-xl.jpg 1600w"></figure>
<hr data-start="1454" data-end="1457">
<h3 data-section-id="1yqbnvf" data-start="1459" data-end="1495">Amplifier – hidden but important</h3>
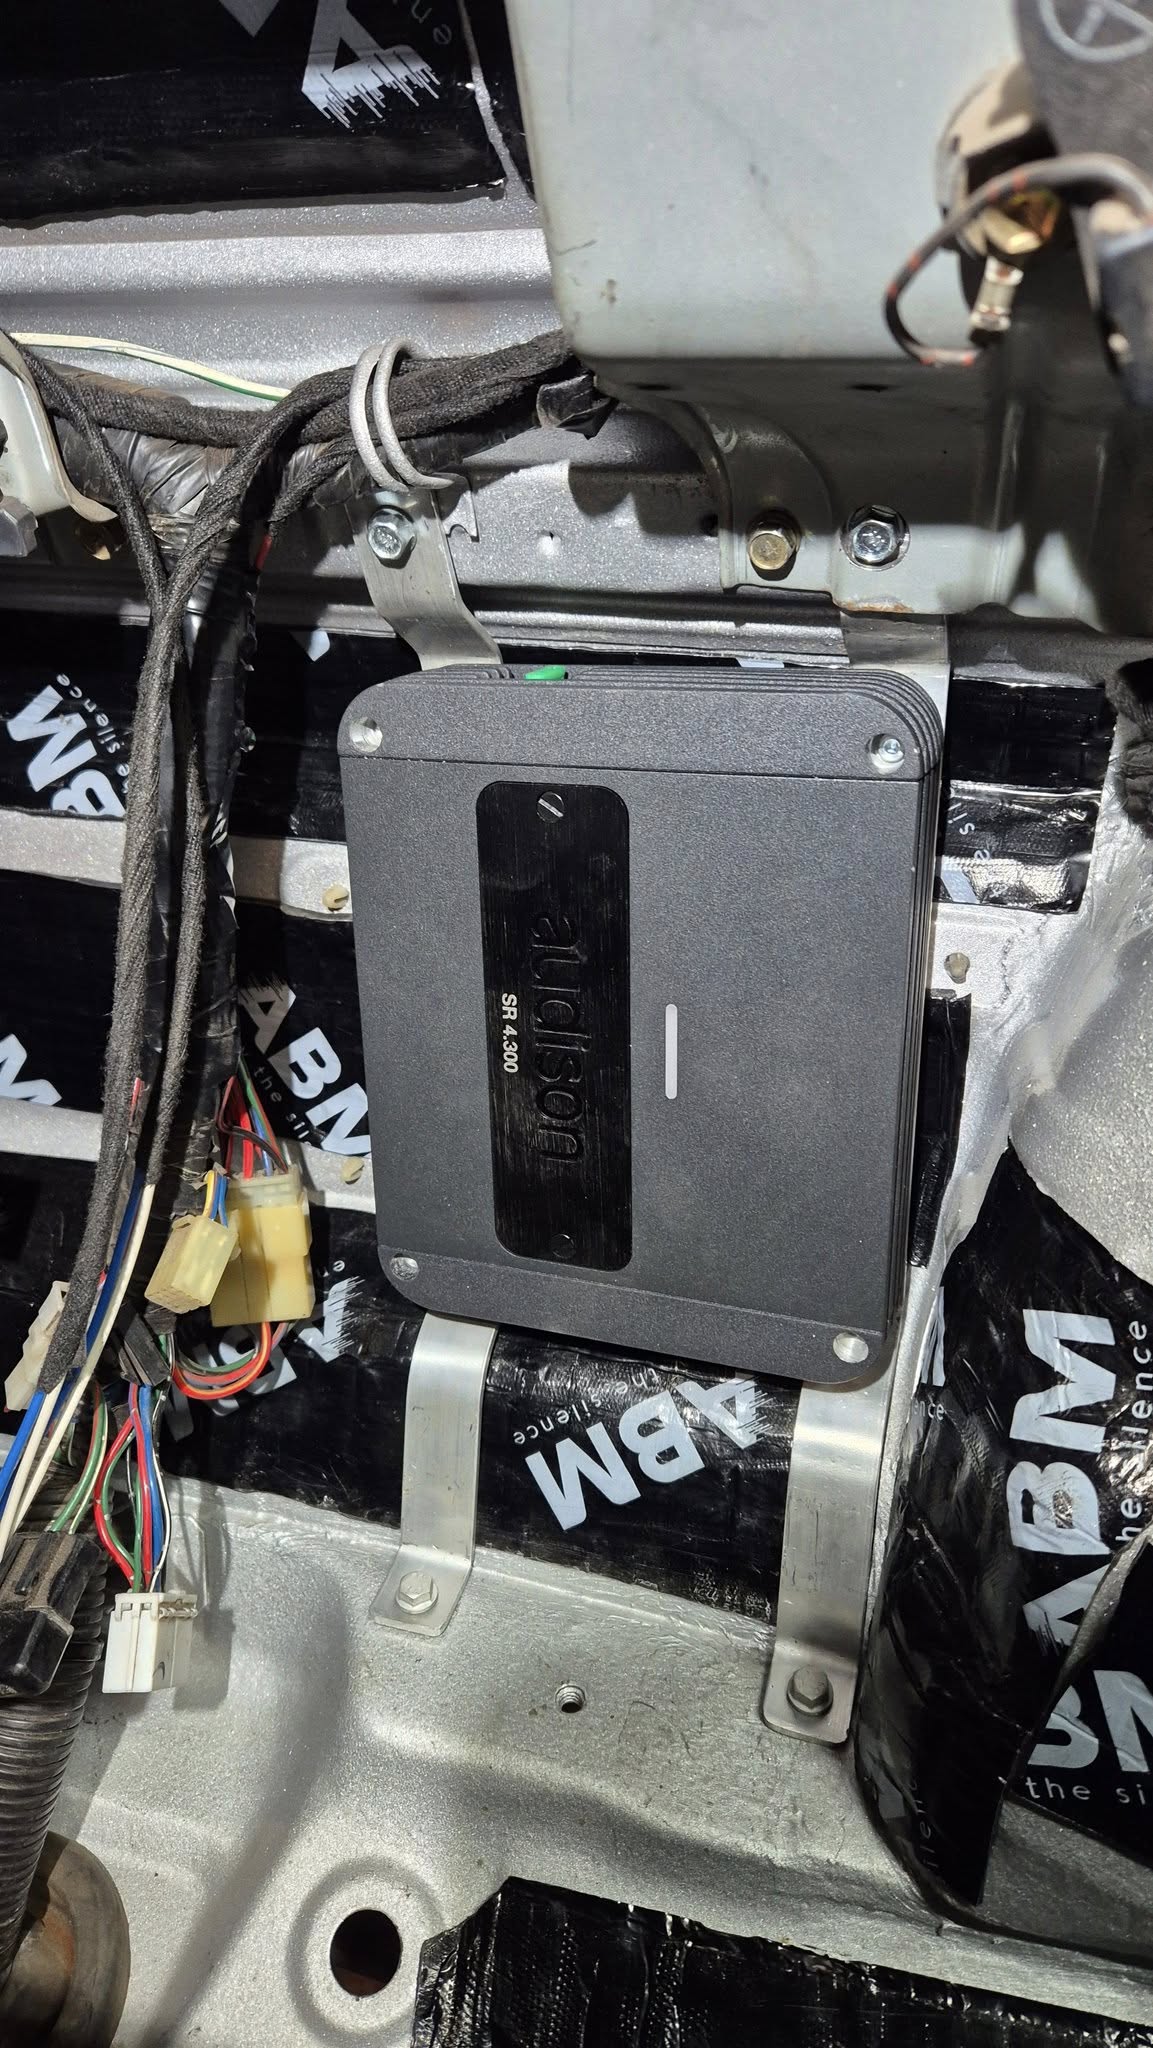
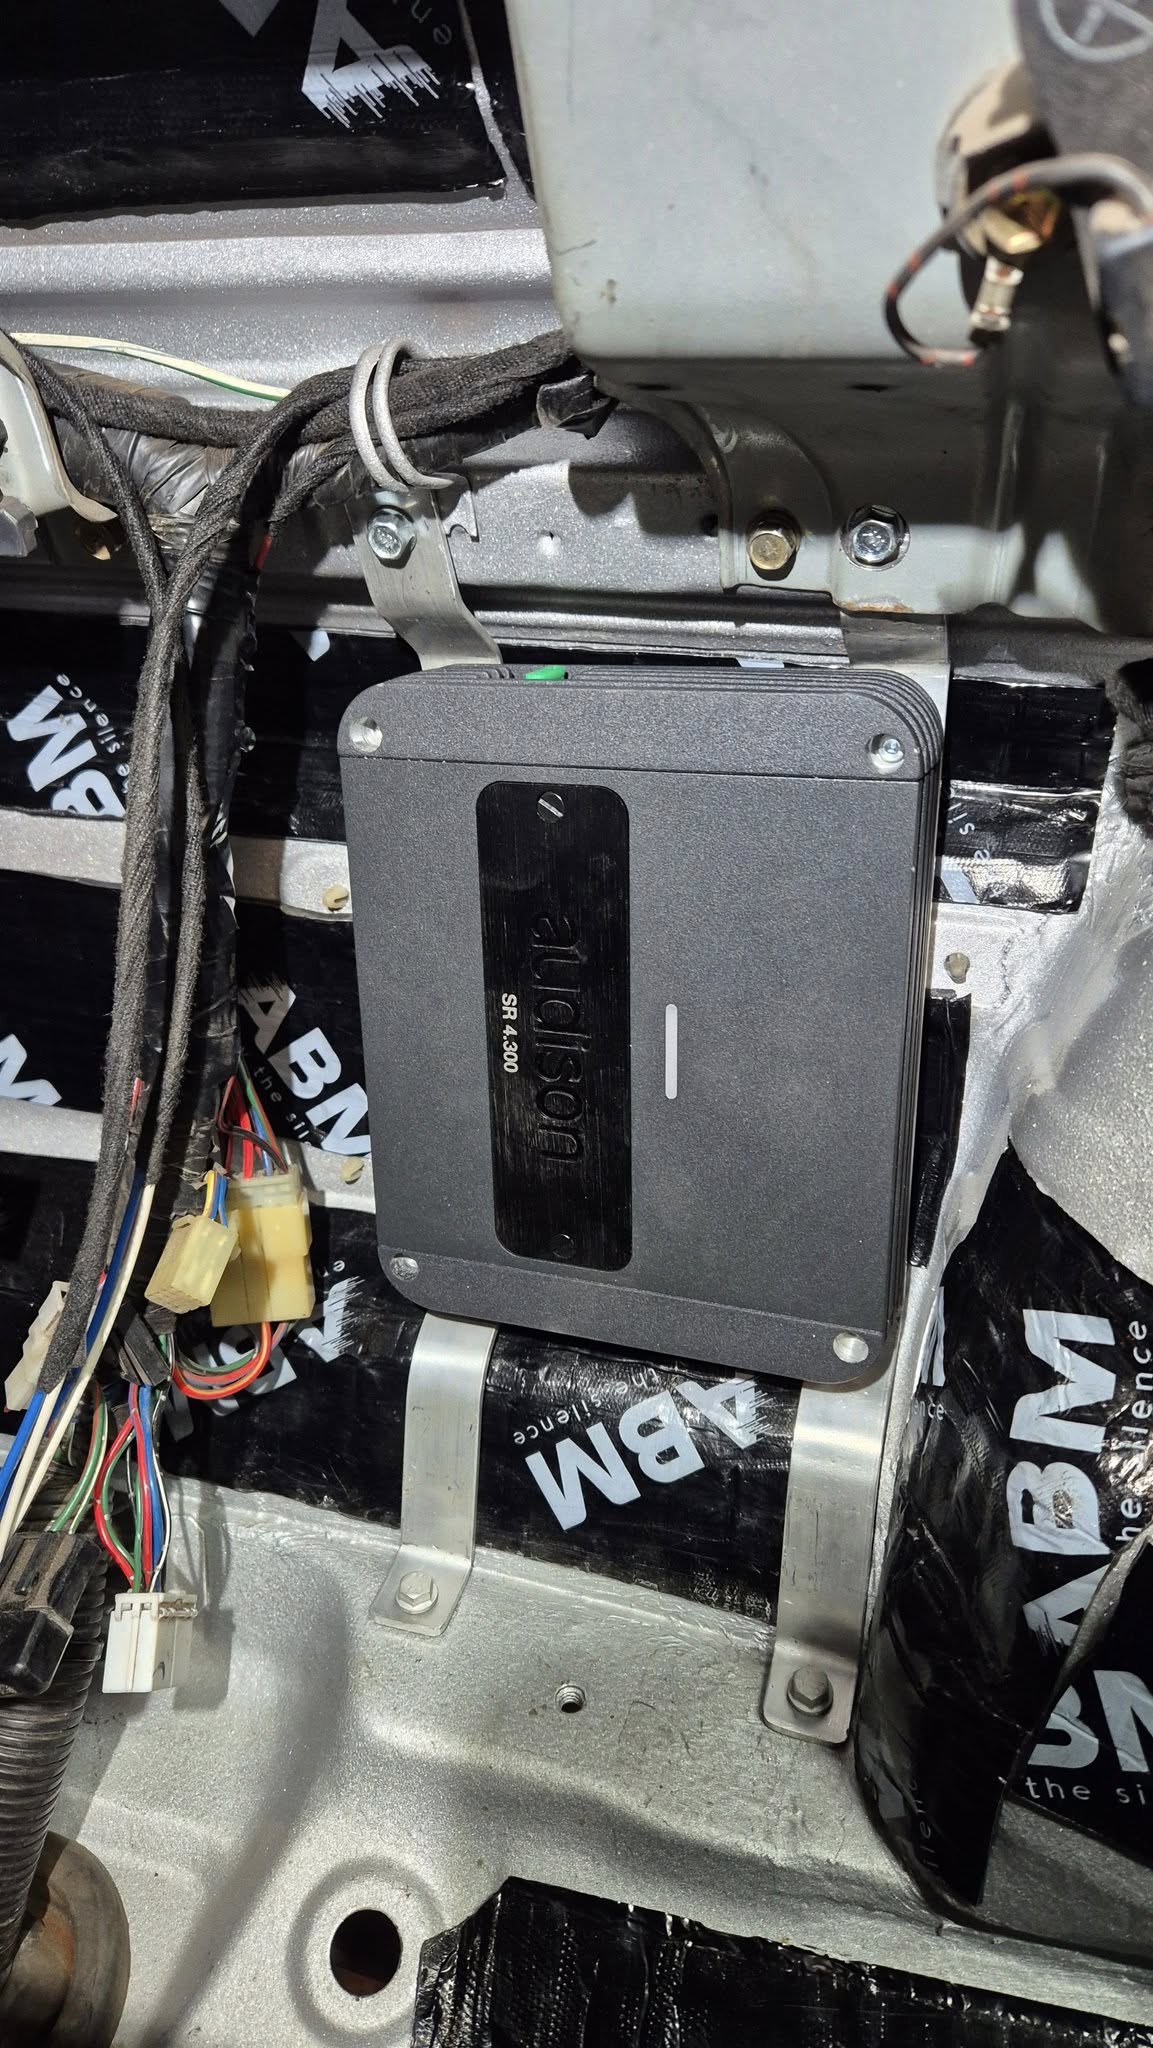
<p data-start="1497" data-end="1603">Since the dashboard was not installed yet after the rebuild, I had a perfect chance to hide the amplifier.</p>
<p data-start="1605" data-end="1668">The Audison SR 4.300 amplifier was mounted under the dashboard:</p>
<ul data-start="1669" data-end="1755">
<li data-section-id="3uupp" data-start="1669" data-end="1693">completely invisible</li>
<li data-section-id="19tiyil" data-start="1694" data-end="1724">no impact on interior look</li>
<li data-section-id="t954pw" data-start="1725" data-end="1755">still accessible if needed</li>
</ul>
<p data-start="1757" data-end="1835">This keeps the classic look of the interior while giving modern sound quality.</p>
<figure class="post__image"><img loading="lazy"  src="http://workshop.l300company.pl/media/posts/4/474887839_10009355489091032_5422799758588310162_n.jpg" alt="" width="1153" height="2048" sizes="(min-width: 37.5em) 1600px, 80vw" srcset="http://workshop.l300company.pl/media/posts/4/responsive/474887839_10009355489091032_5422799758588310162_n-xs.jpg 384w ,http://workshop.l300company.pl/media/posts/4/responsive/474887839_10009355489091032_5422799758588310162_n-sm.jpg 600w ,http://workshop.l300company.pl/media/posts/4/responsive/474887839_10009355489091032_5422799758588310162_n-md.jpg 768w ,http://workshop.l300company.pl/media/posts/4/responsive/474887839_10009355489091032_5422799758588310162_n-lg.jpg 1200w ,http://workshop.l300company.pl/media/posts/4/responsive/474887839_10009355489091032_5422799758588310162_n-xl.jpg 1600w"></figure>
<hr data-start="1837" data-end="1840">
<h3 data-section-id="d5zekq" data-start="2126" data-end="2143">Rear speakers</h3>
<p data-start="2145" data-end="2209">For the rear, I used <strong data-start="2166" data-end="2191">Morel Tempo Ultra Integra 692</strong> two-way speakers.</p>
<p data-start="2211" data-end="2347">They were installed in the original rear locations, but there is one issue — due to their depth, they do not fit under the factory trim.</p>
<p data-start="2349" data-end="2541">This is not a problem in this build, because the rear of the van will be completely redesigned anyway as part of a camper conversion. So the final finish will be adjusted to fit the new setup.</p>
<figure class="post__image"><img loading="lazy"  src="http://workshop.l300company.pl/media/posts/4/20250218_194633.jpg" alt="" width="4000" height="2252" sizes="(min-width: 37.5em) 1600px, 80vw" srcset="http://workshop.l300company.pl/media/posts/4/responsive/20250218_194633-xs.jpg 384w ,http://workshop.l300company.pl/media/posts/4/responsive/20250218_194633-sm.jpg 600w ,http://workshop.l300company.pl/media/posts/4/responsive/20250218_194633-md.jpg 768w ,http://workshop.l300company.pl/media/posts/4/responsive/20250218_194633-lg.jpg 1200w ,http://workshop.l300company.pl/media/posts/4/responsive/20250218_194633-xl.jpg 1600w"></figure>
<hr data-start="1837" data-end="1840">
<h3 data-section-id="15pp87n" data-start="589" data-end="625">Parts used</h3>
<ul data-start="918" data-end="1042">
<li data-section-id="1q9oiei" data-start="918" data-end="950">Morel Tempo Ultra 602</li>
<li data-section-id="1lc3j6n" data-start="951" data-end="997">Morel Tempo Ultra Integra 692</li>
<li data-section-id="1lc3j6n" data-start="951" data-end="997">Audison SR 4.300</li>
<li data-section-id="1jbbmhq" data-start="998" data-end="1042"><a href="https://l300company.pl/retrofits-upgrades/69-165mm-speaker-door-adapter.html" target="_blank" rel="noopener noreferrer">custom speaker adapters - available in our shop</a><hr data-start="4900" data-end="4903"></li>
</ul>
<h3 data-section-id="wv8cei" data-start="1842" data-end="1853">Summary</h3>
<p data-start="1855" data-end="1917">This upgrade is more than just changing speakers. It includes:</p>
<ul data-start="1918" data-end="2070">
<li data-section-id="ihdxu2" data-start="1918" data-end="1946">better speaker placement</li>
<li data-section-id="29ksnm" data-start="1947" data-end="1977">custom-made mounting parts</li>
<li data-section-id="82e7l8" data-start="1978" data-end="2036">use of modern technology like 3D scanning and printing</li>
<li data-section-id="r6k79s" data-start="2037" data-end="2070">clean and hidden installation</li>
</ul>
<p data-start="2072" data-end="2145">The final result is a system that sounds modern but still looks original.</p>
<hr data-start="2147" data-end="2150">
<p data-start="2152" data-end="2293" data-is-last-node="" data-is-only-node="">If you are planning a similar upgrade in your L300, it’s worth doing it properly – not just replacing parts, but redesigning the whole setup.</p>
<div class="gallery-wrapper"><div class="gallery"  data-is-empty="false" data-translation="Add images" data-columns="3">
<figure class="gallery__item"><a href="http://workshop.l300company.pl/media/posts/4/gallery/516730812_24952479671018702_5770769146661097937_n.jpg" data-size="1080x2340"><img loading="lazy" src="http://workshop.l300company.pl/media/posts/4/gallery/516730812_24952479671018702_5770769146661097937_n-thumbnail.jpg" alt="" width="768" height="1664"></a></figure>
<figure class="gallery__item"><a href="http://workshop.l300company.pl/media/posts/4/gallery/474887839_10009355489091032_5422799758588310162_n.jpg" data-size="1153x2048"><img loading="lazy" src="http://workshop.l300company.pl/media/posts/4/gallery/474887839_10009355489091032_5422799758588310162_n-thumbnail.jpg" alt="" width="768" height="1364"></a></figure>
<figure class="gallery__item"><a href="http://workshop.l300company.pl/media/posts/4/gallery/glosniki_CAD.png" data-size="1381x940"><img loading="lazy" src="http://workshop.l300company.pl/media/posts/4/gallery/glosniki_CAD-thumbnail.png" alt="" width="768" height="523"></a></figure>
<figure class="gallery__item"><a href="http://workshop.l300company.pl/media/posts/4/gallery/475128365_10009348222425092_485248014433683446_n.jpg" data-size="1153x2048"><img loading="lazy" src="http://workshop.l300company.pl/media/posts/4/gallery/475128365_10009348222425092_485248014433683446_n-thumbnail.jpg" alt="" width="768" height="1364"></a></figure>
<figure class="gallery__item"><a href="http://workshop.l300company.pl/media/posts/4/gallery/481126693_23991139990486013_6031974210281006067_n.jpg" data-size="1153x2048"><img loading="lazy" src="http://workshop.l300company.pl/media/posts/4/gallery/481126693_23991139990486013_6031974210281006067_n-thumbnail.jpg" alt="" width="768" height="1364"></a></figure>
<figure class="gallery__item"><a href="http://workshop.l300company.pl/media/posts/4/gallery/20250301_190654.jpg" data-size="4000x2252"><img loading="lazy" src="http://workshop.l300company.pl/media/posts/4/gallery/20250301_190654-thumbnail.jpg" alt="" width="768" height="432"></a></figure>
<figure class="gallery__item"><a href="http://workshop.l300company.pl/media/posts/4/gallery/20260106_173520.jpg" data-size="4000x2252"><img loading="lazy" src="http://workshop.l300company.pl/media/posts/4/gallery/20260106_173520-thumbnail.jpg" alt="" width="768" height="432"></a></figure>
</div></div>
            ]]>
        </content>
    </entry>
    <entry>
        <title>12 Switches - Zero Holes (in the dash)</title>
        <author>
            <name>Piotr</name>
        </author>
        <link href="http://workshop.l300company.pl/12-switches-zero-holes-in-the-dash.html"/>
        <id>http://workshop.l300company.pl/12-switches-zero-holes-in-the-dash.html</id>
        <media:content url="http://workshop.l300company.pl/media/posts/3/switch-panel-1-crop-2.jpg" medium="image" />
            <category term="interior"/>
            <category term="electrical"/>

        <updated>2026-03-01T00:39:01+01:00</updated>
            <summary>
                <![CDATA[
                        <img src="http://workshop.l300company.pl/media/posts/3/switch-panel-1-crop-2.jpg" alt="" />
                    One of the nicer upgrades you can do in an off-road van is extra lighting. Work lights, rear floods, side&hellip;
                ]]>
            </summary>
        <content type="html">
            <![CDATA[
                    <p><img src="http://workshop.l300company.pl/media/posts/3/switch-panel-1-crop-2.jpg" class="type:primaryImage" alt="" /></p>
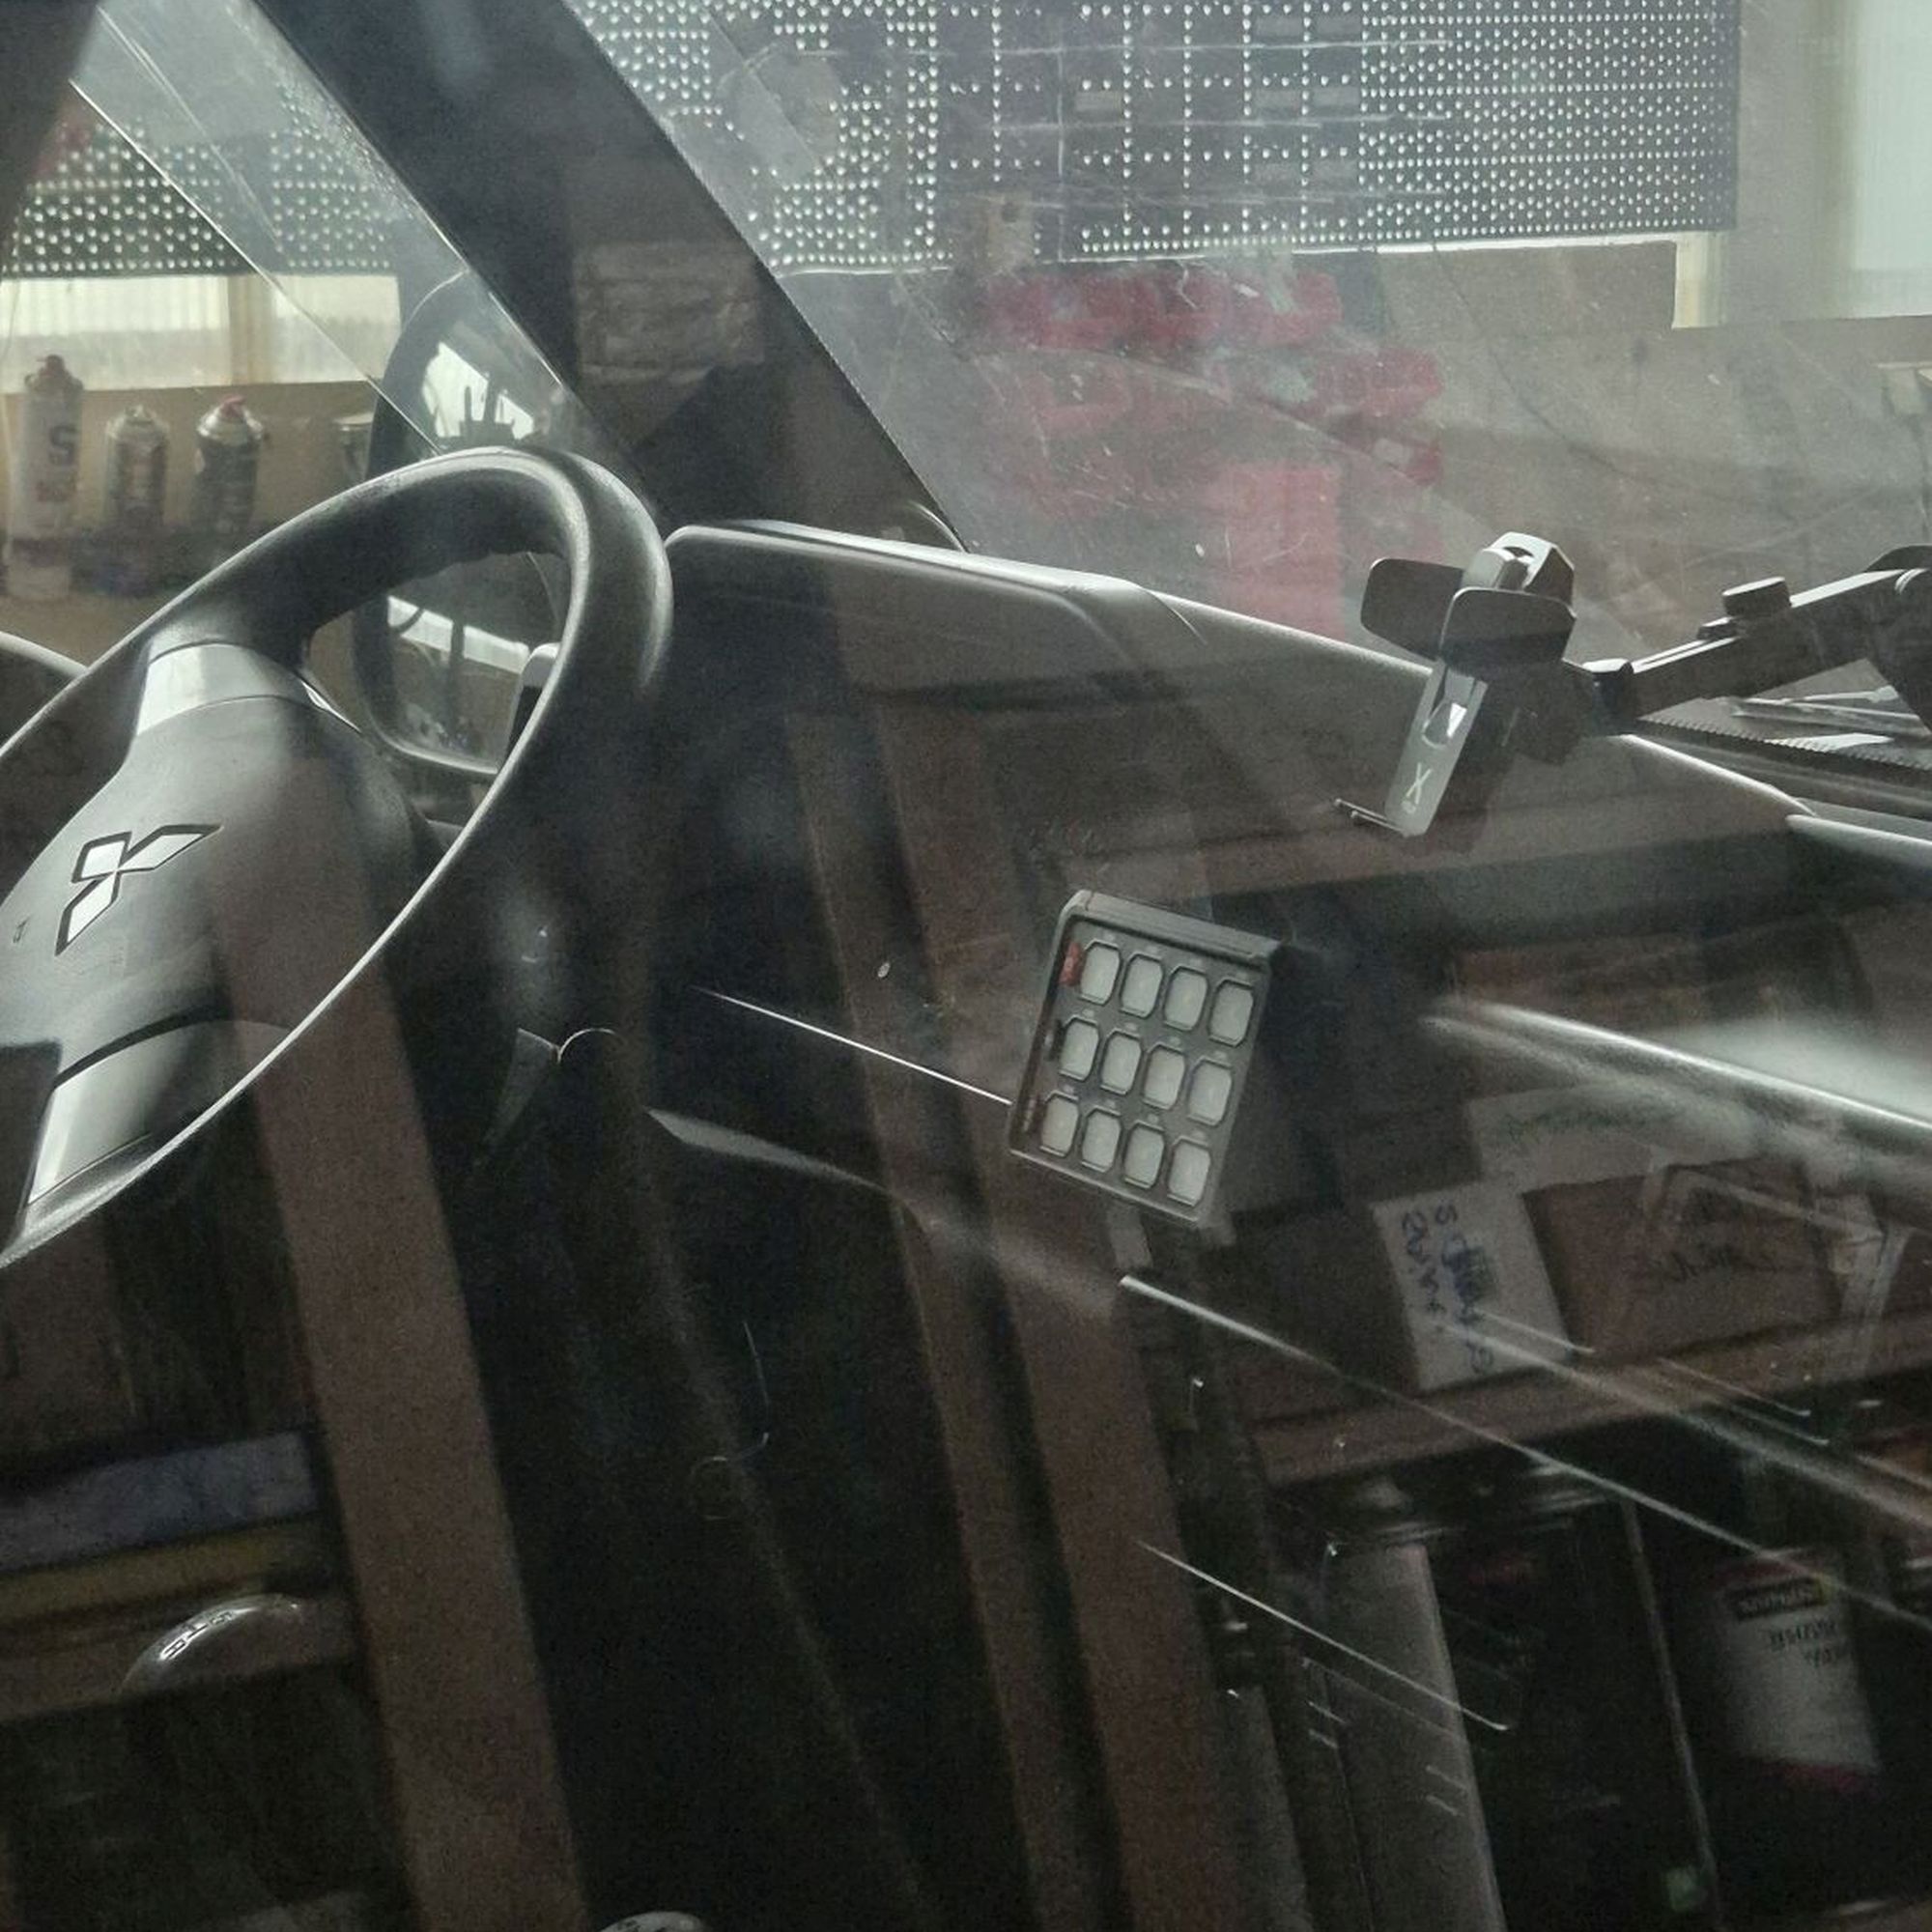
                <p data-start="68" data-end="142">One of the nicer upgrades you can do in an off-road van is extra lighting.</p>
<p data-start="144" data-end="285">Work lights, rear floods, side lights, camp lights — basically anything that makes reversing through a forest at night slightly less sketchy.</p>
<p data-start="287" data-end="333">The problem usually starts shortly after that.</p>
<p data-start="335" data-end="408">Because together with the lights, you also run out of space for switches.<br>So instead of squeezing another random rocker switch somewhere under the dashboard, I decided to actually plan the whole thing properly from the beginning.</p>
<hr data-start="642" data-end="645">
<p><strong>If you want to copy this setup, the full parts list is included near the end of the article.</strong></p>
<hr data-start="642" data-end="645">
<h2 data-section-id="1rw7fcd" data-start="647" data-end="692">A Control Module Instead of a Relay Jungle</h2>
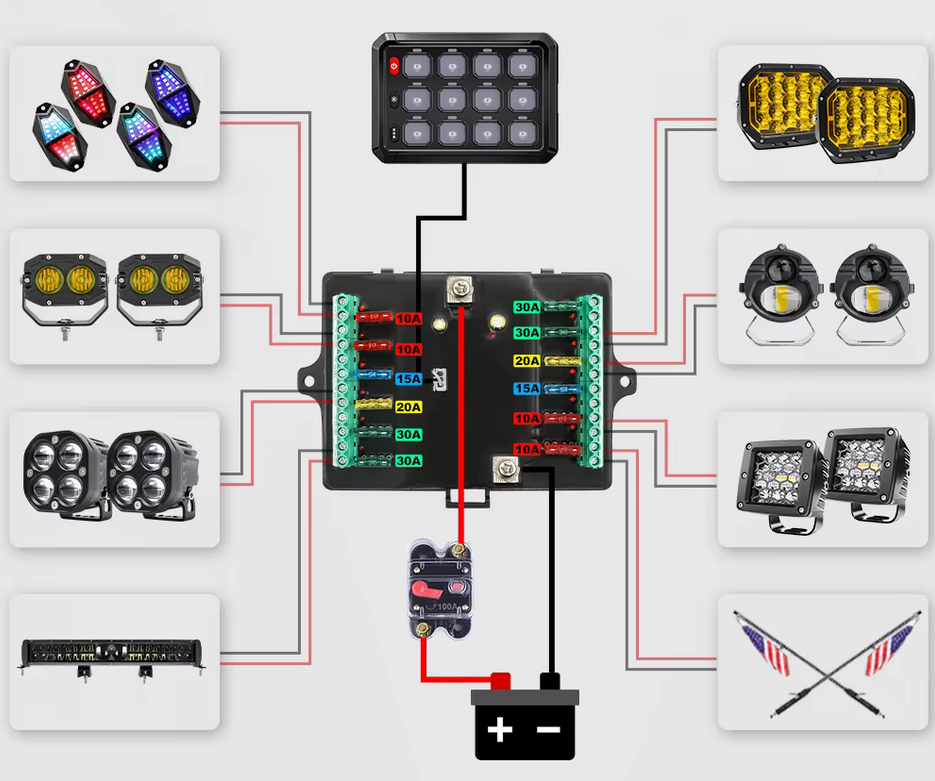
<p data-start="694" data-end="753">There are plenty of switch panel systems on the market now.</p>
<p data-start="755" data-end="777">The concept is simple:</p>
<ul data-start="779" data-end="975">
<li data-section-id="409smy" data-start="779" data-end="813">a small keypad inside the cabin,</li>
<li data-section-id="nn68jh" data-start="814" data-end="873">a separate relay or solid-state module mounted elsewhere,</li>
<li data-section-id="knblp8" data-start="874" data-end="928">no thick power cables running through the dashboard,</li>
<li data-section-id="1c77j3w" data-start="929" data-end="975">no giant relay nest hiding behind the radio.</li>
</ul>
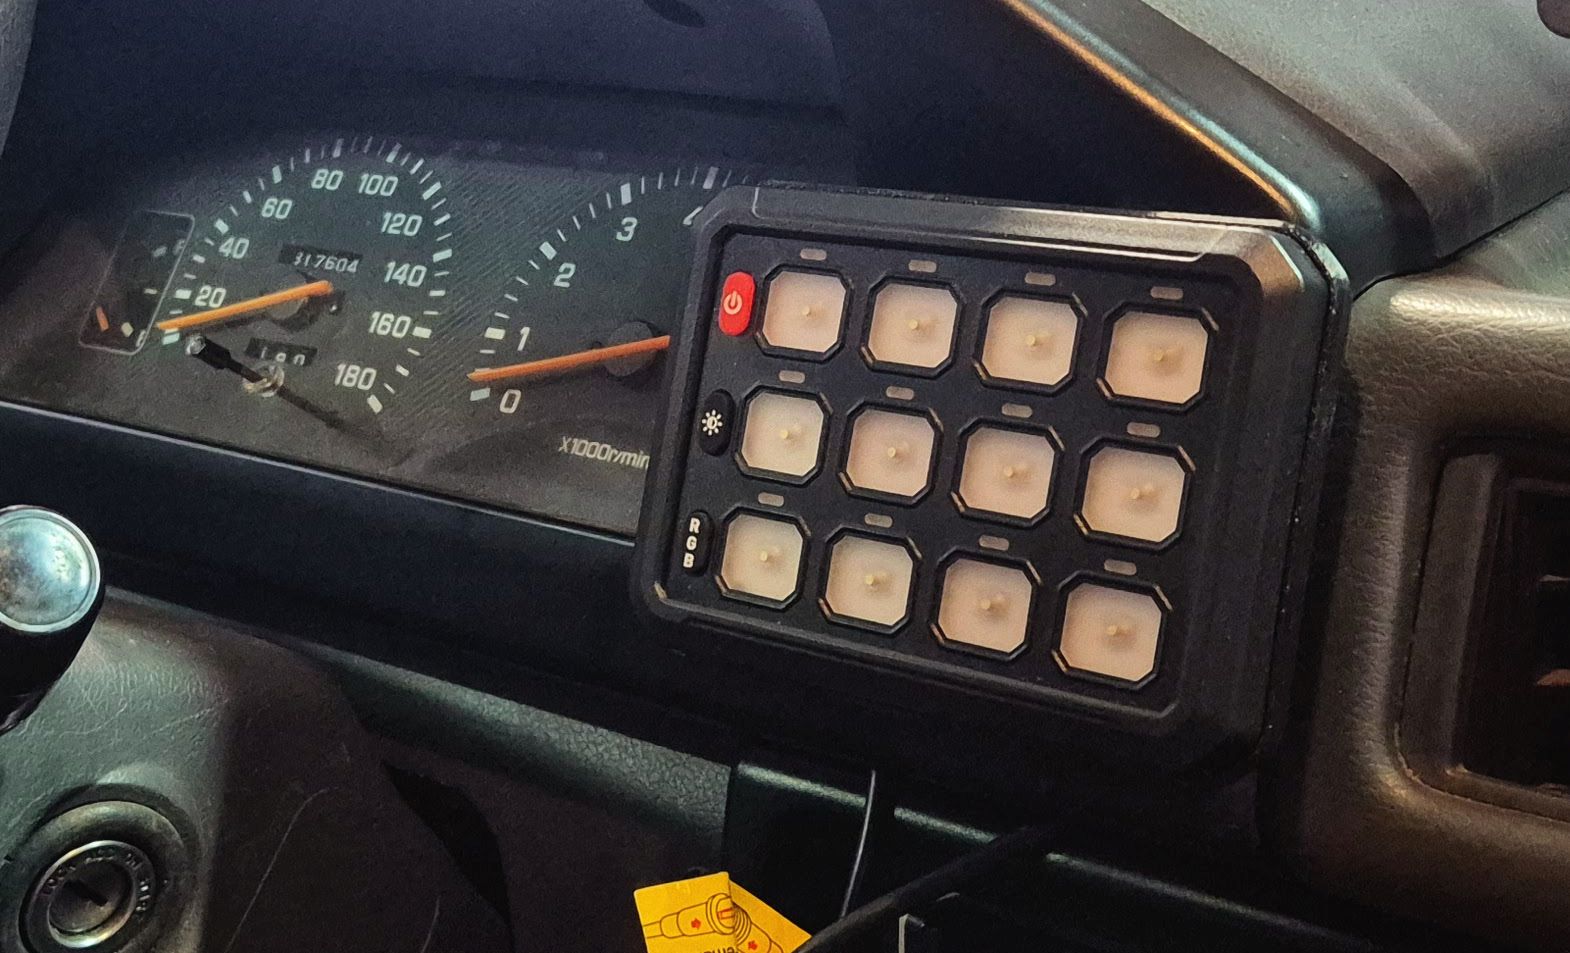
<p data-start="977" data-end="1029">I went with the <strong data-start="993" data-end="1012">Colight 12 Gang</strong> from AliExpress.</p>
<p data-start="1031" data-end="1044">Why this one?</p>
<ul data-start="1046" data-end="1330">
<li data-section-id="mdmung" data-start="1046" data-end="1081">reviews were surprisingly decent,</li>
<li data-section-id="q5kzf" data-start="1082" data-end="1172">the keypad is wired, not wireless (I still don’t trust random Chinese RF communication),</li>
<li data-section-id="n74hh6" data-start="1173" data-end="1214">it supports optional Bluetooth control,</li>
<li data-section-id="10rhlb6" data-start="1215" data-end="1310">naturally it comes with RGB backlighting and more effects than any adult realistically needs,</li>
<li data-section-id="m9tfnu" data-start="1311" data-end="1330">and it was cheap.</li>
</ul>
<p data-start="1332" data-end="1394">Functionally though, it does exactly what it’s supposed to do.</p>
<figure class="post__image"><img loading="lazy"  src="http://workshop.l300company.pl/media/posts/3/alli.png" alt="" width="935" height="781" sizes="(min-width: 37.5em) 1600px, 80vw" srcset="http://workshop.l300company.pl/media/posts/3/responsive/alli-xs.png 384w ,http://workshop.l300company.pl/media/posts/3/responsive/alli-sm.png 600w ,http://workshop.l300company.pl/media/posts/3/responsive/alli-md.png 768w ,http://workshop.l300company.pl/media/posts/3/responsive/alli-lg.png 1200w ,http://workshop.l300company.pl/media/posts/3/responsive/alli-xl.png 1600w"></figure>
<p data-start="1435" data-end="1524">What’s actually useful with these panels is that they’re not limited to simple switching.</p>
<p data-start="1526" data-end="1592">Each channel can be configured independently with different modes:</p>
<ul data-start="1594" data-end="1677">
<li data-section-id="1f9m7pa" data-start="1594" data-end="1612">standard ON/OFF,</li>
<li data-section-id="ms0l9n" data-start="1613" data-end="1635">momentary operation,</li>
<li data-section-id="1ejouj8" data-start="1636" data-end="1644">flash,</li>
<li data-section-id="1lncehl" data-start="1645" data-end="1654">strobe,</li>
<li data-section-id="bl7s0c" data-start="1655" data-end="1677">various pulse modes.</li>
</ul>
<p data-start="1679" data-end="1787">Which opens up quite a few possibilities once you start adding more accessories and lighting around the van.</p>
<hr data-start="1789" data-end="1792">
<h2 data-section-id="16spvdf" data-start="1794" data-end="1831">No Cutting Factory Interior Panels</h2>
<p data-start="1833" data-end="1887">There’s one thing I really try to avoid on this build.</p>
<p data-start="1889" data-end="1923">Cutting factory interior plastics.</p>
<p data-start="1925" data-end="2059">Parts for the L300 are already difficult enough to find. Once you cut a dashboard panel, that decision becomes permanent very quickly.</p>
<p data-start="2061" data-end="2097">So from day one the goal was simple:</p>
<p data-start="2099" data-end="2146"><strong data-start="2099" data-end="2146">everything should remain fully plug &amp; play.</strong></p>
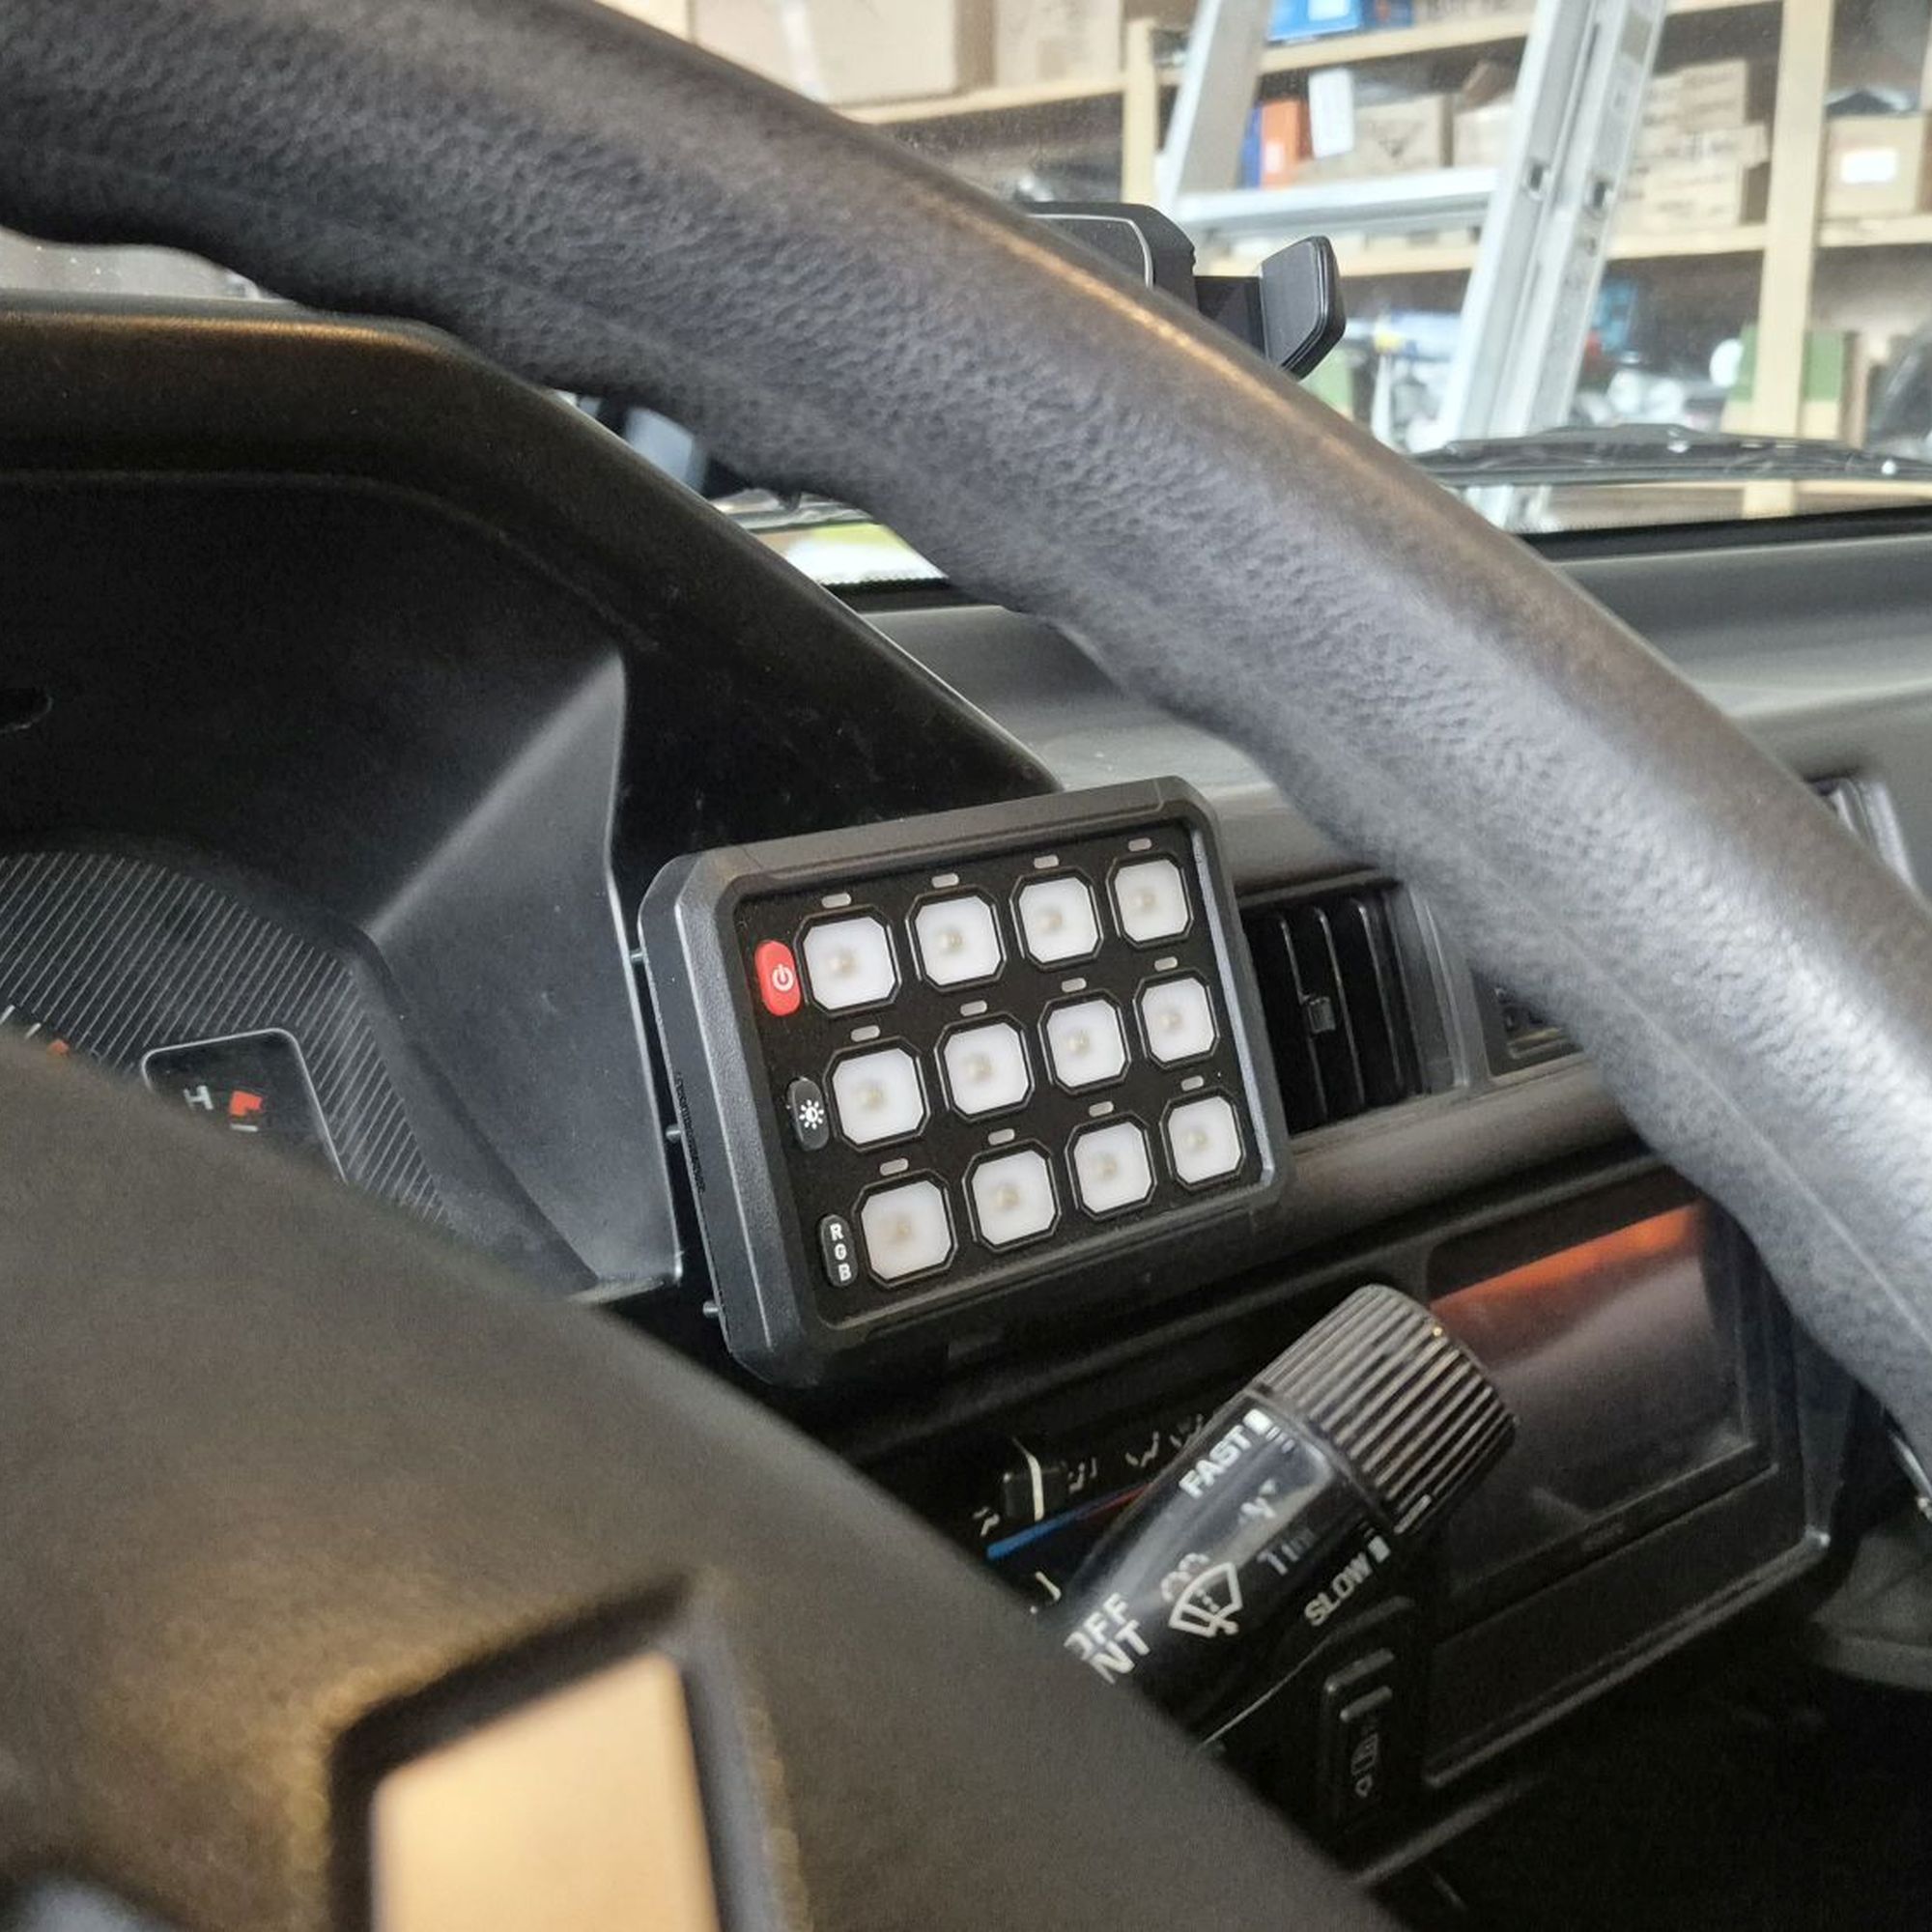
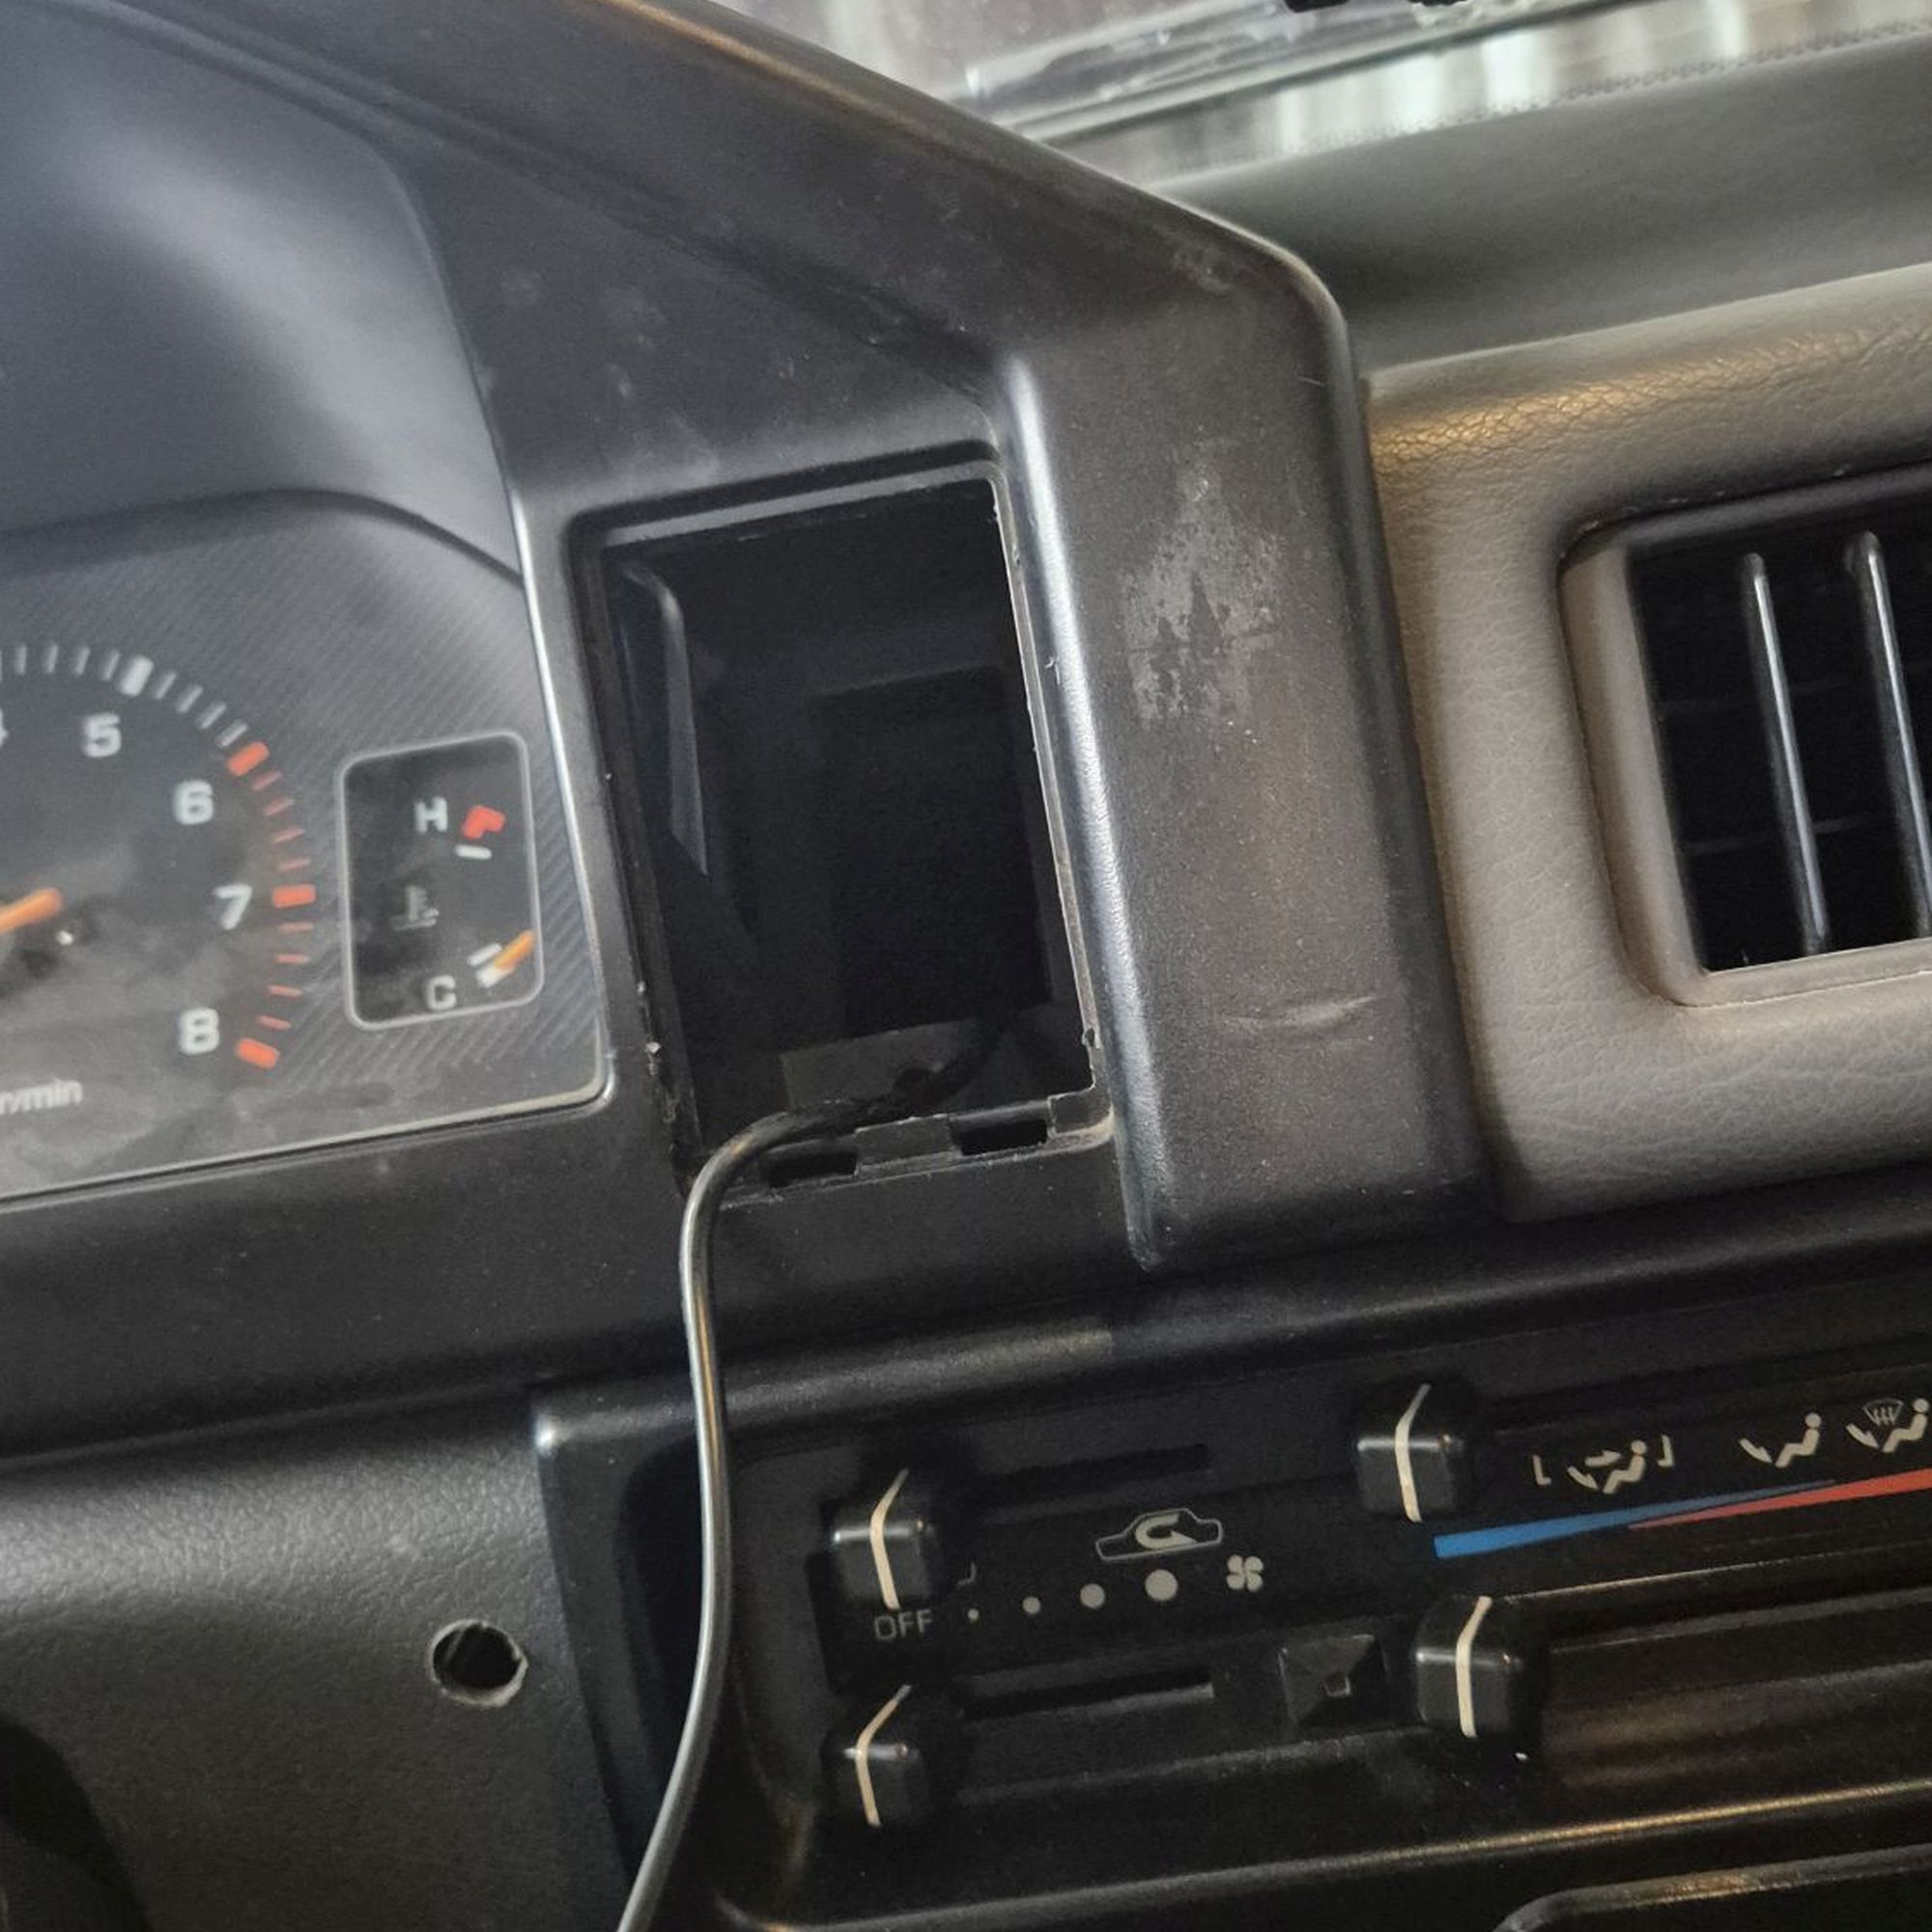
<p data-start="2148" data-end="2231">The new switch panel will replace the factory rear wiper and hazard switch section.</p>
<p data-start="2233" data-end="2357">Those original switches will move to the left side of the steering wheel, because there’s already unused space there anyway:</p>
<ul data-start="2359" data-end="2557">
<li data-section-id="1mbswdm" data-start="2359" data-end="2404">the factory central locking switch is gone,</li>
<li data-section-id="1s9ozd5" data-start="2405" data-end="2485">the Hi/Low rear heater fan switch disappeared together with the second heater,</li>
<li data-section-id="muze87" data-start="2486" data-end="2557">even the rear fog light switch will eventually move to the new panel.</li>
</ul>
<p data-start="2618" data-end="2679">The rear wiper switch, on the other hand, is gone completely.</p>
<p data-start="2681" data-end="2806">I never really use the rear wiper anyway, and there’s a good chance I’ll eventually install a rear wiper delete plug instead.</p>
<p data-start="2808" data-end="2918">So instead of drilling new holes everywhere, I’m simply reorganizing — and simplifying — what already existed.</p>
<div class="gallery-wrapper"><div class="gallery"  data-is-empty="false" data-translation="Add images" data-columns="3">
<figure class="gallery__item"><a href="http://workshop.l300company.pl/media/posts/3/gallery/20260515_153347.jpg" data-size="2000x2000"><img loading="lazy" src="http://workshop.l300company.pl/media/posts/3/gallery/20260515_153347-thumbnail.jpg" alt="" width="768" height="768"></a></figure>
<figure class="gallery__item"><a href="http://workshop.l300company.pl/media/posts/3/gallery/20260515_162009.jpg" data-size="2000x2000"><img loading="lazy" src="http://workshop.l300company.pl/media/posts/3/gallery/20260515_162009-thumbnail.jpg" alt="" width="768" height="768"></a></figure>
<figure class="gallery__item"><a href="http://workshop.l300company.pl/media/posts/3/gallery/20260515_152422.jpg" data-size="2000x2000"><img loading="lazy" src="http://workshop.l300company.pl/media/posts/3/gallery/20260515_152422-thumbnail.jpg" alt="" width="768" height="768"></a></figure>
</div></div>
<hr data-start="2650" data-end="2653">
<h2 data-section-id="1i8khdu" data-start="2655" data-end="2684">3D Scan and Custom Adapter</h2>
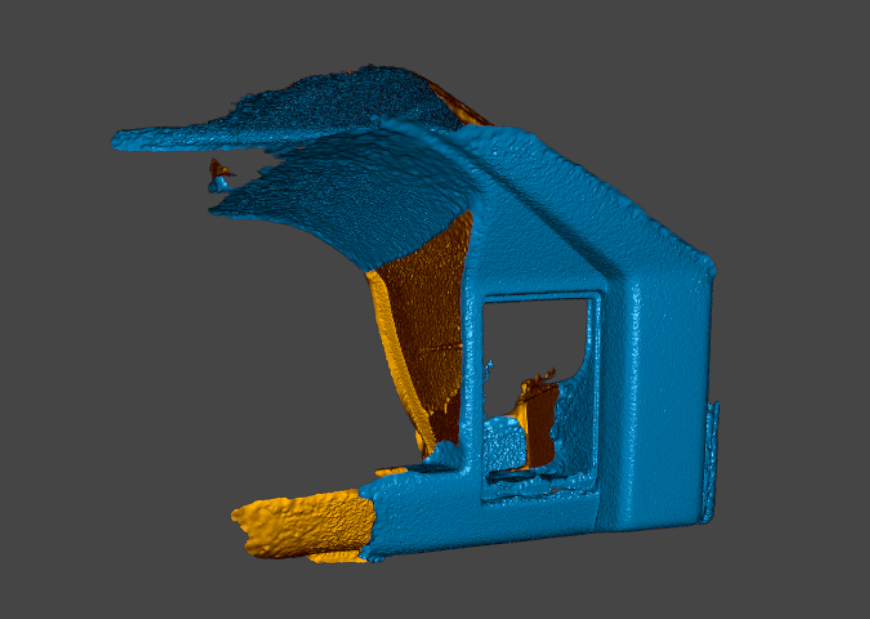
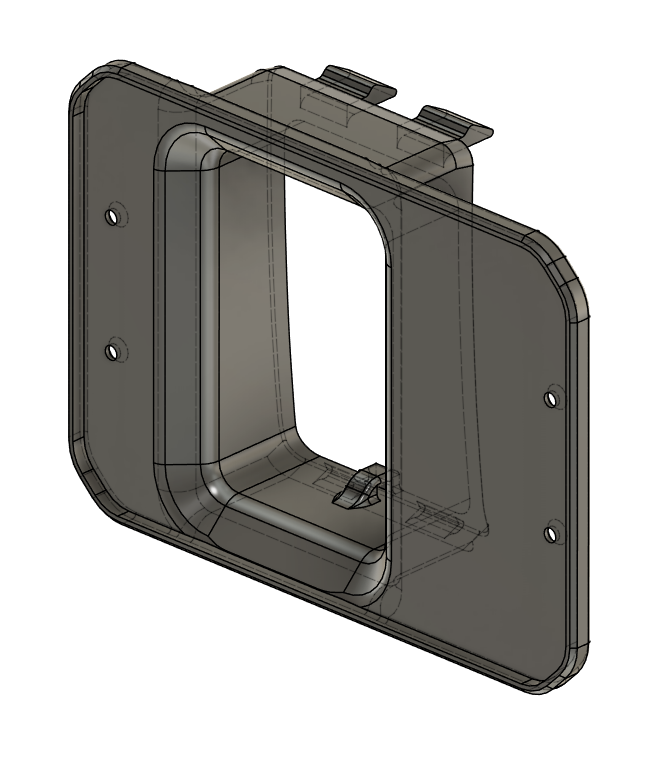
<p data-start="2686" data-end="2822">After 3D scanning the dashboard and gauge surround, I designed a custom adapter that mounts exactly where the original blank panel sits.</p>
<p data-start="2824" data-end="2835">No cutting.</p>
<p data-start="2837" data-end="2917">No destroying 30-year-old plastics that are basically impossible to replace now.</p>
<p data-start="2919" data-end="2971">Everything can still be returned to stock if needed.</p>
<p data-start="2973" data-end="3022">Realistically though, that probably won’t happen.</p>
<figure class="post__image"><img loading="lazy"  src="http://workshop.l300company.pl/media/posts/3/skan_deski-2.png" alt="" width="870" height="619" sizes="(min-width: 37.5em) 1600px, 80vw" srcset="http://workshop.l300company.pl/media/posts/3/responsive/skan_deski-2-xs.png 384w ,http://workshop.l300company.pl/media/posts/3/responsive/skan_deski-2-sm.png 600w ,http://workshop.l300company.pl/media/posts/3/responsive/skan_deski-2-md.png 768w ,http://workshop.l300company.pl/media/posts/3/responsive/skan_deski-2-lg.png 1200w ,http://workshop.l300company.pl/media/posts/3/responsive/skan_deski-2-xl.png 1600w"></figure>
<figure class="post__image"><img loading="lazy"  src="http://workshop.l300company.pl/media/posts/3/adapter_CAD-2.png" alt="" width="663" height="757" sizes="(min-width: 37.5em) 1600px, 80vw" srcset="http://workshop.l300company.pl/media/posts/3/responsive/adapter_CAD-2-xs.png 384w ,http://workshop.l300company.pl/media/posts/3/responsive/adapter_CAD-2-sm.png 600w ,http://workshop.l300company.pl/media/posts/3/responsive/adapter_CAD-2-md.png 768w ,http://workshop.l300company.pl/media/posts/3/responsive/adapter_CAD-2-lg.png 1200w ,http://workshop.l300company.pl/media/posts/3/responsive/adapter_CAD-2-xl.png 1600w"></figure>
<hr data-start="642" data-end="645">
<h2 data-section-id="1rw7fcd" data-start="647" data-end="692">Parts used</h2>
<p>- Colight 12 Gang<br>- <a href="https://l300company.pl/retrofits-upgrades/72-in-dash-switch-panel-mount.html">in dash switch panel mount available in our shop</a></p>
<hr data-start="642" data-end="645">
<h2 data-section-id="1lw4tes" data-start="3029" data-end="3077">Overengineering Potential</h2>
<p data-start="3079" data-end="3145">And then there’s the slightly more obsessive side of this project.</p>
<p data-start="3147" data-end="3214">The keypad communicates with the relay module using simple signals.</p>
<p data-start="3216" data-end="3338">Which means that theoretically, it should be possible to intercept that communication and place another device in between.</p>
<p data-start="3340" data-end="3422">And once you can do that, outputs no longer have to depend only on button presses.</p>
<p data-start="3424" data-end="3444">They could react to:</p>
<ul data-start="3446" data-end="3608">
<li data-section-id="1tn7d4" data-start="3446" data-end="3460">temperature,</li>
<li data-section-id="17a4n8h" data-start="3461" data-end="3472">pressure,</li>
<li data-section-id="5u23ie" data-start="3473" data-end="3490">ignition state,</li>
<li data-section-id="wjb3kl" data-start="3491" data-end="3506">reverse gear,</li>
<li data-section-id="xtzyif" data-start="3507" data-end="3523">sensor inputs,</li>
<li data-section-id="engl86" data-start="3524" data-end="3608">or whatever unnecessary level of overengineering seems like a good idea this week.</li>
</ul>
<p data-start="3610" data-end="3655">I may or may not already have plans for that.</p>
<p data-start="3150" data-end="3177" data-is-last-node="" data-is-only-node=""> </p>
            ]]>
        </content>
    </entry>
    <entry>
        <title>ISOFIX adapter plate</title>
        <author>
            <name>Piotr</name>
        </author>
        <link href="http://workshop.l300company.pl/isofix-adapter-plate.html"/>
        <id>http://workshop.l300company.pl/isofix-adapter-plate.html</id>
        <media:content url="http://workshop.l300company.pl/media/posts/2/Adapter-ISOFIX-2.jpg" medium="image" />
            <category term="interior"/>

        <updated>2026-02-28T23:12:57+01:00</updated>
            <summary>
                <![CDATA[
                        <img src="http://workshop.l300company.pl/media/posts/2/Adapter-ISOFIX-2.jpg" alt="" />
                    Every modern car comes with proper child seat mounting points — so obviously the Mitsubishi L300 doesn’t. After finishing the&hellip;
                ]]>
            </summary>
        <content type="html">
            <![CDATA[
                    <p><img src="http://workshop.l300company.pl/media/posts/2/Adapter-ISOFIX-2.jpg" class="type:primaryImage" alt="" /></p>
                <p data-start="0" data-end="107">Every modern car comes with proper child seat mounting points — so obviously the Mitsubishi L300 doesn’t.</p>
<p data-start="109" data-end="361">After finishing the restoration, I wanted to start taking my son on trips. That’s when I realized the so-called “universal” Isofix adapters on the market are pretty flimsy and don’t allow for a truly safe installation of a child seat in this vehicle.</p>
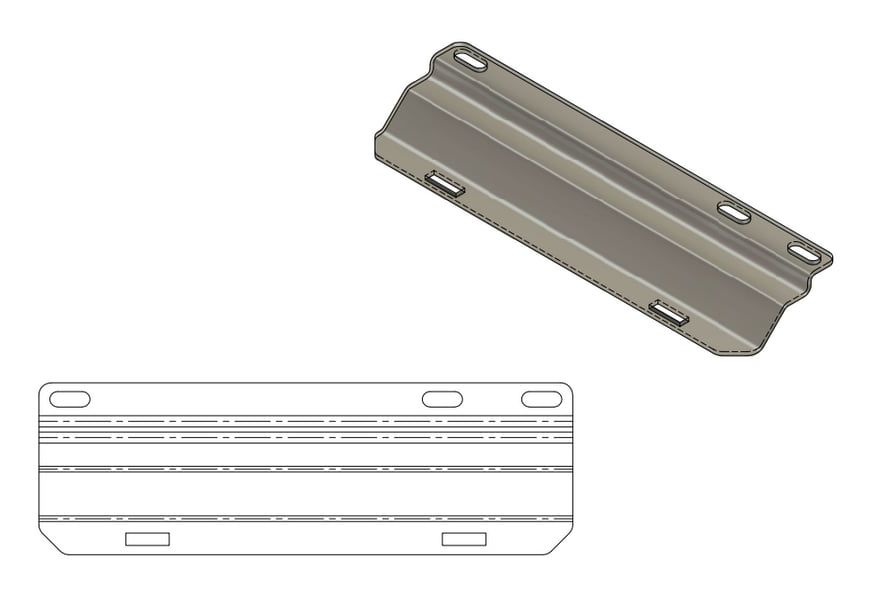
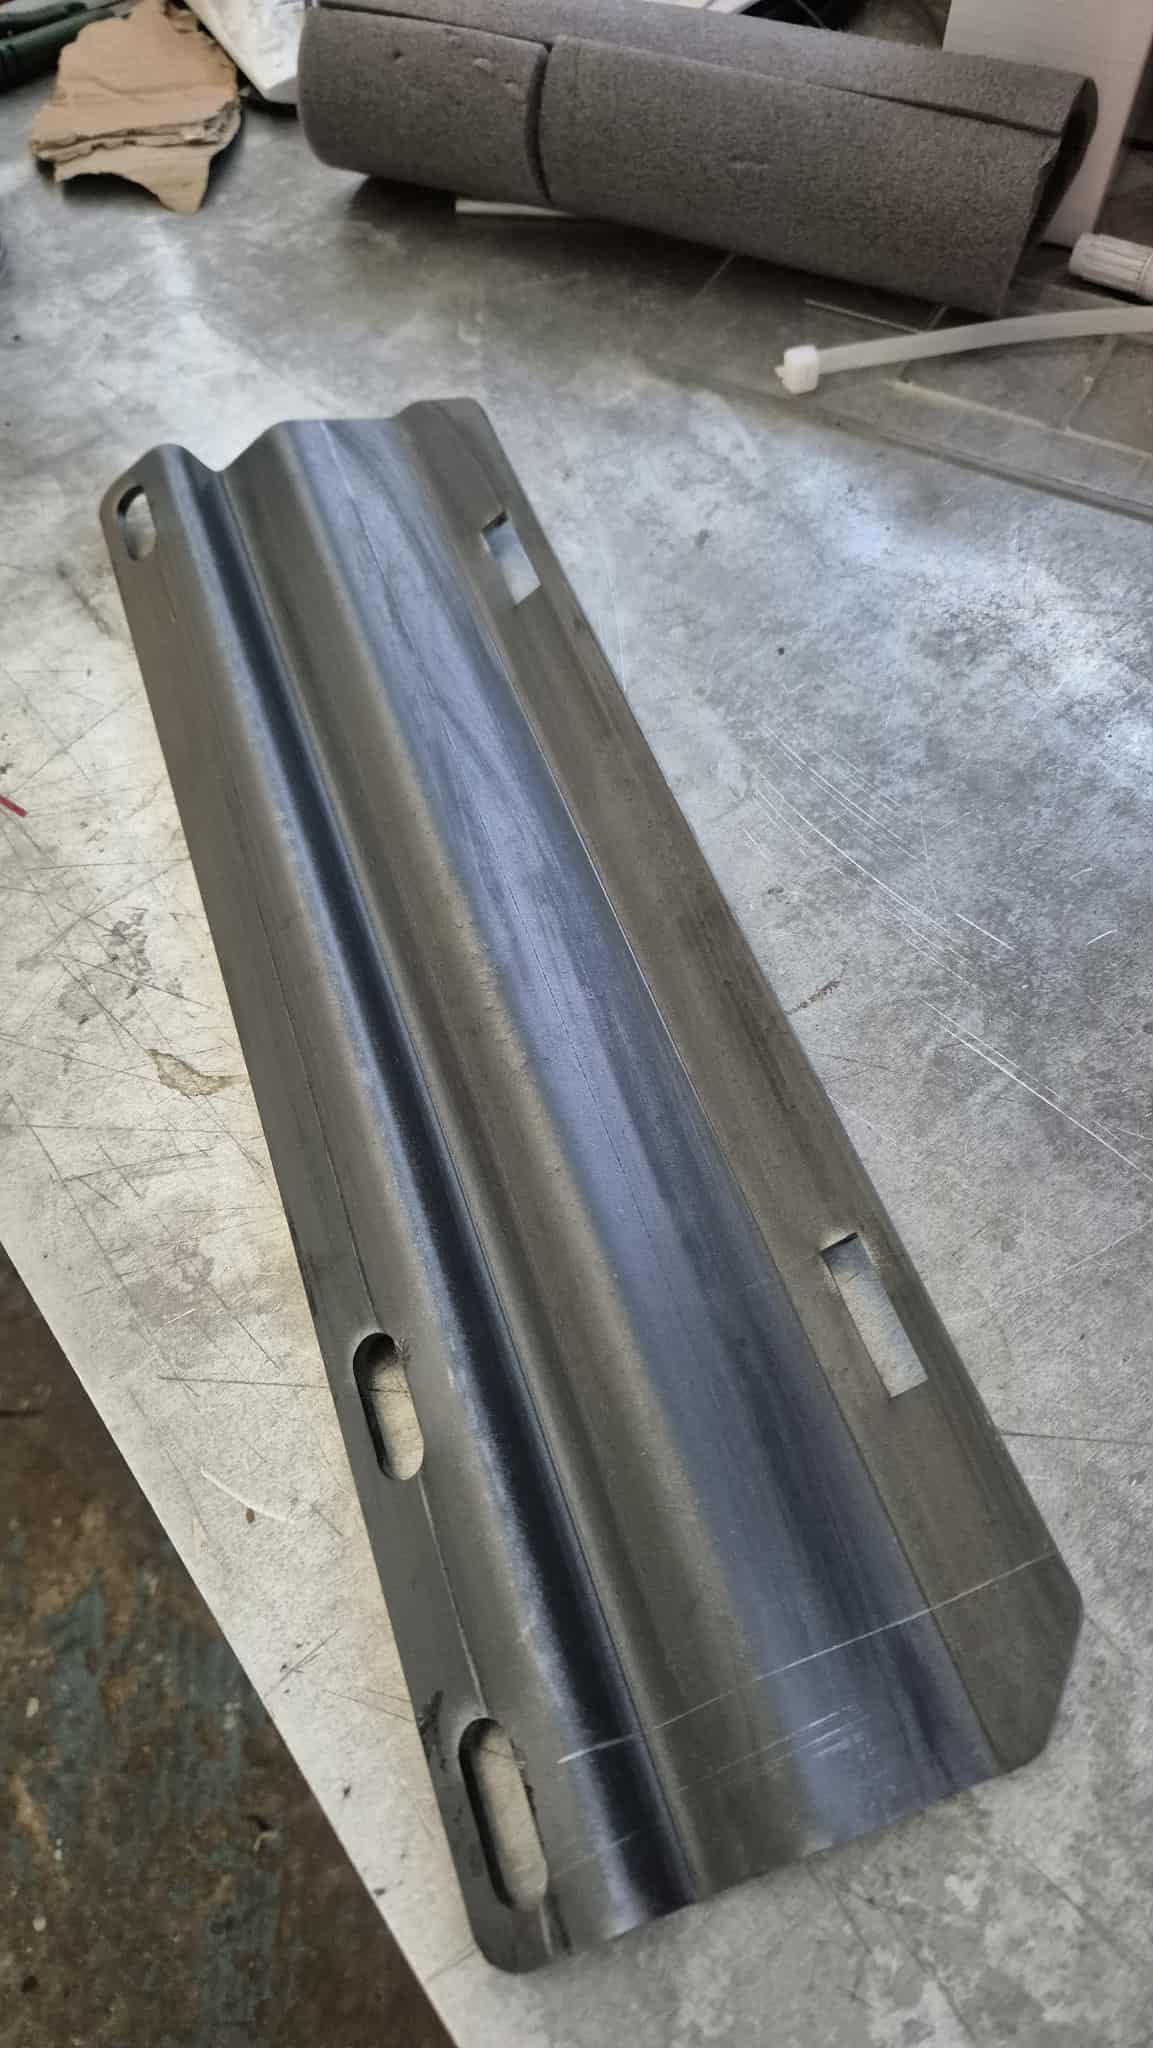
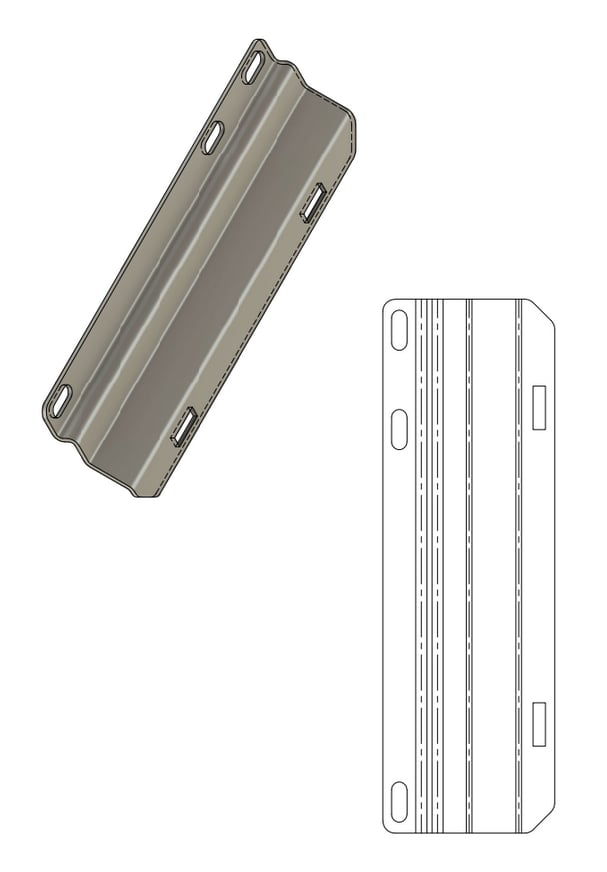
<p data-start="363" data-end="446">So I designed and built my own ISOFIX adapter dedicated specifically to the L300.</p>
<div class="gallery-wrapper"><div class="gallery"  data-is-empty="false" data-translation="Add images" data-columns="3">
<figure class="gallery__item"><a href="http://workshop.l300company.pl/media/posts/2//gallery/Adapter-ISOFIX-1-2.jpg" data-size="1153x2048"><img loading="lazy" src="http://workshop.l300company.pl/media/posts/2//gallery/Adapter-ISOFIX-1-2-thumbnail.jpg" alt="" width="720" height="1279"></a></figure>
<figure class="gallery__item"><a href="http://workshop.l300company.pl/media/posts/2//gallery/Adapter-ISOFIX-1-2.png" data-size="1554x878"><img loading="lazy" src="http://workshop.l300company.pl/media/posts/2//gallery/Adapter-ISOFIX-1-2-thumbnail.png" alt="" width="720" height="407"></a></figure>
<figure class="gallery__item"><a href="http://workshop.l300company.pl/media/posts/2//gallery/Adapter-ISOFIX-2-2.jpg" data-size="607x872"><img loading="lazy" src="http://workshop.l300company.pl/media/posts/2//gallery/Adapter-ISOFIX-2-2-thumbnail.jpg" alt="" width="607" height="872"></a></figure>
</div></div>
<p data-start="448" data-end="461">Main features:</p>
<ul data-start="463" data-end="695">
<li data-start="463" data-end="525">
<p data-start="465" data-end="525">Safe and solid mounting of an ISOFIX-compatible child seat</p>
</li>
<li data-start="526" data-end="612">
<p data-start="528" data-end="612">Use of the factory mounting points (no drilling or sketchy mods wherever possible)</p>
</li>
<li data-start="613" data-end="695">
<p data-start="615" data-end="695">Ability to install it on either the left or right seat of the second-row bench</p>
</li>
</ul>
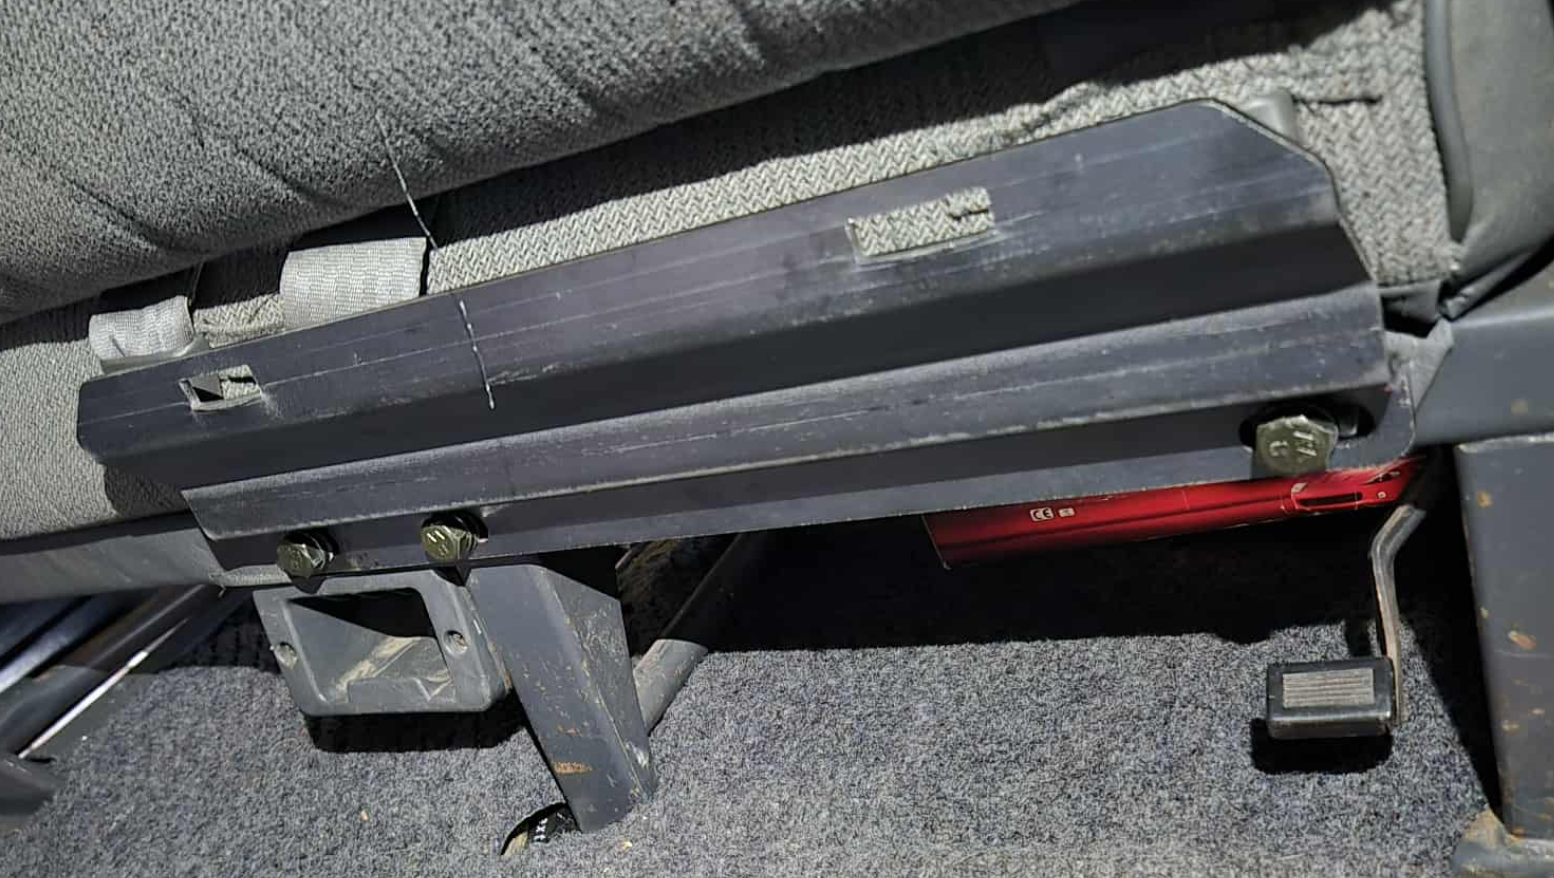
<p data-start="697" data-end="886">The bracket was designed so that it can be installed on the right-hand seat of the second row without any drilling. For the left-hand side, only a single additional hole needs to be made.</p>
<p data-start="888" data-end="1006">It mounts directly to the factory seat belt mounting points on the seat frame, ensuring a firm and solid attachment.</p>
<p data-start="1008" data-end="1199">The design was done in Fusion 360 using the sheet metal workspace. I prepared a proper workshop drawing with a flat pattern, so the part can be accurately manufactured on a CNC press brake.</p>
<p data-start="1201" data-end="1427" data-is-last-node="" data-is-only-node=""><strong data-start="1201" data-end="1216">Disclaimer:</strong> This adapter has not undergone any official testing, certification, homologation, or crash validation. It has no approvals or safety ratings of any kind. I’m using it entirely at my own risk and responsibility.</p>
            ]]>
        </content>
    </entry>
</feed>